

Channeling ruins good espresso.
Water finds gaps and blows past flavor.
The WDT needle technique breaks clumps, spreads fines, and evens the whole puck so water can’t take shortcuts.
It only adds about 15–25 seconds to your routine and gives steadier flow, longer extraction, and cleaner taste.
Try WDT right after dosing and before tamping.
This post shows the needle depth, motions, and patterns that stop channeling and make shots repeatable.
How the WDT Needle Technique Prevents Channeling in Espresso

Channeling happens when water takes the path of least resistance through your puck instead of flowing evenly. Your coffee grounds clump together during grinding because of static, retention, and how they settle in the basket. Those clumps create dense spots and loose spots. Water rushes through the gaps and barely touches the tight areas. You get a shot that’s over-extracted in some places, under-extracted in others, and tastes thin, bitter, or sour all at once.
WDT needles fix that. You’re breaking apart every clump and spreading fines across the entire basket. When you insert fine needles into the coffee bed and stir gently, you separate stuck particles and fill gaps. The grounds become uniform, with consistent density from edge to edge, top to bottom. Water can’t find a shortcut. It flows through the whole puck at the same rate and extracts flavor evenly.
Timing matters. Needles should reach close to the basket bottom without scraping it. Use slow circular or back-and-forth motions. The stirring step takes under 20 seconds if you stay focused. Adding WDT to your workflow typically adds 15 to 25 seconds total, including setup. Gentle motion is everything. Aggressive stirring just creates new pockets.
WDT reduces channeling by:
- Eliminating static clumps that form during grinding and create uneven density.
- Redistributing fines so smaller particles fill voids instead of piling up in one zone.
- Evening out the entire bed from edges to center, top to bottom.
- Reaching problem areas near the basket wall where grounds settle unevenly.
- Setting up a consistent tamp because a uniform bed compresses uniformly under pressure.
Proper Needle Depth, Motion, and Distribution Patterns for WDT

Insert your needles 8 to 12 millimeters below the puck surface. That depth reaches most of the bed without hitting the basket floor. Scrape the basket and you risk creating a gap at the bottom or bending your needles. Move the tool slowly. Fast motion whips air into the grounds and leaves voids. A gentle stir separates particles and lets them resettle into an even layer. Six to twelve total passes work for most baskets. Start near the center, spiral outward, then reverse. Or use a crosshatch grid. Full coverage matters, not over-working the bed.
Pattern choice changes how you level density. A spiral motion from center to edge pushes clumps outward and fills the perimeter. A radial pattern, moving from edge to center like spokes, pulls loose grounds inward. A crosshatch grid catches every zone twice. Pick the pattern that matches your basket shape and your grinder’s clumping behavior. Test each one over a few shots and watch flow through a bottomless portafilter to see which gives the most even extraction.
| Pattern | What It Fixes | Ideal Usage | Time Required |
|---|---|---|---|
| Spiral (center out) | Edge voids and perimeter clumps | Single-dose grinders with central clumping | 12–18 seconds |
| Radial (edge in) | Center density pockets | Grinders with heavy static at basket walls | 10–15 seconds |
| Crosshatch (grid) | General uneven distribution across entire basket | Any basket; best for very fine grinds | 15–20 seconds |
| Random gentle stir | Quick clump-breaking without formal pattern | Experienced users, low-static setups | 8–12 seconds |
Recommended WDT Tools, Needles, and DIY Options for Channeling Prevention

Most commercial WDT tools use acupuncture needles set into a wood or plastic base. Needle diameter between 0.1 and 0.5 millimeters works best. Thicker needles compress the coffee instead of separating it. Stainless steel needles last longer and clean easier than coated or plated versions. Tools with three to five needles spaced a few millimeters apart cover a 58-millimeter basket efficiently. Commercial multi-needle tools typically cost between ten and thirty dollars. One commonly mentioned model is the IntrovertMakes Classic WDT Tool at sixteen dollars. Total equipment cost for a basic setup, including a dosing collar and a simple WDT tool, runs around thirty-five dollars.
You can build a working WDT tool for almost nothing. An unfolded paperclip, a sewing needle pushed through a wine cork, or a dissection needle from a lab-supply store all break clumps. Toothpicks work in a pinch but splinter and don’t reach as deep. Bamboo skewers are too thick. If you want multiple needles, drill small holes in a wood dowel or plastic handle and glue in sewing needles or straight pins. Space them three to five millimeters apart. Keep the diameter under half a millimeter and the length long enough to reach the bottom of your dose without bottoming out on the basket.
Tool choice comes down to workflow and patience. A single-needle tool is cheap and simple but takes longer and requires more passes to cover the basket. Multi-needle versions speed up the job and reduce the chance you’ll miss a zone. Rotary WDT tools, which spin as you move them, work faster but cost more and can be harder to control if you’re learning. Start with a basic three-needle tool or a DIY setup and upgrade only if you find yourself rushing or skipping WDT because it feels slow.
Where WDT Fits in the Espresso Workflow (Dosing, WDT, Level, Tamp)
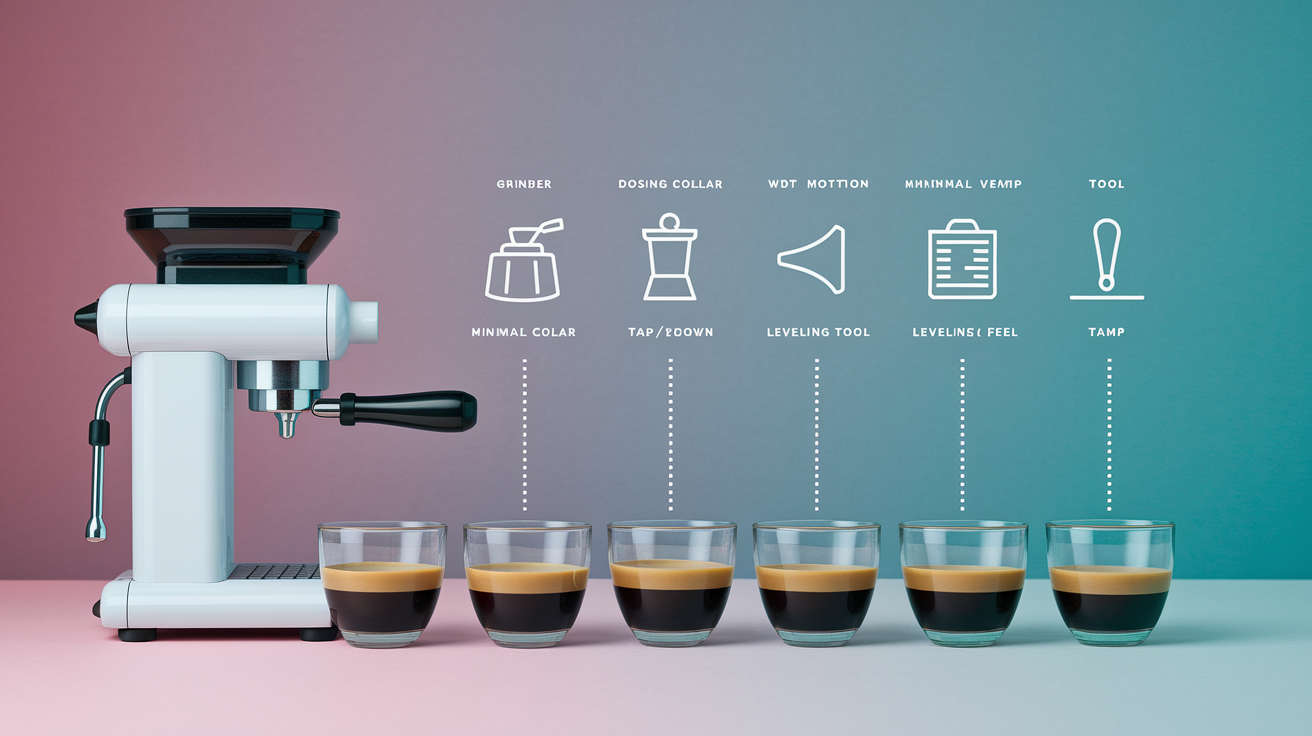
WDT happens immediately after dosing and before any leveling or tamping. Grind your coffee fresh, right before you dose, to keep CO₂ in the grounds. Attach a dosing collar to the portafilter basket. The collar contains the grounds while you stir and prevents spills. Without a dosing collar, WDT can take three times longer because you have to go slow to avoid knocking grounds over the edge. Dose your target weight into the basket, then perform WDT. Keep your stirring under twenty seconds if you can. Break clumps and even out the bed, don’t aerate it or create new problems.
After WDT, you can tap the portafilter lightly on a tamp mat to settle and compact the bed slightly. This knock-down step is optional. Some baristas skip it. Some find it helps create a flatter surface for tamping. If you use a leveling tool, a palm distributor, or an OCD-style leveler, run it now, after WDT and any knock-down. The leveler pushes high spots down and fills low spots. Then remove the dosing collar, confirm the bed is level, and tamp with consistent pressure, typically twenty to thirty pounds-force. Lock the portafilter into the group and pull your shot.
The complete workflow in order:
- Grind immediately before dosing to preserve CO₂ and flavor.
- Attach the dosing collar to the portafilter basket.
- Dose the target weight into the basket (commonly 18 grams for a double).
- Perform WDT with gentle circular or crosshatch motion, reaching near the basket bottom, for 10 to 20 seconds.
- Optional: tap the portafilter on a tamp mat to settle the bed.
- Use a leveling tool if desired, then tamp with even, level pressure and pull the shot.
Diagnosing Channeling: Visual Signs, Bottomless Portafilter Clues, and Extraction Data

Channeling shows up as spritzing, irregular jets, or a single fast stream when you use a bottomless portafilter. Instead of a smooth, even flow across the basket, you see water punching through one or two spots. The shot finishes fast, often in fifteen to twenty seconds for an eighteen-gram dose, and tastes sour or weak. Crema looks thin and breaks up quickly. The spent puck might show one big crater or a muddy, uneven surface instead of a flat, uniform disk.
A side-by-side test proves whether WDT is working. Pull a shot without WDT, keeping your grind, dose, and machine settings the same. Note the extraction time, yield, and how the shot looks and tastes. Then pull another shot with WDT, changing nothing else. If WDT is effective, the second shot will flow more evenly, hit a longer extraction time (closer to twenty-five to thirty seconds for a 1:2 ratio), and taste more balanced. Crema should look thicker and last longer in the cup.
Track your numbers. Write down dose, yield, time, and a quick taste note for each shot. When you see erratic times or inconsistent flavor even though your grind and dose stayed the same, poor distribution is usually the culprit. Adding WDT or improving your WDT technique should tighten the spread and bring your shots back into the target window.
Troubleshooting WDT: Common Mistakes That Actually Cause Channeling
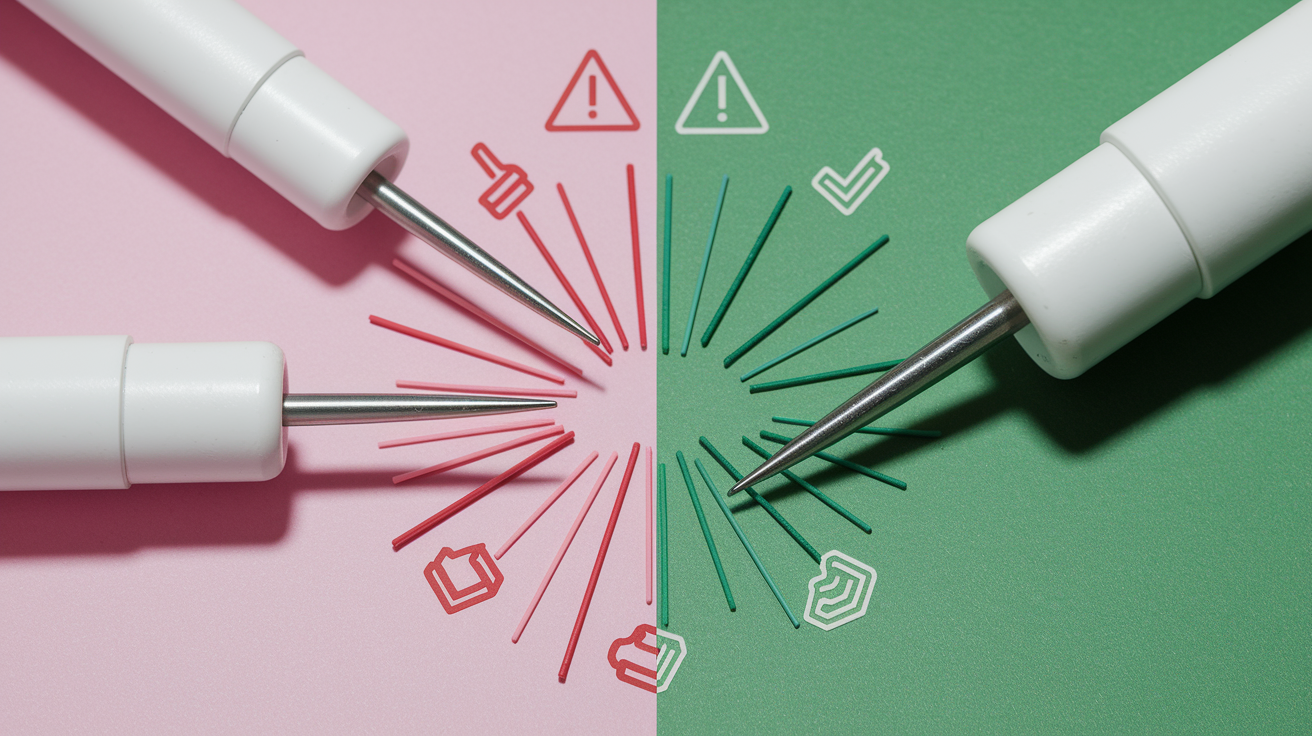
Being too aggressive with the needles creates new density pockets instead of eliminating them. Fast, rough stirring whips air into the bed and leaves voids. Move slowly and gently. The needles should glide through the coffee, not churn it. Another mistake is using needles thicker than 0.5 millimeters. Thick needles push grounds aside and compress them into clumps. You end up with the same channeling problem you were trying to fix, just in a different spot.
Skipping the edges is common. Grounds near the basket wall often settle unevenly, and if your needles don’t reach that zone, water will find it. Make sure every pass covers the full diameter of the basket. Also, if you insert the needles at a steep angle or poke straight down without any lateral motion, you create vertical channels instead of breaking them. Use a shallow angle and stir side to side or in circles. Grinding too coarse or overdosing the basket will cause channeling no matter how good your WDT is. If your puck is too loose or too tall, adjust grind size and dose before blaming your distribution technique.
Common WDT mistakes that cause channeling:
- Over-aggressive stirring that whips air into the grounds and creates voids.
- Using needles thicker than 0.5 mm, which compress coffee instead of separating it.
- Missing the basket edges and leaving uneven density near the perimeter.
- Poking straight down without lateral motion, which forms vertical gaps.
- Grinding too coarse, so the bed stays loose even after WDT and tamping.
- Overdosing the basket so the puck is too tall and uneven pressure develops during extraction.
Before/After Comparison: What Successful WDT Extraction Looks Like

Before WDT, you might see a shot that finishes in eighteen seconds, spritzes from two or three spots, and leaves a puck with one deep crater. The espresso tastes sharp or hollow. Crema is pale and disappears in thirty seconds. After you add WDT and dial in your technique, the same dose and grind setting will flow steadily across the entire basket. Extraction time stretches to twenty-five or thirty seconds for an eighteen-in, thirty-six-out shot. Crema looks thick, reddish-brown, and holds for a few minutes. The shot tastes fuller and more balanced, with sweetness and body that were missing before.
The visual difference through a bottomless portafilter is obvious. A well-distributed puck produces an even curtain of espresso with no spurting or jetting. The spent puck comes out flat and dry, with a uniform surface and no obvious holes or craters. Your shot-to-shot consistency improves because every puck starts with the same density. Dialing in becomes easier because you’re not chasing phantom variables caused by random clumping.
What successful WDT delivers:
- Consistent extraction times in the 25- to 30-second range for typical 1:2 ratios.
- Thicker, longer-lasting crema with a reddish-brown color.
- Steady, even flow with no spritzing or concentrated jets.
- Flat, dry spent pucks with no craters or muddy patches.
Needle Care, Sanitation, and Maintenance for Consistent Distribution

Clean your WDT tool after every session. Wipe the needles with a damp cloth or rinse them under warm water to remove coffee oils and fines. Stainless steel needles resist rust and last longer than plated or coated versions. If you see bent tips or dull points, replace the needles. A bent needle won’t reach the full depth of the basket and will miss clumps. Over time, oils can build up on the handle or base, especially if it’s wood. Wash the handle with mild soap and let it dry completely before storing.
Store your WDT tool in a dry spot where the needles won’t get knocked or bent. Some users keep the tool in a drawer with a cork or foam block over the tips. If you’re using a DIY setup with sewing needles or pins, check the attachment points regularly. Glue can loosen, and needles can shift. A needle that wobbles or sits at the wrong angle will create uneven distribution. Replace worn tools before they start causing the problem they’re supposed to fix.
Final Words
Start WDT right after dosing. It breaks clumps, evens fines, and keeps water from taking easy paths. We covered why channeling happens, correct needle depth and motion, distribution patterns, and where WDT sits in the dose→level→tamp flow.
You also got tool options (buy or DIY), how to read a bottomless, and common WDT mistakes. A gentle, 10–20 second routine and clean needles pay off.
Practice the WDT needle technique to prevent channeling and you’ll pull steadier shots with clearer flavor and less waste. Change one thing at a time, track results, and enjoy better espresso.
FAQ
Q: Can WDT help with channeling?
A: The WDT can help with channeling by breaking clumps and evening the coffee bed, removing low-resistance paths so water flows evenly. Do it gently for 10–25 seconds before tamping to improve flow consistency.
Q: What is the best WDT technique?
A: The best WDT technique is slow, gentle needle insertion 8–12 mm without touching the basket, using spiral or crosshatch motions for 6–12 passes. Finish in 10–30 seconds, then level and tamp.
Q: How to prevent or get rid of channeling?
A: To prevent or fix channeling, check grind and dose, use WDT to remove clumps and cover edges, level the puck, and tamp evenly (20–30 lbf). Change only one variable at a time and re-test.