

Think oat milk can never make real microfoam?
It can if you steam in a tighter temperature window, choose a barista blend, and fold air into a strong whirlpool.
This step-by-step guide shows exactly where to place the wand, how long to stretch, when to stop (55 to 65°C), and the simple taps and swirls that polish the texture.
Make one targeted change at a time and you’ll get a glossy, dense cappuccino cap that pours like paint.
Step-by-Step Oat Milk Texturing Technique for Perfect Cappuccinos

Texturing oat milk for cappuccinos works the same way as dairy, just with a tighter temperature window and slightly faster timing. Grab cold barista-blend oat milk straight from the fridge. Pour it into a clean metal pitcher, filling to about ½” below where the spout starts to curve. You need that headspace or the foam’s going to overflow mid-steam.
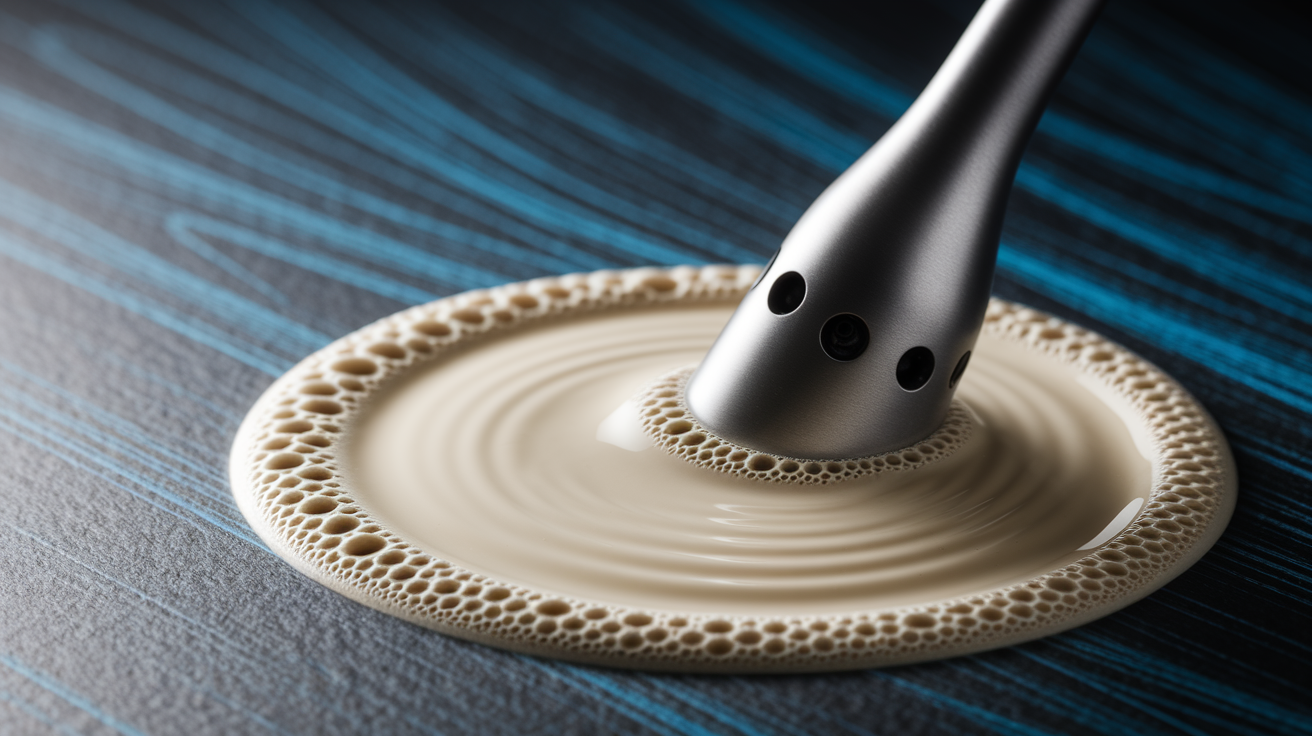
Position the steam wand tip just under the surface, angling the pitcher a bit off-center so the milk starts spinning. You’re trying to inject air without making giant soapy bubbles. Open the steam valve. You should hear a light chirping sound, almost like tearing paper, as the tip breaks the surface. That’s the stretching phase, where you’re building volume.
After a couple seconds of surface contact, lower the pitcher gradually as the foam rises. Keep the wand tip submerged about two inches deep. The whirlpool should spin smoothly, folding those tiny bubbles into the liquid. This is the texturing phase, where everything integrates into glossy microfoam. Watch the temperature closely. For cappuccinos, stop between 55–65°C (131–149°F). If you don’t have a thermometer, use the 3-second palm test. When the pitcher’s too hot to hold for more than three seconds, you’re around 60°C and it’s time to stop. Push past 77°C and you’ll scald the oat milk, breaking the emulsion and flattening the foam.
- Pour cold barista oat milk to ½” below the pitcher’s spout start.
- Insert the steam wand tip just under the surface, angling the pitcher off-center.
- Open the steam valve and introduce air for 2–3 seconds, listening for that chirping sound.
- Lower the pitcher as foam rises, submerging the tip about two inches.
- Keep a steady whirlpool going to integrate bubbles and heat evenly.
- Monitor temperature with a thermometer or use the 3-second palm test to hit 55–65°C.
- Close the steam valve and pull the pitcher when you reach target temp.
- Tap the pitcher once on the counter, then swirl fast to collapse any big bubbles and polish the foam.
After tapping and swirling, the surface should look glossy and velvety. Uniform microbubbles that pour thick, almost like paint. For cappuccinos, you want foam dense enough to hold a firm cap on top of the espresso, not soupy or wet.
Choosing the Best Oat Milk for Reliable Cappuccino Texture
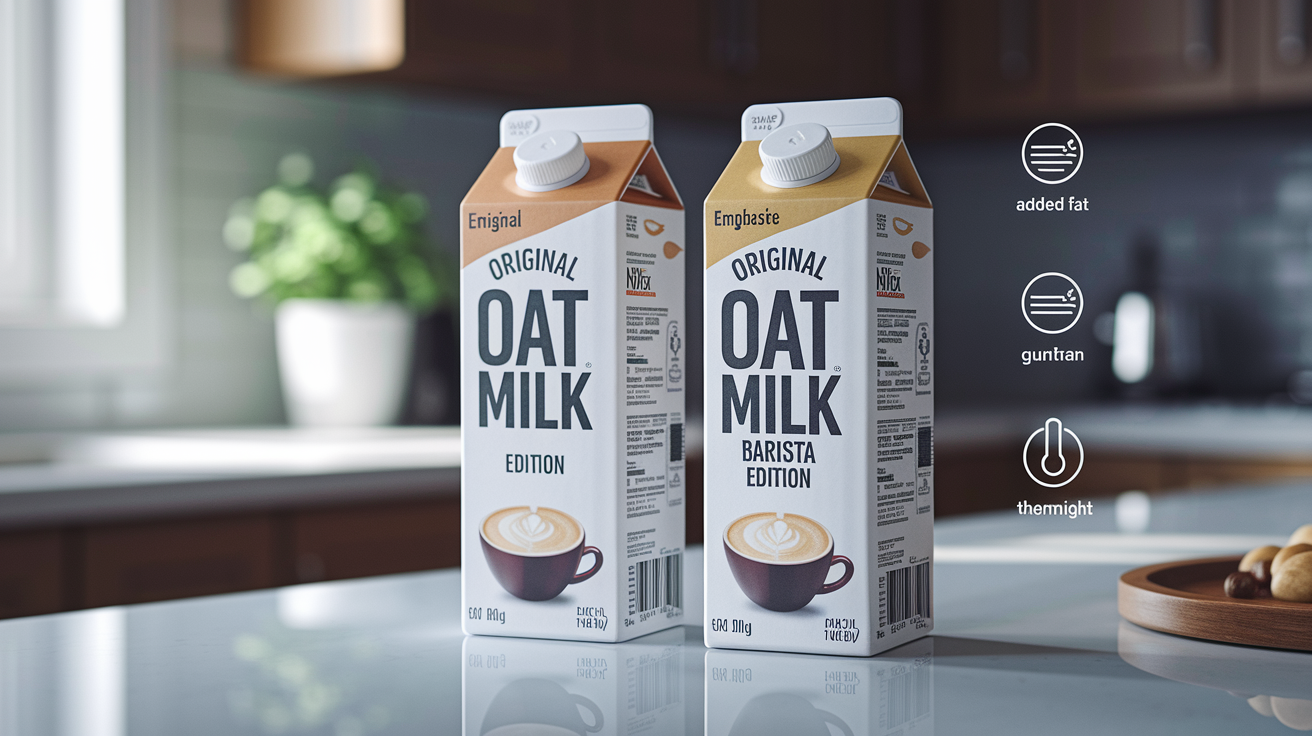
Not all oat milk froths the same. The difference comes down to fat content, protein, and added stabilizers. Plain or “original” oat milks are usually too thin and low in fat to hold stable foam. They’ll bubble up during steaming, but the foam separates fast or collapses into a flat layer. Barista-blend oat milks are built specifically for this. They’ve got higher fat (often from added oils like rapeseed, canola, or sunflower) and stabilizers like guar gum or xanthan gum. Those ingredients help the foam bind together and stay creamy.
When you’re scanning labels at the store, look for anything that says “barista,” “barista edition,” or “for professionals.” Check the ingredient list for added fat and emulsifiers. And always start with cold milk straight from the fridge. Cold milk aerates more predictably and gives you a wider temperature window before you risk overheating.
- Barista or barista-edition labeling – formulated for steam wands and microfoam.
- Added oils – rapeseed, canola, sunflower, or similar neutral fats for richness and stability.
- Stabilizers – guar gum, xanthan gum, or gellan gum to hold foam structure.
- Higher protein content – check nutrition labels. More protein usually means better foam strength.
Equipment Essentials for Oat Milk Texturing Success

A steam wand and a stainless-steel frothing pitcher are the bare minimum for café-quality microfoam. The metal pitcher conducts heat, so you can feel the temperature rising through the side wall. Pitchers with a pointed spout give you better control when pouring. If you don’t have a steam wand, a standalone electric milk frother or a handheld battery-powered frother can approximate the texture. But the results won’t match true microfoam.
A digital thermometer removes all guesswork. Clip-on or probe-style models let you track the exact temperature in real time, which helps a lot while you’re learning the timing and sounds of the steam wand. Once you’ve textured a few dozen pitchers, you’ll recognize the feel and sound cues. The thermometer becomes optional.
| Tool | Best Use |
|---|---|
| Steam wand (espresso machine) | Café-quality microfoam with precise control over air and whirlpool |
| Standalone electric milk frother | Home convenience; decent foam but less control over texture |
| Digital thermometer | Ensures you stay within 55–65°C and avoid scalding |
Advanced Steam Wand Refinements for Superior Oat Milk Microfoam
Small adjustments to wand depth, pitcher angle, and timing separate passable foam from silky, pourable microfoam. Even if you’re following the basic steps correctly, refinements in whirlpool formation and bubble integration can fix inconsistencies that show up in the cup.
Diagnosing and Correcting Poor Whirlpool Formation
A weak or chaotic whirlpool means the milk isn’t folding air into itself properly. You’ll end up with patchy foam and separated liquid. The usual cause is pitcher angle. Try tilting the pitcher slightly more or rotating it a few degrees to find the sweet spot where the milk spins smoothly. If your machine has a single-hole steam tip, the whirlpool will be strong and focused. Multi-hole tips create gentler circulation, so you may need to hold the wand closer to the side of the pitcher to encourage spin. If the milk is stalled or barely moving, check that the wand is submerged deep enough (around two inches) and that the steam pressure is fully open. A stalled whirlpool often means the tip is too shallow or the milk is already overheated and too thin to circulate.
Reducing Bubble Size Without Re-Aeration
If you see bubbles larger than pinheads on the surface, don’t restart the stretching phase. Tap the pitcher once on the counter to dislodge the big bubbles, then swirl firmly with quick wrist motions. The swirling folds the bubbles back into the liquid and breaks them down. If a few stubborn bubbles remain, you can briefly lower the steam wand back into the milk (without introducing new air) and let the whirlpool pull them under for a second or two. Works only if the milk is still below 65°C. Once you’ve overheated the milk, the emulsion weakens and you can’t recover the texture.
Alternative Frothing Methods When You Don’t Have a Steam Wand
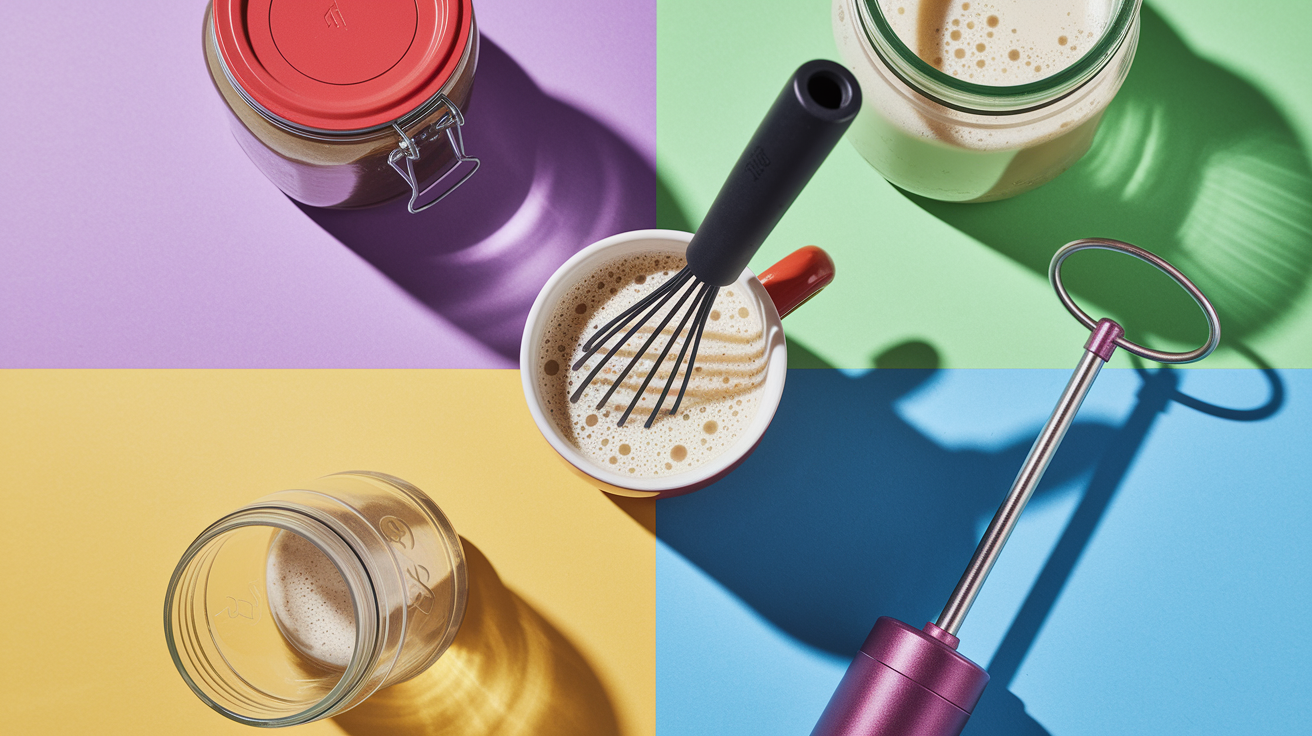
You don’t need an espresso machine to texture oat milk, but the results vary. A handheld battery-powered frother is the simplest substitute. Pour cold barista oat milk into a mug or small pitcher, turn on the frother, and hold the whisk near the surface for 15–30 seconds while pumping it up and down gently. You’ll see foam build on top, though it won’t have the integrated microfoam of a steam wand. Heat the milk separately in the microwave or on the stove to around 55–65°C before or after frothing.
Standalone electric milk frothers heat and froth at the same time. Fill the frother to the maximum line marked inside, close the lid, and run a 1–2 minute cycle. These machines are consistent and hands-off, but the foam tends to be lighter and airier than true microfoam. For a no-equipment method, pour cold oat milk into a jar until it’s half to two-thirds full, screw the lid on tight, and shake hard for 15–30 seconds. The jar method works best for cold drinks like iced cappuccinos because the foam doesn’t integrate well when heated afterward.
High-powered blenders can froth oat milk by whipping air into it. Pour cold milk into the blender, pulse on low for 10–20 seconds, then increase to medium-high for another 20–30 seconds (total around 30–50 seconds). The foam will be thick but bubbly, not velvety. An electric hand mixer or even a manual whisk will work in a pinch. Start the mixer on low and increase to medium-high, moving the beaters up and down in the milk until foam forms. A hand whisk requires vigorous vertical whisking for 1–2 minutes and produces inconsistent results.
- Handheld frother: fast and simple; foam sits on top rather than integrating.
- Standalone electric frother: convenient and consistent; lighter texture than steam wand.
- Jar shaking: best for cold drinks; foam separates quickly when heated.
- Blender or hand mixer: creates volume but larger, less stable bubbles.
- Manual whisk: labor-intensive; uneven microfoam and limited cappuccino quality.
Understanding Oat Milk Foam Science for Better Texturing
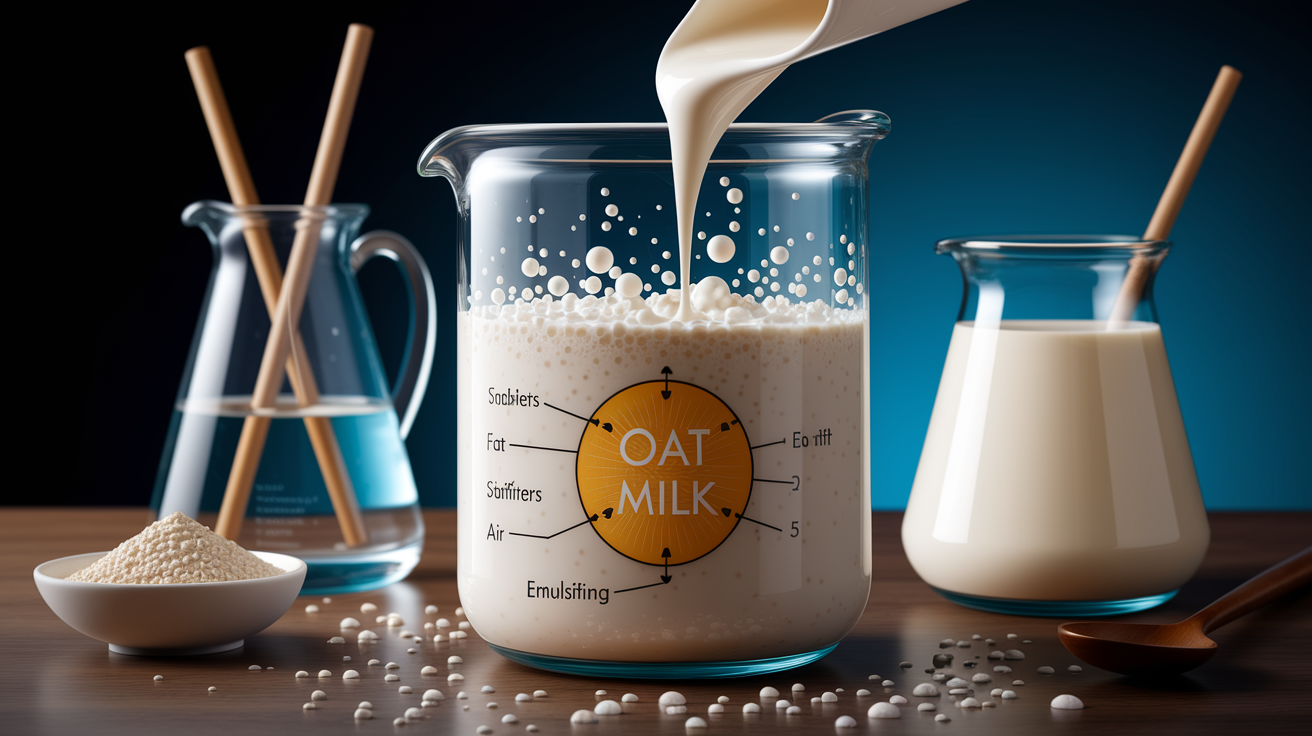
Oat milk behaves differently than dairy because it lacks casein, the protein that gives cow’s milk its natural foaming power. To compensate, barista-blend oat milks add neutral oils and emulsifiers. When you steam the milk, the added fats coat the air bubbles and stabilize them, kind of like whipped cream. The emulsifiers (guar gum, xanthan gum, or similar thickeners) help bind the fat, water, and air into a single creamy structure. Without enough fat or emulsifier, the bubbles pop quickly and the liquid separates from the foam.
Heating oat milk also changes its flavor. Oat sugars begin to caramelize gently around 55–65°C, bringing out a subtle sweetness that complements espresso. Push past 77°C and the sugars scorch, the emulsion breaks, and the milk tastes burnt or flat. The foam will look thin and watery, and you may see an oily film on the surface. Thin or “light” oat milk formulations (marketed for lower calories) usually don’t have enough fat or stabilizer to hold foam under heat. That’s why starting with a barista-specific product makes such a clear difference in your final cappuccino.
Troubleshooting Thin, Weak, or Separated Oat Milk Foam
When oat milk foam disappoints, the cause is usually one of three things: wrong milk type, wrong temperature, or wrong technique during stretching. Each has a straightforward fix.
| Problem | Cause | Fix |
|---|---|---|
| Thin foam that collapses immediately | Started with warm milk, used plain (non-barista) oat milk, or under-aerated during stretching phase | Always start with cold barista-blend oat milk; stretch for a full 2–3 seconds at the surface; confirm you hear the chirping sound |
| Large, soapy bubbles on the surface | Wand held at surface too long or positioned too high, introducing too much air | Tap pitcher firmly on counter and swirl to break bubbles; next time, lower the wand sooner and reduce stretching time to 2 seconds |
| Separated liquid and foam, or oily film on top | Overheated above 77°C or used unstable formulation without emulsifiers | Use a thermometer and stop at 55–65°C; switch to a barista-edition oat milk with added stabilizers; if milk has already separated, discard and re-steam fresh cold milk |
Pouring Techniques for Oat Milk Cappuccinos

Once you’ve textured the milk, the pour determines whether you get a clean cappuccino cap or a messy mix. Hold the cup at a slight angle and start your pour from a few inches above the surface, aiming for the center where the espresso is darkest. The height and distance keep the first stream of milk diving under the crema, mixing with the espresso base without disturbing the foam on top.
As the cup fills halfway, lower the pitcher closer to the surface and slow your pour. The foam will start to rise and spread across the top. For a classic cappuccino, you want a thick, even layer of microfoam sitting on the espresso, not wet milk. If you’re attempting simple latte art, a gentle side-to-side wiggle or a straight pull-through can create basic shapes. But cappuccino foam is denser than latte foam, so intricate designs are harder.
- Center pour from height: keeps the first liquid under the crema and mixes the base.
- Lower pitcher as cup fills: brings foam to the surface for the final cap.
- Finish with a small wiggle or pull-through: optional for simple contrast or a heart shape.
Final Words
Start by steaming cold barista oat milk: tip just under the surface to add air, then lower the wand to make a whirlpool until the milk feels warm and glossy at about 55–65°C. Tap and swirl the pitcher to polish the microfoam.
You chose the right milk and tools, practiced wand depth and whirlpool control, and worked on pouring for a thick cappuccino cap.
For a quick reminder on how to texture oat milk for cappuccinos, trust the pitcher fill, wand position, and the 3-second hold test — you’ll get a smooth, velvety result.
FAQ
Q: How to froth oat milk for cappuccino?
A: To froth and texture oat milk for a cappuccino, use cold barista oat milk, fill the pitcher 1/2 inch below the spout, briefly aerate with the wand tip, then lower to create a whirlpool and steam to 55–65°C.
Q: Is oat milk ok for osteoporosis?
A: Oat milk can be okay for osteoporosis when fortified with calcium and vitamin D; choose fortified unsweetened barista blends, check the calcium amount per serving, and pair with other calcium-rich foods.
Q: Is oat milk ok for diabetics?
A: Oat milk can fit a diabetic meal plan if you choose unsweetened varieties and watch portions; check the carbohydrate grams, avoid added sugars, and monitor blood glucose after trying a serving.