

Tired of weak, bubbly foam from your compact espresso machine?
On small machines the wand angle often makes the difference between glossy microfoam and a fight with your pitcher.
Adjusting the angle gives you better vortex control, fewer big bubbles, and more consistent pours.
In this post I’ll show safe, repeatable steps to loosen and set the wand, simple checks to spot fixed versus swivel arms, the handful of tools you need, and quick tests so you can lock in a one- to two-inch tip depth for reliable microfoam.
Immediate Wand Angle Adjustment Steps for Compact Espresso Machines

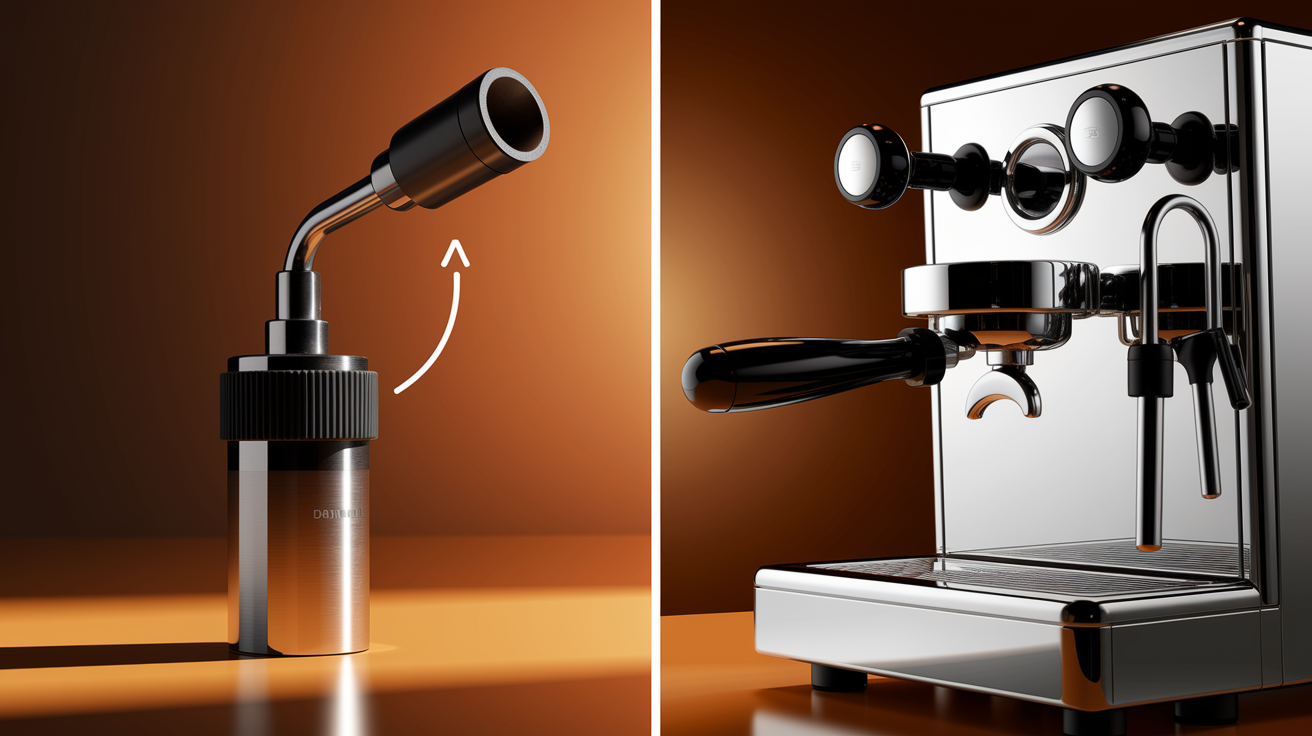
Adjusting your steam wand angle on a compact machine can make the difference between smooth frothing and an awkward fight with your pitcher. The angle you choose affects how easily you can create a vortex and how much control you’ve got over air injection. On smaller machines, the wand sits close to the drip tray or group head, so getting the angle right matters more than you’d think.
Safety first. Purge the wand by cracking the steam valve for a second or two to clear out condensation or leftover milk. Let the machine cool for at least five minutes with the valve closed and boiler off. If your manual mentions a pressure release step, do it now. Wear heat-resistant gloves and keep your face away from the wand. Steam burns don’t need the machine to be running.
Here’s the six-step workflow:
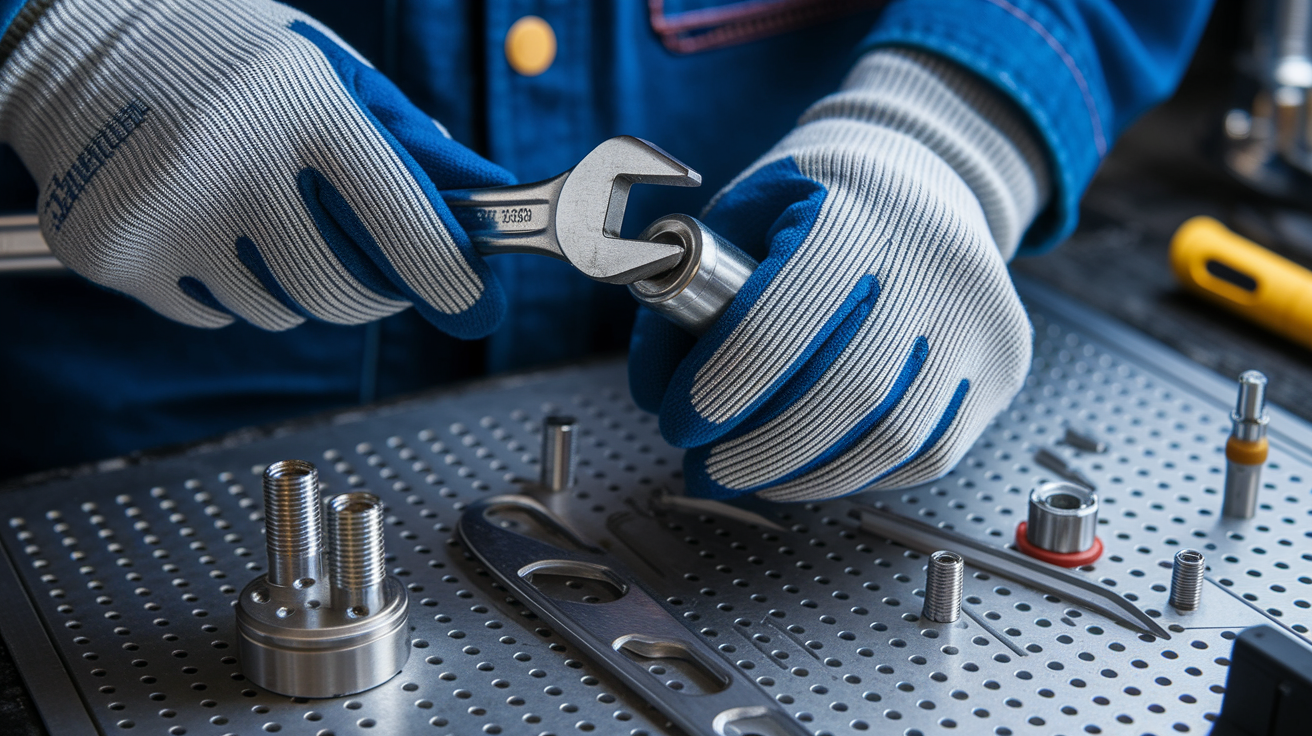
- Loosen the retaining collar or swivel nut one or two full turns with an 8 mm or 10 mm wrench. Stop as soon as the wand rotates by hand.
- Rotate the wand to your target angle. Aim for 15° to 30° off vertical so the tip clears the pitcher rim but still reaches the center when you tilt the pitcher.
- Check that any O-ring or seal inside the joint is seated flat, not twisted.
- Hand-tighten the collar until it stops, then add one-quarter turn with the wrench. Don’t crank it down or you’ll strip the threads.
- Purge steam briefly at low pressure to confirm there’s no leak at the joint.
- Fine-tune the angle in small steps if your first test shows the tip sitting too close to the pitcher wall or too far from the surface.
For best results, set the wand so the tip sits about one to two inches below the milk surface when you hold the pitcher at a 20° to 45° tilt. That depth lets you inject air in short bursts (three to five seconds of soft hissing) without creating big bubbles or splashing. Once you’ve finished injecting air, drop the wand slightly deeper to spin a stable whirlpool that folds the microfoam through the milk.
Test your new angle right away by steaming a small pitcher of cold milk. Open the valve gently and watch for a smooth, swirling motion. If the milk sprays up the spout or spins too slowly, nudge the wand a few degrees and try again. Proper alignment means the tip holes direct steam toward the pitcher wall at a slight angle, creating the vortex that blends air evenly and gives you glossy foam ready for latte art.
Identifying Adjustable vs Fixed Steam Wands on Compact Machines
Start by gently trying to rotate the wand by hand while the machine is cool and unplugged. If it moves through 90° or more without resistance, you’ve got a swivel-type wand. If it feels locked or only wobbles slightly, it’s probably fixed or held by a hidden set screw. Many compact machines use ball joints or collar nuts that allow rotation, but some budget models have one-piece wands welded or press-fit to the boiler.
Look for these clues that your wand is adjustable:
- A visible swivel collar or retaining nut where the wand meets the machine body.
- A ball-joint fitting that lets the wand pivot in multiple directions.
- A removable tip or nozzle held by a small hex screw or threaded collar.
- A set screw on the side of the wand mount, often needing a 2.5 mm or 3 mm Allen key.
- Any seam, gap, or O-ring visible between the wand tube and the machine housing.
Fixed wands are single pieces of stainless tube brazed or threaded straight into the boiler port. They don’t rotate and can’t be angled without bending the metal, which will crack welds or kink the tube. On these machines, your only option is adjusting pitcher position or upgrading to an aftermarket swivel adapter. Fixed wands are common on entry-level compact models to save cost and reduce leak points.
Before you start taking things apart, check your machine’s exploded-view diagram or manual for the steam-wand assembly. Some compact models hide the retaining hardware under a decorative shroud or silicone sleeve. If you see no obvious fastener and the wand won’t budge, check the parts list to confirm whether your model supports angle adjustment or needs a retrofit kit.
Tools and Hardware Needed to Adjust a Compact Steam Wand Angle
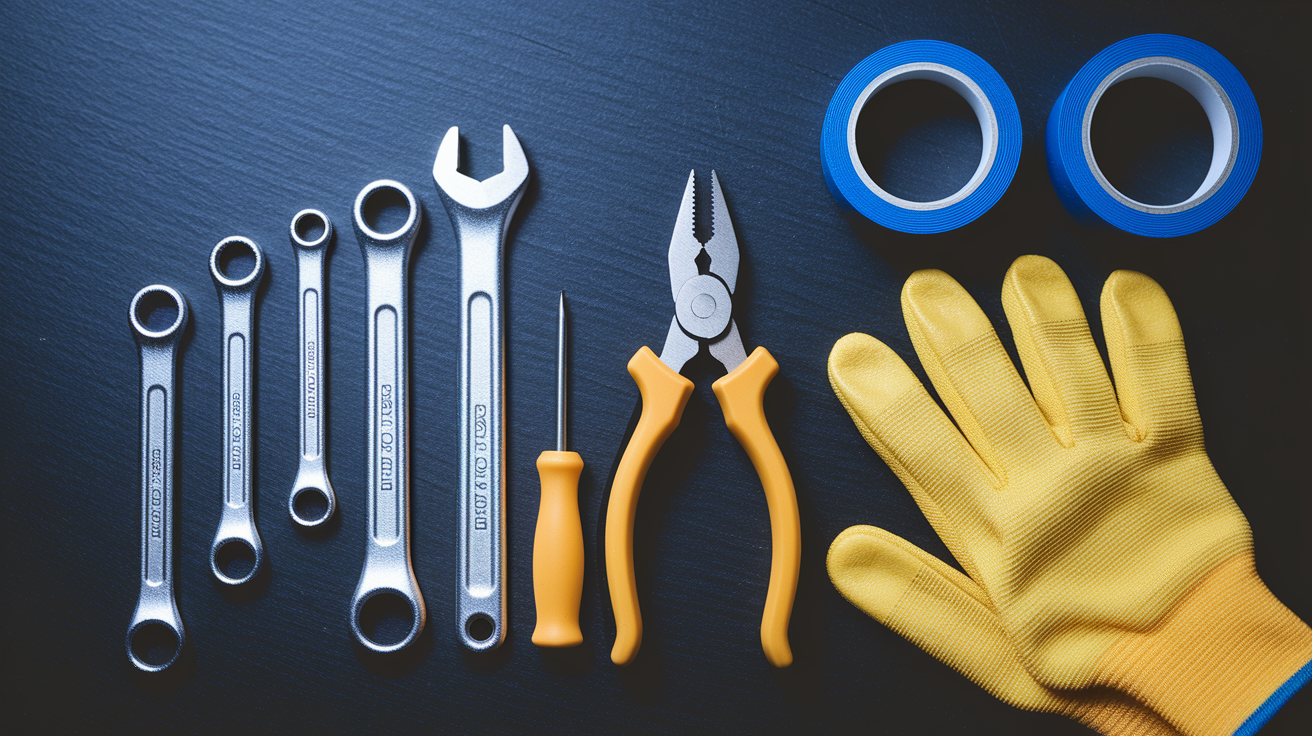
Most adjustments need only a few hand tools you probably already own. The exact sizes depend on your machine brand, but the job rarely calls for anything exotic. Having the right wrench or key ready before you start prevents stripped fasteners and saves time.
Gather these items before you begin:
- 8 mm, 10 mm, or adjustable wrench to loosen and tighten the retaining collar or swivel nut.
- 2.5 mm or 3 mm hex key (Allen key) for set screws that lock the wand angle.
- Small flat-blade screwdriver to remove decorative caps or pry stubborn sleeves.
- Slip-joint pliers for gripping rounded or mineral-crusted fittings.
- PTFE (Teflon) tape, plumber’s grade, to seal threaded joints if you see minor leaks after reassembly.
- Heat-resistant gloves to protect your hands while you work near the boiler.
Use the wrench to loosen the collar just enough that the wand rotates smoothly. One or two turns is usually all it takes. The hex key comes into play if your machine uses a side set screw to lock the wand in position. Loosen it first, then adjust the angle, then retighten. Pliers help when mineral deposits have glued the collar to the wand. Grip gently and twist counterclockwise to break the bond. Wrap two or three layers of PTFE tape clockwise around any male threads if you notice dripping during your test purge. Gloves keep your fingers safe if residual heat lingers in the metal or if a fitting suddenly releases pressurized steam.
Optimal Wand Angle and Pitcher Positioning for Microfoam on Compact Machines

Set your wand to lean 15° to 30° off vertical, measured from the machine’s front panel. That range keeps the tip accessible without forcing you to tilt the pitcher so far that milk sloshes out. Machines with limited countertop clearance benefit from the steeper 30° angle because it moves the wand away from the drip tray and gives you more room to maneuver a standard 12-ounce pitcher.
Hold your pitcher at a 20° to 45° tilt and position the wand tip about one inch below the milk surface, close to the pitcher’s inside edge. Open the steam valve gently and let the tip pull air into the milk with a soft tearing sound for three to five seconds while the milk is still cold. Once you hear the texture shift from hissing to a quieter roll, stop injecting air and let the wand spin the milk into a steady whirlpool. Keep the temperature climbing smoothly toward 140°F to 150°F, stopping before you hit 160°F to avoid scalding the proteins. For more detailed technique on creating stable vortex and microfoam, see Steam Wand Tips: How to Froth Milk Like a Pro.
| Angle Setting | Practical Purpose |
|---|---|
| Wand tilt 15°–30° off vertical | Clears pitcher rim and drip tray; lets you hold pitcher comfortably without twisting your wrist |
| Pitcher tilt 20°–45° | Creates asymmetric flow that drives a stable vortex and folds microfoam evenly through the milk |
| Tip depth 1 inch below surface | Injects fine air bubbles without splashing or creating large foam; adjusts deeper once air phase is complete |
Precision in wand angle translates straight to microfoam quality. When the tip holes point slightly off-center toward the pitcher wall, steam pushes milk in a circular path that self-mixes. If the angle is too shallow, the vortex collapses and you get layered foam on top of hot milk. If the angle is too steep, the tip might break the surface too early or sit so deep that you can’t inject air at all. Test each adjustment with a few ounces of milk and watch the surface. You want a smooth, glossy roll that looks wet and feels like melted ice cream when you pour.
Troubleshooting Wand Angle Issues and Stuck Steam Arms
A wand that won’t budge usually means the retaining collar was over-tightened during the last cleaning or mineral scale has glued the threads together. Try soaking a clean rag in white vinegar, wrapping it around the base of the wand, and leaving it for ten minutes to dissolve calcium deposits. Then grip the collar with your wrench and twist counterclockwise with steady pressure. Avoid jerking, which can snap the fitting.
Watch for these five problems after you adjust the angle:
- Stripped threads on the collar or wand base, causing the nut to spin freely without tightening.
- Steam or water leaking from the swivel joint during operation.
- Restricted rotation because the wand hits the drip tray or group-head housing at certain angles.
- Misaligned tip holes that spray steam sideways instead of into the milk.
- Milk splatter on the counter or machine body due to incorrect depth or excessive steam pressure.
For stripped threads, wrap the male threads with two layers of PTFE tape as a temporary seal, then order a replacement collar or swivel-ball assembly. Repair kits typically cost ten to thirty dollars. Leaks around the joint mean the internal O-ring is damaged or missing. Disassemble the fitting, inspect the rubber seal, and replace it if it looks flattened or cracked. If the wand can’t rotate past a certain point without hitting the machine, you might need a longer swivel adapter or a redesigned wand arm that extends farther from the boiler. Misaligned tips are harder to fix on fixed wands. Sometimes you can rotate the entire wand assembly a few degrees, but permanent correction often requires a new tip with repositioned holes.
After any repair, run a full steam cycle with an empty pitcher to confirm the joint holds pressure and the wand stays locked at your chosen angle. If it drifts during use, the collar is still too loose or the ball joint is worn. Tighten incrementally and retest until the wand holds firm under normal steam flow. Prevent future issues by never cranking the collar past hand-tight plus one-quarter turn with a wrench, and descale your machine every two to six months depending on water hardness.
Alternative Solutions When a Compact Wand Cannot Be Adjusted

If your machine has a fixed wand or the swivel mechanism is broken beyond simple repair, a bolt-on swivel adapter can restore angle flexibility without replacing the entire steam assembly. These adapters thread onto the existing wand base and add a ball joint that rotates 360°. Prices range from ten to forty dollars depending on thread size and build quality. Check your machine’s boiler-port thread pitch. Common sizes are M6, M8, or 1/4-inch NPT. Match the adapter accordingly.
Full replacement wands offer another route when the original is damaged or too short for comfortable frothing. Aftermarket stainless wands with built-in swivels cost twenty to one hundred twenty dollars and often include upgraded tips with finer hole patterns for better microfoam. Some models ship with silicone sleeves and locking collars pre-installed. Verify that the replacement wand’s total length and bend radius won’t interfere with your machine’s drip tray or front panel before ordering.
Consider these four upgrade categories:
- Swivel ball adapters: low-cost add-ons that convert a fixed wand into a rotatable one. Easiest installation but add slight height.
- Complete replacement wands: drop-in assemblies that replace the factory arm and tip. Best when the original is corroded or cracked.
- Aftermarket steam tips: screw-on nozzles with 2.5 mm to 3 mm hole diameters. Improve foam texture without changing the wand itself.
- O-ring and gasket kits: small seals that stop leaks at the swivel joint. Necessary when steam escapes during frothing.
Compact machines from Breville, Gaggia, and De’Longhi each use different thread standards and clearance dimensions. Breville Bambino and Infuser models often accept universal M8 adapters, while older Gaggia Classic machines use proprietary swivel nuts available only from OEM parts suppliers. De’Longhi Dedica and similar compact units sometimes have non-standard tapered threads that require model-specific adapters. Always cross-reference your machine’s service manual or measure the existing threads with calipers before purchasing retrofit hardware.
Maintenance Habits to Keep Compact Steam Wands Moving Smoothly
Purge the wand for one to two seconds right after every frothing session to push out milk residue before it dries inside the tip or joint. Wipe the outside of the wand with a damp cloth while it’s still warm, then purge again to clear the cloth fibers. This two-step routine prevents milk proteins from hardening around the swivel collar and keeps the threads clean.
Follow these four maintenance actions on a regular schedule:
- Tip cleaning: unscrew the tip once a week, soak it in a 1:1 mix of white vinegar and water for fifteen minutes, then clear each hole with a needle and rinse.
- Descaling: run a full descale cycle every two to six months depending on water hardness. Mineral buildup inside the boiler migrates to the wand joint and restricts movement.
- Joint lubrication: apply a tiny drop of food-grade silicone grease to the swivel threads every three months after cleaning. Don’t use petroleum-based lubricants near steam.
- O-ring inspection: check the small rubber seal inside the collar every six months. Replace it if you see cracks, flattening, or loss of elasticity.
Mineral scale is the main enemy of smooth wand rotation. Hard water leaves calcium deposits that coat threads and freeze moving parts. Even if you descale the boiler, residue can collect in the narrow gap between the wand tube and the retaining collar. When you notice resistance during angle adjustments, remove the wand assembly, soak the collar and base in descaling solution for thirty minutes, then scrub with a nylon brush and reassemble with fresh PTFE tape.
Consistent maintenance extends the life of seals and prevents expensive part replacements. A clean, lubricated swivel joint moves freely with light finger pressure and stays locked under steam pressure without needing excessive wrench torque. Machines that see daily use in a small café or busy home kitchen benefit from monthly deep cleaning of the wand assembly, while occasional-use machines can stretch that interval to quarterly.
Final Words
Purge the wand, let it cool, loosen the collar 1–2 turns, rotate to a comfy angle, hand-tighten plus a 1/4 turn, then steam-test in short bursts.
This guide walked you through safety steps, the 6-step adjustment workflow, suggested wand and pitcher geometry for a solid vortex, the basic tools, troubleshooting tips, and upgrade options if the arm won’t move.
Try a quick test: collar loose, 20° wand tilt, 30° pitcher, short bursts. Practice how to adjust steam wand angle on compact home espresso machines and you’ll get smoother milk and steadier results.
FAQ
Q: How to adjust steam wand pressure?
A: Adjusting steam wand pressure depends on your machine: many compact models don’t let you change boiler pressure. If adjustable, alter the boiler/steam setting per the manual; otherwise control steam with purge, short bursts, and wand position.
Q: How to position the steam wand?
A: Positioning the steam wand means placing the tip 1–2 inches below the milk surface with the pitcher tilted 20°–45°, tip holes aligned to create a vortex; adjust angle for comfort and splash control.
Q: What angle is the steam wand on Bambino Plus?
A: The steam wand on the Bambino Plus is a fixed, slightly off-vertical wand—about 15°–25°—and doesn’t swivel; use pitcher tilt (20°–45°) and 1–2″ immersion to dial microfoam instead.
Q: Do I adjust the espresso machine to be more fine when I want it to go slower?
A: Making the grind finer slows extraction; adjust the grinder one small step, reweigh and time the shot, and taste. Aim for a slightly longer time without over-extracting bitter notes.