

Think replacing a gasket is just slap it in and you’re done?
It isn’t. A bad reseat leads to leaks, torn gaskets, and wasted shots.
Follow this clear sequence to install and seat a new group gasket so it seals right, avoids leaks, and lasts longer.
Start by powering down and letting the group cool for 20 to 30 minutes. Do that first and the rest is safe and repeatable.
Complete Step Sequence to Reseat an Espresso Gasket After Replacement
A successful gasket reseat starts with planning and careful step order, not force.
Follow this complete sequence to install and seat a new group gasket without leaks or damage:
- Power down and unplug the machine. Let the boiler and group head cool completely, at least 20 to 30 minutes.
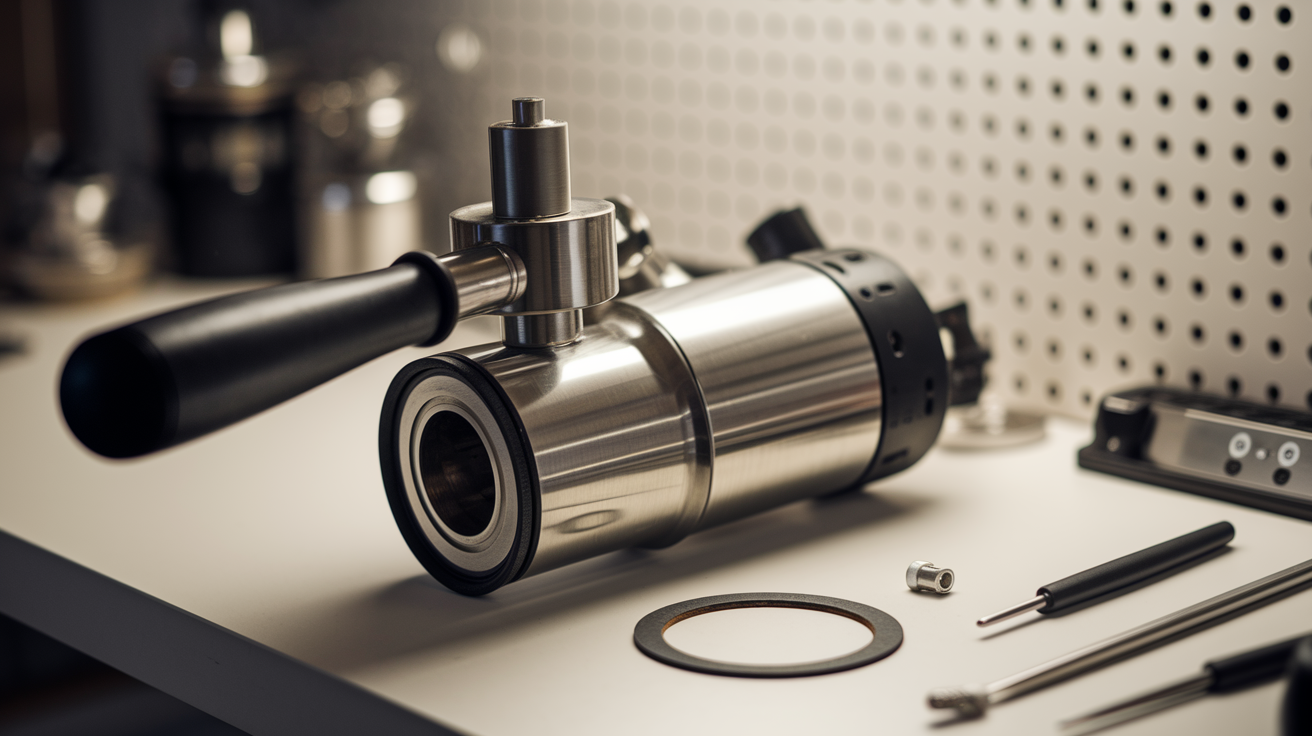
- Remove the water reservoir, drip tray, and drip pan. Lay the machine on its back if you need better access to the group from below.
- Remove the shower screen using a short Phillips screwdriver.
- Remove the shower holding plate by loosening the two Allen screws with a 5 mm Allen wrench. If the plate’s stuck, twist it free with needle‑nose pliers inserted into the screw holes.
- Extract the old gasket. Soft gaskets pull out directly. Hardened gaskets require two pointed screws driven into the rubber no deeper than 5/16″, then pull alternating sides with pliers until the gasket comes out.
- Clean the gasket groove, shower plate area, and screen with a stiff brush and descaler. Scrub until all debris and scale are gone, then dry the groove.
- Inspect the gasket orientation. The beveled edge typically faces downward toward the portafilter, flat side up. Confirm using the old gasket or the machine’s diagram.
- Apply a pea‑sized smear of food‑grade espresso grease around the gasket seating groove. Spread it thin and even.
- Press the new gasket into the cleaned slot by hand, working around the circumference. Don’t fold or roll the edges inward.
- Reinstall the shower holding plate and screen. Finger‑tighten the screws first, then torque to 1.5 to 4 Nm for small screws.
- Lock the portafilter into the group firmly and release it two or three times. This initial compression begins seating the gasket.
- Reassemble the machine. Return the drip pan, tray, and reservoir, then fill and plug in.
- Run 20 to 50 brew cycles to complete the break‑in. Expect minor weeping during the first 5 to 10 cycles as the gasket settles into final shape.
Each numbered step links to a deeper explanation in later sections covering cleaning technique, correct torque, orientation checks, and troubleshooting persistent leaks.
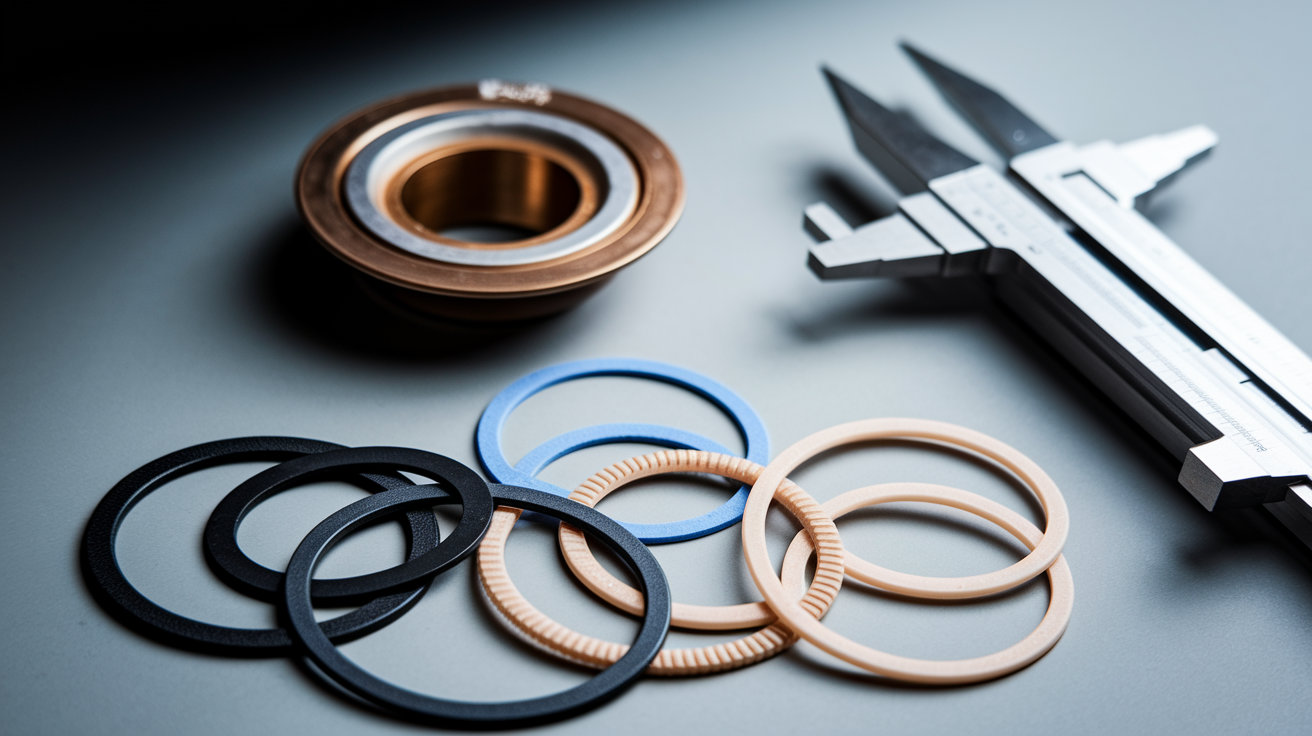
Tools and Materials Needed for Espresso Gasket Reseating
Having the right tools on hand prevents scratches, stripped screws, and gasket tears during installation.
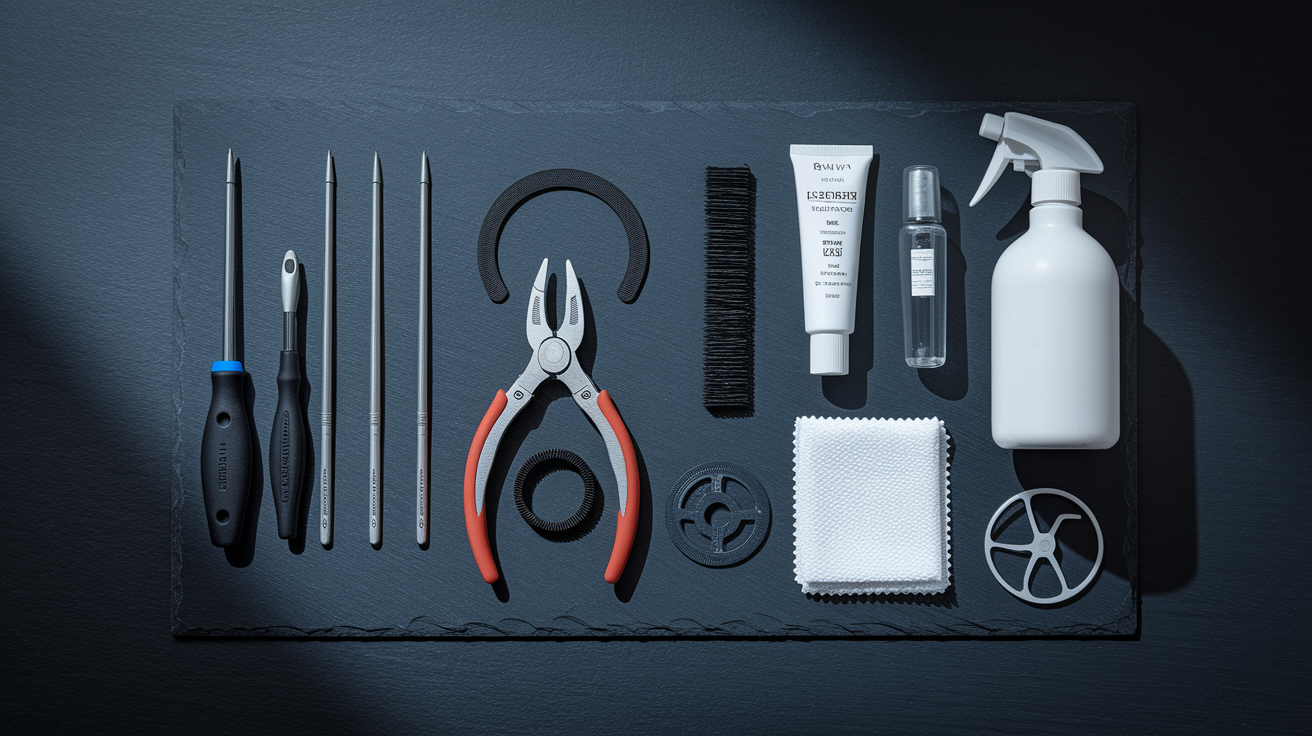
Start with fastener drivers sized exactly to your machine: a short Phillips screwdriver for the shower screen and a 5 mm Allen wrench for the holding plate screws. Keep a large flat‑blade screwdriver nearby to pry a stuck holding plate gently. Grab needle‑nose pliers in case you need to twist the plate free by its screw holes. For extracting a hardened old gasket, you’ll need two pointed screws and a pair of standard pliers. A stiff nylon brush and a descaling cleaner (Urnex CleanCaf is a solid choice) will clear debris and buildup from the gasket slot and shower components.
To confirm gasket size before ordering, use calipers to measure the old gasket’s outer diameter (common sizes: 58 mm, 53 to 54 mm, 50 to 51 mm) and thickness (typically 2 to 4 mm). Finally, pick up a small tube of food‑grade, non‑silicone espresso lubricant and use only a pea‑sized amount spread thin.
Essential reseating kit:
- Fastener tools: Short Phillips screwdriver, 5 mm Allen wrench
- Extraction and prying tools: Large flat‑blade screwdriver, needle‑nose pliers, two pointed screws, standard pliers
- Cleaning supplies: Stiff nylon brush, descaler (Urnex CleanCaf or equivalent), clean cloths
- Measurement tools: Calipers or ruler for diameter and thickness checks
- Gasket installation aids: Food‑grade non‑silicone espresso grease (pea‑sized smear), blunt rounded tool or dedicated gasket driver if needed
- Optional extras: Replacement shower screen (if yours is warped or pitted), replacement shower holding plate (GA‑DY0036/A for Gaggia models if the ridge is damaged)
Don’t use household silicone grease, metal prying tools that gouge aluminum, or oversized screwdrivers that strip screw heads.
Cleaning and Preparing the Group Head Before Reseating the Gasket
A clean gasket groove is the difference between a seal that lasts six months and one that leaks after the second shot.
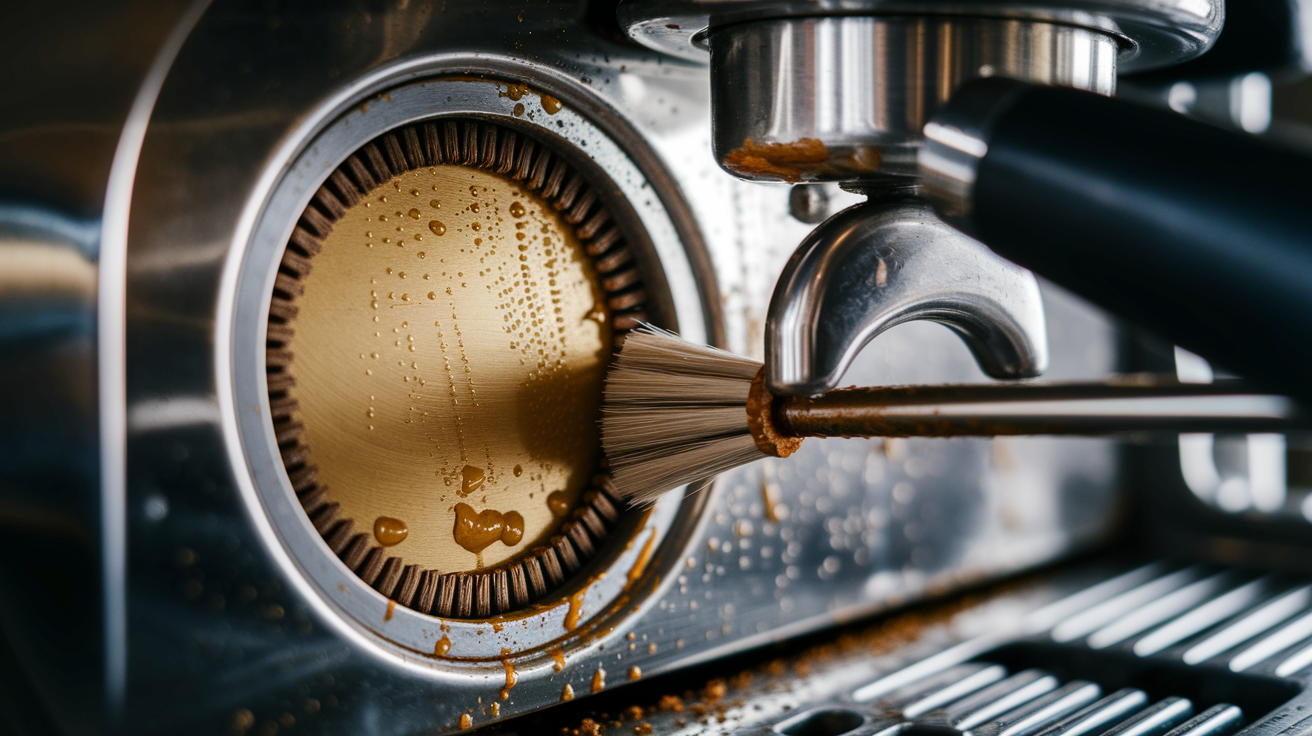
After the machine is cool and unplugged, remove the shower screen and holding plate as outlined in the step sequence. Use the stiff brush and descaler to scrub the entire gasket slot, working around the circumference to lift hardened coffee oils, scale, and any bits of old rubber left behind. If stubborn residue won’t budge, apply descaler and let it sit for a minute, then scrub again.
Use the brush or a wooden toothpick to clear debris from the screw holes and the recessed lip where the gasket seats. Skip metal scrapers. They gouge the aluminum or brass surface and create leak paths.
Once the groove is clean, inspect the seating lip for nicks, burrs, or corrosion. Small burrs can be smoothed with fine‑grit sandpaper wrapped around a dowel, using light circular strokes. Rinse the area with warm water, wipe it dry with a clean cloth, and confirm there are no coffee grounds or fibers left in the slot.
A gasket pressed onto a dirty or wet surface will never seal correctly, no matter how carefully you orient it.
Before inserting the new gasket, lay out the shower screen and holding plate on a clean towel and inspect them for warping, cracks, or buildup. Clean both thoroughly with the same descaler and brush, then dry them. A warped shower screen or a holding plate with bent edges will prevent even gasket compression and cause single‑spot leaks later.
Correct Espresso Gasket Orientation and Insertion Technique
Most espresso gaskets have a chamfered edge and a flat edge. Installing them backward guarantees a poor seal.
Hold the new gasket up to eye level and look at its cross‑section. The beveled or chamfered side typically faces downward toward the portafilter lip, while the flat side sits against the group body. If you saved the old gasket, compare the two to confirm orientation. If the old gasket is too degraded to read, consult the machine’s exploded‑parts diagram or contact the manufacturer.
Some gaskets include a small alignment notch or index mark that must line up with a corresponding pin or slot in the group head. Confirm that feature exists before pressing the gasket into place.
Apply a thin, even smear of food‑grade espresso grease around the gasket groove using your fingertip. Spread it to cover the seating surface without pooling in the corners. Use only about a pea‑sized amount total. The lubricant prevents the gasket from twisting during insertion and helps it slip into the final seated position without tearing.
Don’t use household silicone grease, petroleum jelly, or excessive amounts of any lubricant. All of those can contaminate the brew path or cause the gasket to slip out of alignment during the first few cycles.
Start the gasket at the top of the group and press one section into the groove with your thumbs. Work around the circumference, pressing firmly and evenly, stretching the gasket slightly if needed to clear the full perimeter. Don’t fold the inner or outer edge inward. If the gasket is tight and won’t seat by hand, use a blunt wooden dowel or a dedicated gasket installation driver to press it down section by section. Apply radial pressure evenly and check that the gasket sits flush in the groove with no high spots or gaps.
Bevel Direction and Groove Alignment
Most machines use the same bevel‑down convention, but a few older or specialty models reverse it. When in doubt, photograph the old gasket in place before removal or consult the parts diagram. If the gasket has an alignment notch, rotate it until the notch lines up with the group’s indexing pin or mark. A misaligned notch can block water flow or create uneven compression.
| Orientation Issue | Corrective Action |
|---|---|
| Gasket installed bevel‑up instead of bevel‑down | Remove gasket, flip it, and press it back into the groove with bevel facing the portafilter |
| Alignment notch does not line up with group pin | Rotate gasket in the groove until notch and pin align; press firmly to seat |
| Gasket edge folded inward during installation | Remove gasket, clean any debris, re‑lubricate lightly, and reinstall using even radial pressure |
After the gasket is seated, run your finger around the entire perimeter to confirm it sits evenly with no bulges, twists, or gaps.
Reassembly, Torque Guidance, and Gasket Break‑In

Correct screw torque and a methodical break‑in period turn a new gasket into a reliable seal.
Reinstall the shower holding plate first, aligning the screw holes and making sure the plate sits flat against the gasket. Insert the two Allen screws and tighten them finger‑tight, then use the 5 mm Allen wrench to snug them down. If you have a torque wrench, set it to 1.5 to 4 Nm for small screws like these. Over‑torquing can strip threads or deform the gasket. Under‑torquing allows the plate to shift and create uneven compression. Tighten in a cross pattern if there are more than two screws, working incrementally to distribute pressure evenly.
Next, reinstall the shower screen and tighten its Phillips screw to the same 1.5 to 4 Nm range. Confirm the screen sits flush with no wobble. If your machine uses larger group retaining bolts or a locking ring, torque those fasteners to 6 to 12 Nm, but only if the machine manual provides a specific value. When in doubt, stop at firm resistance and don’t force the fastener.
Break‑in and seating progression:
- Lock and unlock the portafilter two or three times with firm pressure before running any water. This initial compression helps the gasket conform to the portafilter rim.
- Run a blank shot (no coffee, just hot water) with the portafilter locked in place. Watch for leaks around the gasket perimeter.
- Perform 5 to 10 additional blank shots over the next few minutes. Expect minor weeping as trapped air escapes and the gasket settles.
- Pull 20 to 50 normal espresso shots over the next few days to complete the break‑in. The gasket will compress slightly and conform to the group head and portafilter surfaces.
- Check portafilter resistance after every 10 cycles. Resistance should feel firm and consistent, not loose or suddenly tight.
If you see heavy leaking or spurting water after the first 20 cycles, stop and re‑check gasket orientation, groove cleanliness, and shower screen alignment before continuing.
Testing and Verifying the Seal After Reseating

A proper seal shows itself in pressure stability, even extraction, and no lateral leaking during the brew.
Start with a cold leak test: lock the portafilter into the group without turning on the machine, then inspect the gasket perimeter for gaps or uneven contact. Unlock and relock the portafilter, noting the rotational stop point. It should match the original position before gasket replacement. If the portafilter stops earlier or later than before, the gasket may be too thick, too thin, or incorrectly oriented.
Next, run a hot water flush with the portafilter in place but no coffee in the basket. Watch the gasket line while water flows. A small amount of weeping (a few droplets) is normal during the first 5 to 10 cycles as the gasket compresses and seats fully. Heavy dripping, spurting, or water running down the side of the group indicates a problem.
If your machine has a brew pressure gauge, observe the needle during the flush. Pressure should build smoothly to the machine’s normal range (typically 9 bar for most pumps) and hold steady. Erratic pressure swings or a gauge that climbs above spec suggest channeling, a clogged screen, or uneven gasket compression.
After the initial flushes, pull a real shot and inspect the extraction. Flow should start evenly across the entire basket bottom. If one side drips faster or slower, the gasket may be seated unevenly or the shower screen may be cocked. Let the machine cool slightly, then remove the portafilter and check the puck. An evenly compressed puck with no deep craters or dry spots confirms the gasket is distributing pressure correctly.
Continue testing through the 20 to 50‑cycle break‑in window, checking for leaks and pressure consistency after every 10 shots.
Diagnosing Misalignment and Fixing Persistent Leaks After Reseating

When leaks persist after careful installation, the cause is usually debris, orientation, or a worn mating surface.
Start by removing the portafilter and inspecting the gasket perimeter again under good light. Look for coffee grounds, scale fragments, or bits of old gasket rubber trapped between the new gasket and the groove. Even a single grain of coffee can create a leak path. If you find debris, remove the gasket, clean the groove again with the stiff brush and descaler, dry it thoroughly, and reinstall the gasket with fresh lubricant. Confirm the gasket is seated evenly with no high or low spots.
If the groove is clean and the gasket still leaks, check orientation. Remove the gasket and flip it so the bevel faces the opposite direction, then reseat it and test again. Some aftermarket gaskets are manufactured with inconsistent bevel angles. Reversing them can improve the seal. If leaking continues, measure the gasket’s outer diameter and thickness with calipers and compare the numbers to the machine’s specification. An undersized gasket will never seal. An oversized gasket will compress unevenly and cause single‑spot leaks.
Inspect the portafilter rim for wear, burrs, or damage. A worn or nicked rim won’t mate cleanly with even a perfect gasket. Measure the portafilter’s outer diameter at the sealing surface and compare it to the factory spec. If the rim is out of round or smaller than spec, the portafilter needs replacement or re‑machining. Check the shower screen for flatness by laying it on a flat surface and looking for gaps or wobble. A warped screen prevents even gasket compression and will leak at the high spot.
Correcting Single‑Spot Leaks
A leak that always appears in the same place points to a localized defect in the gasket seat or portafilter rim.
Remove the gasket and run your finger slowly around the inside of the groove, feeling for sharp edges, burrs, or a gouge. Use fine‑grit sandpaper wrapped around a dowel to smooth any rough spots, working gently to keep from removing material from the seating surface. Wipe the groove clean, apply fresh lubricant, and reseat the gasket.
If the leak persists, inspect the portafilter rim at the same clock position as the leak. A small nick or burr can be smoothed with fine sandpaper or a needle file, but deep damage requires portafilter replacement. Test the seal again after smoothing, running 5 to 10 blank shots to confirm the leak is gone.
Selecting the Correct Espresso Gasket for Reliable Reseating
Installing the wrong gasket size or material guarantees frustration, even if every other step is perfect.
Measure your old gasket’s outer diameter, inner diameter, and thickness with calipers before ordering a replacement. Common outer diameters are 58 mm (standard commercial and most prosumer machines), 53 to 54 mm (some compact or older models), and 50 to 51 mm (small or specialty groups). Thickness typically ranges from 2 mm to 4 mm. A gasket that’s too thin will leak because the portafilter won’t compress it fully. A gasket that’s too thick will make the portafilter hard to lock and may prevent it from reaching the correct rotational stop.
Record all three measurements and cross‑reference them with your machine’s parts diagram or contact the manufacturer to confirm the correct replacement part number. For Gaggia aluminum‑boiler machines, the OEM gasket is part number GA‑NG01/001.
Material choice affects longevity and sealing tightness. Standard rubber gaskets (often EPDM or nitrile) provide a firm, tight seal and are less expensive, but they harden and crack after six to twelve months of daily use. Silicone gaskets last longer (up to two years) and resist hardening, but they compress less aggressively and may feel slightly looser when locking the portafilter. For machines used daily, silicone is a practical upgrade. For machines used occasionally, standard rubber is fine and costs less.
Material summary:
- Standard rubber (EPDM/nitrile): Firm seal, tighter portafilter lock, shorter lifespan (6 to 12 months), lower cost, best for daily‑use machines where you’ll replace gaskets regularly.
- Silicone: Longer lifespan (12 to 24 months), softer compression, slightly looser feel, higher cost, best for home users who want to replace gaskets less often.
- OEM vs aftermarket: OEM gaskets (like GA‑NG01/001 for Gaggia) match factory specs exactly. Aftermarket gaskets vary in quality, so measure carefully and buy from suppliers with explicit size charts and material listings.
Final Words
Start with the machine powered down and cooled. Remove the shower screen with a short Phillips and the holding plate with a 5 mm Allen. The old gasket usually sits around 5/16 inch.
Clean and dry the groove, then press the GA‑NG01/001 into the slot. Orient the bevel correctly, use a light smear of food‑grade lubricant, and avoid folds.
Seat the gasket by locking the portafilter several times and allow a 20–50 cycle break‑in. Run a blind shot and visual leak checks. These steps to reseat an espresso gasket after replacement give you a reliable seal and fewer leaks.
FAQ
Q: How to replace gasket on espresso machine?
A: Replacing a gasket on an espresso machine: power down and cool, remove shower screen (short Phillips) and plate (5 mm Allen), remove old gasket, clean groove, fit GA‑NG01/001 to 5/16″, lubricate, seat with multiple portafilter locks, run 20–50 cycles, test.
Q: What is the 30 second rule for espresso?
A: The 30 second rule for espresso says a standard shot should extract in roughly 25–30 seconds using typical dose/yield; if it’s faster, grind finer, if slower, grind coarser or lower dose.
Q: What to expect after head gasket replacement?
A: After head gasket replacement you can expect an improved seal but possible light weeping initially; the gasket seats over 20–50 cycles, so check for leaks, verify pressure or portafilter resistance, and retorque hardware if needed.
Q: When installing a new gasket, which step directly follows removing the gasket?
A: After removing the gasket, the next step is to clean and inspect the groove thoroughly, remove debris and scale, dry the area, confirm chamfer/orientation, then apply a light food‑grade non‑silicone lubricant before fitting the new gasket.