

Think a little rubber ring can’t wreck your espresso? Think again.
A failing gasket lets 9 bar of pressure leak out, so shots pull thin, sour, with little crema and often a hiss or spray at the portafilter.
This post shows two quick, repeatable tests, a soapy-bubble leak check and a blind-basket pressure hold, so you can find the leak without guessing.
Follow these steps and you’ll know whether to clean, reseat, or replace the gasket, saving wasted coffee and frustrating shots.
Understanding Espresso Gasket Seal Leaks and How to Test for Them

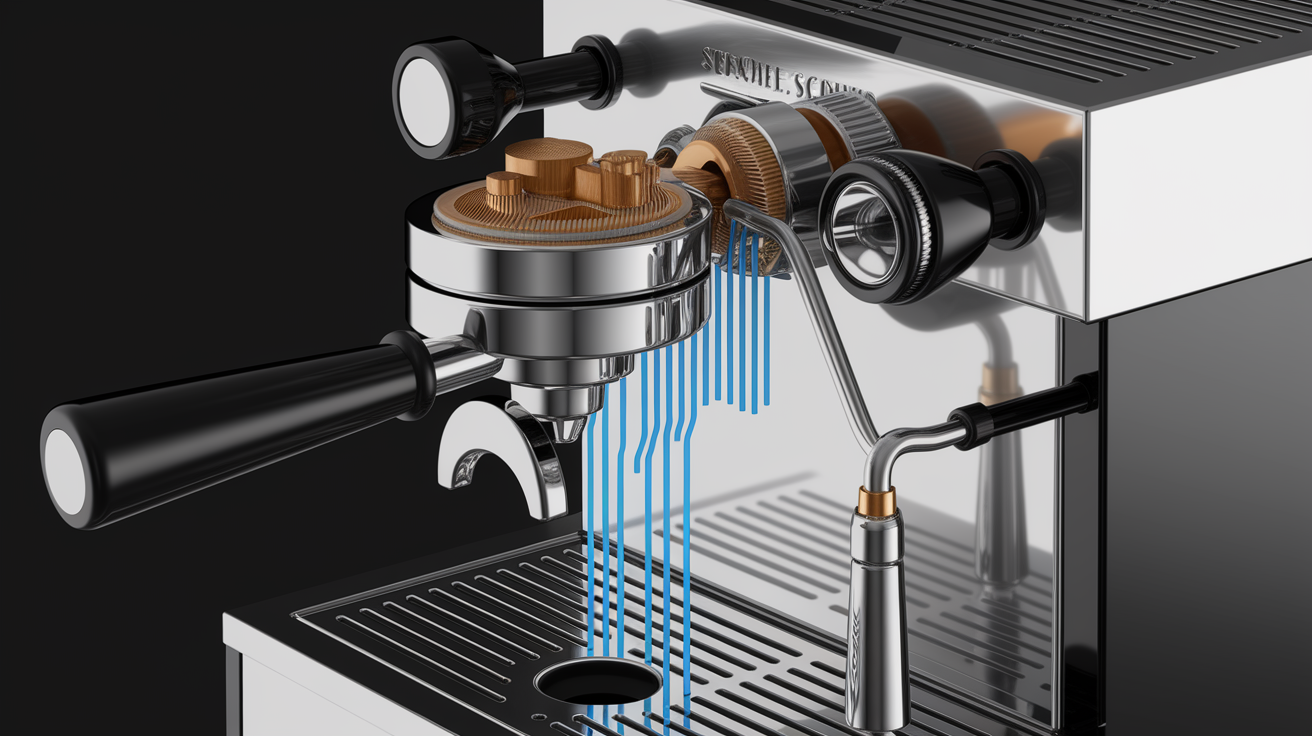
When your espresso gasket fails, the machine can’t build or hold the roughly 9 bar of pressure you need for proper extraction. You’ll pull weak, thin shots with barely any crema. Water sprays or drips from the sides of the portafilter while you’re brewing. Sometimes you’ll hear a hiss near the group head. The gasket itself is just a small rubber or silicone ring tucked into the group head that seals the portafilter against metal when you lock it in. Once it cracks, flattens, or hardens, pressure escapes instead of pushing through your puck.
Testing for leaks involves visual checks, pressure readings, and a few simple DIY tools. Most tests have you run the machine at full brew pressure and watch where water or steam shows up, then compare that against what a properly sealed machine should do. If your gauge drops from around 9 bar down to 7 or 8 bar (or lower) during a shot without any obvious grind or dose change, the gasket’s probably your culprit.
Quick signs your gasket’s leaking:
- Water dripping or spraying from the gap between portafilter and group head while brewing
- Hissing or steam escaping from the sides of the locked portafilter
- Brew pressure reading lower than usual, or dropping more than 1 bar within 30 to 60 seconds during a blind basket hold test
- Portafilter feels loose when locked, or it locks way tighter or looser than normal (outside the typical 30 to 45 degree rotation)
- Shot time runs faster than 25 to 30 seconds with the same dose and grind, and the espresso tastes sour or weak
The fastest way to confirm? Run a blind basket pressure hold test. Install a blind basket (backflush disk) in the portafilter, lock it in, fire up the pump to build pressure to about 9 bar, and hold for 30 to 60 seconds while watching your gauge. If pressure drops more than 1 bar, you’ve got a leak. Pair that with a soapy water bubble test around the portafilter rim while the pump’s running, and you’ll see exactly where the seal’s breaking.
Why Espresso Gasket Pressure Leaks Happen
Gaskets wear out from repeated heat cycles, coffee oil exposure, and compression fatigue. Every time you lock the portafilter and pull a shot, the gasket compresses against metal at high temperature and pressure. Over hundreds or thousands of cycles, the material loses elasticity, flattens, and eventually cracks. High volume use speeds this up. A home machine pulling two shots a day might keep a gasket healthy for a year. A café pulling 200 shots a day might need replacement every few weeks.
Scale buildup on the group head seating surface (or on the gasket itself) creates uneven contact, letting water escape through tiny channels. Coffee oils, cleaning detergent residue, and burnt particles can harden on the gasket lip and stop it from compressing fully. Misalignment of the portafilter ears or uneven torque when you lock in also prevents the gasket from sealing uniformly around the entire circle.
Common root causes of gasket leaks:
- Compression fatigue after roughly 1,000 or more shots, or 6 to 12 months of regular use
- Heat exposure causing rubber or silicone to harden, crack, or turn brittle
- Coffee oil and residue buildup on the gasket lip or group head seating surface
- Scale deposits stopping flush contact between gasket and portafilter rim
- Debris or old coffee grounds stuck in the gasket groove
- Overtightening the portafilter, which speeds up flattening and material fatigue
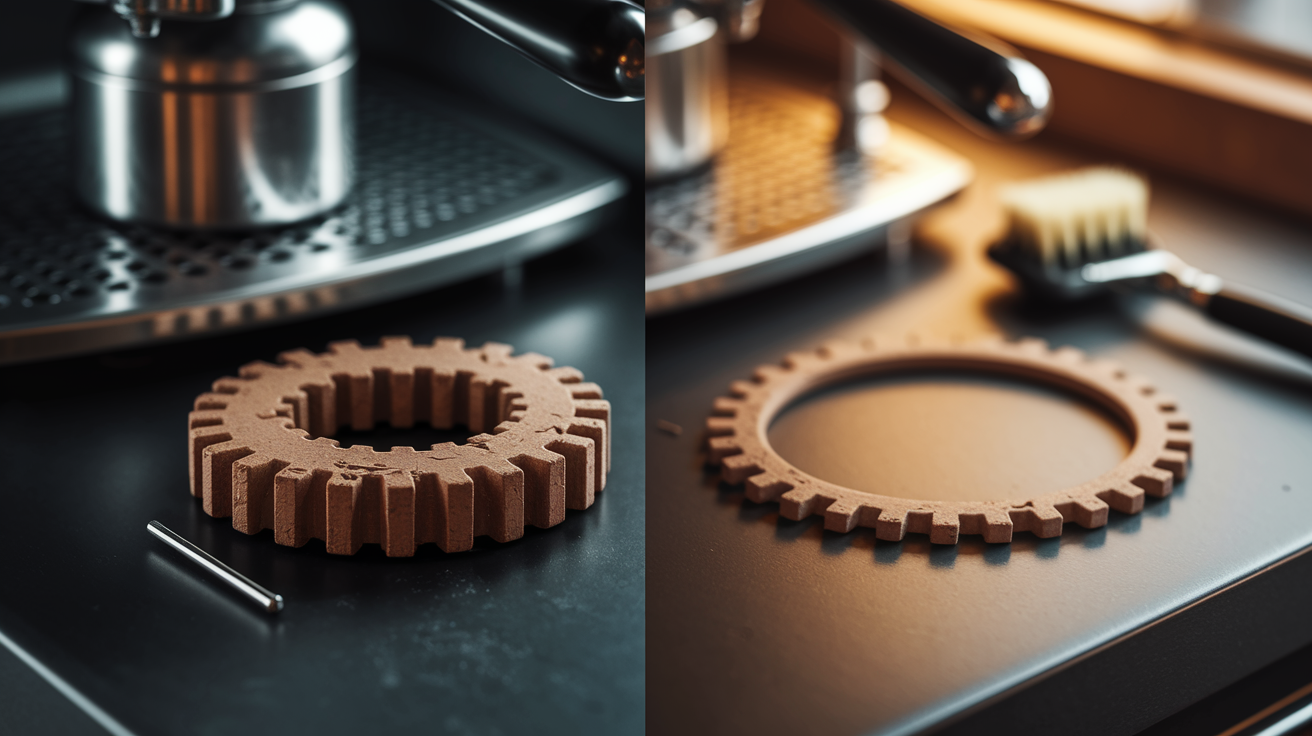
Performing a Full Visual Espresso Gasket Seal Inspection
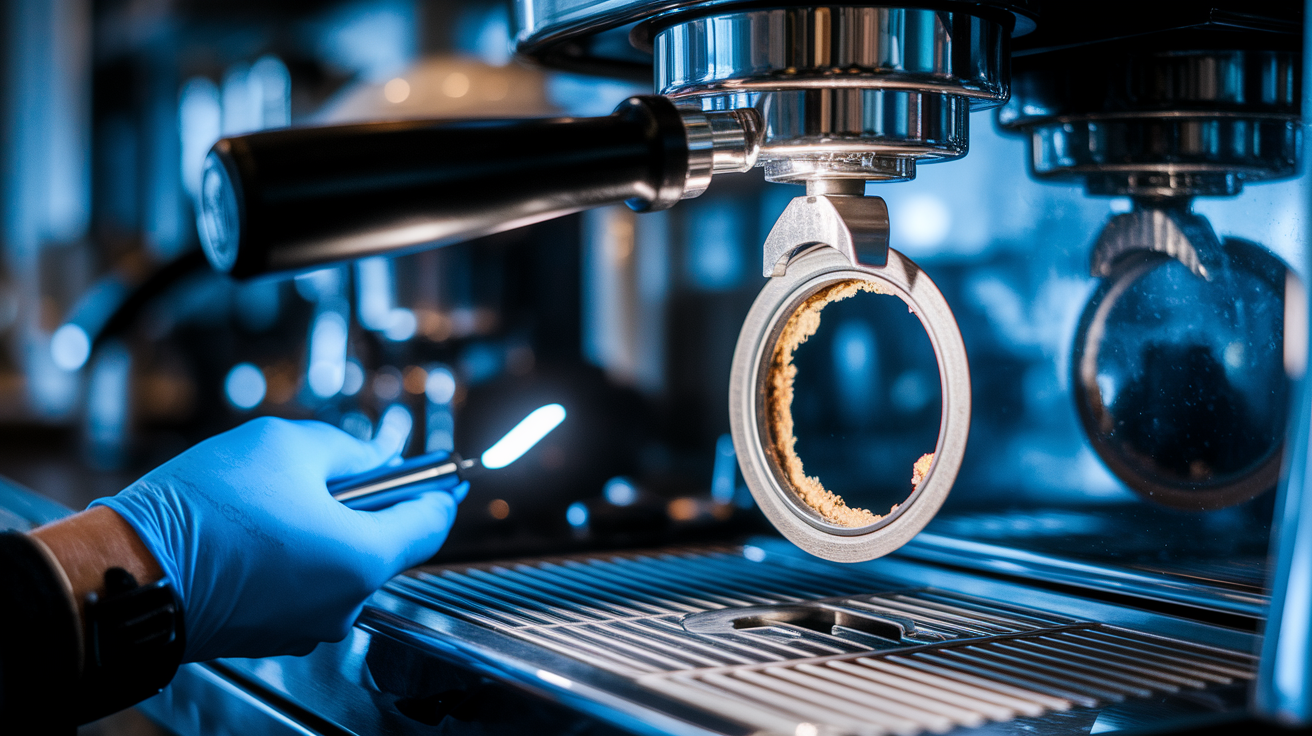
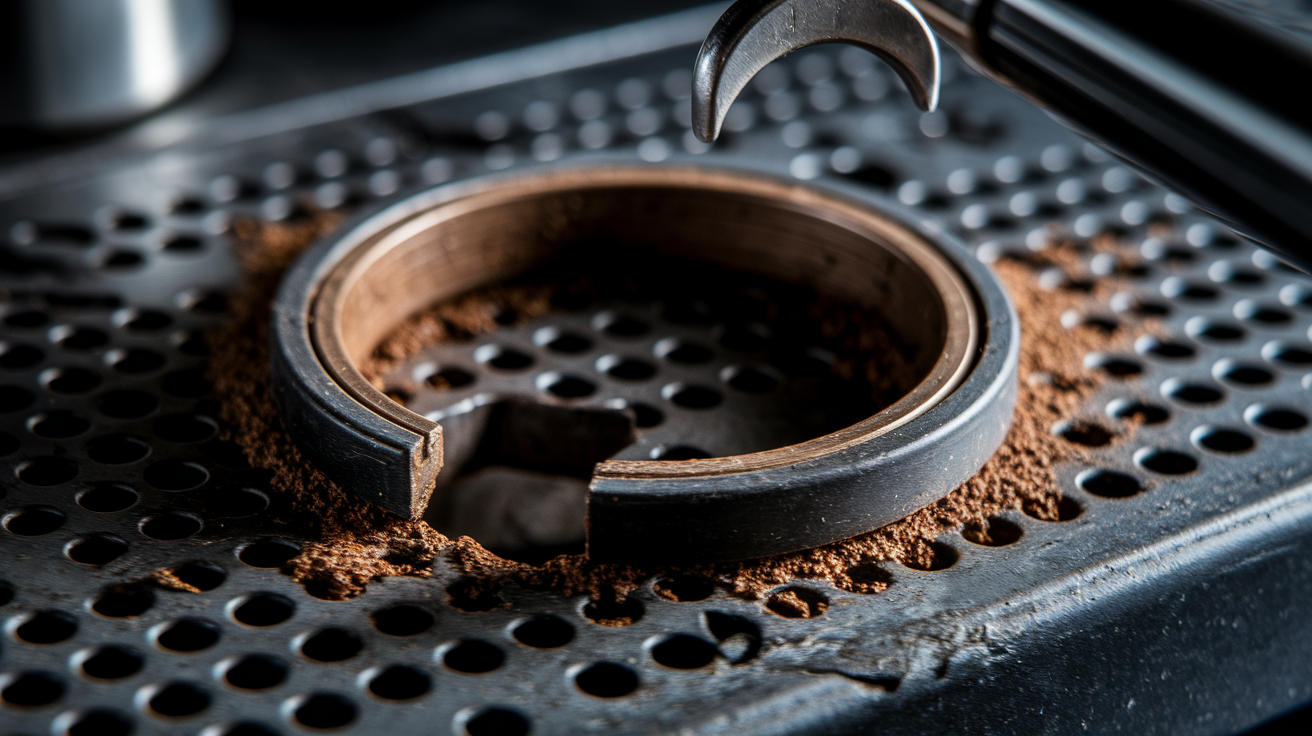
Power off the machine, let it cool, and remove the portafilter. Shine a flashlight into the group head or use your phone’s camera to zoom in and inspect the gasket surface. A healthy gasket sits evenly in its groove with a smooth, consistent lip all the way around. Look for cracks, missing chunks, flat spots, dark discoloration, or hardened sections. If the gasket feels brittle when you press it gently with a fingernail, or if it doesn’t spring back when compressed, it’s near failure.
Check the group head seating surface for buildup. Wipe the metal rim with a clean towel and look for coffee residue, scale flakes, or detergent film. Any irregularity on that surface stops even compression. Test portafilter engagement by locking it in without a basket. Note the rotation angle and resistance. If it locks noticeably tighter or looser than when the gasket was new, compression has changed.
Signs to watch during visual inspection:
- Visible cracks, splits, or missing material anywhere on the gasket lip
- Flattened or compressed sections that no longer have a rounded profile
- Dark, oily residue or burnt coffee stuck to the gasket surface
- Hardened texture that doesn’t compress when you press it lightly
- Gasket sitting unevenly in the groove, tilted or pulled to one side
- Debris, scale, or coffee grounds trapped under the gasket or on the group head seating ring
- Portafilter lock angle changed outside the typical 30 to 45 degree range
If you see any cracks or flattening, plan to replace the gasket right away.
How to Test an Espresso Gasket Seal With a Soapy Bubble Leak Check

Mix a few drops of dish soap with water in a small cup or spray bottle. Remove the portafilter basket so the portafilter’s empty, lock it into the group head, and apply a thin layer of soapy water around the rim where the portafilter meets the group. Flip the brew switch to run the pump at full pressure and watch the soapy area closely. If bubbles form and grow steadily at one spot, that’s your leak point.
Steps for the soapy bubble test:
- Power on the machine and let it reach operating temperature
- Remove coffee and basket from the portafilter, leaving it empty or use a regular (non blind) basket
- Lock the portafilter into the group head like you normally would
- Apply soapy water around the entire seam between portafilter and group head with a brush or spray
- Run the brew pump for 10 to 15 seconds at full pressure
- Watch for continuous bubble formation. Mark or note the exact location
Small, occasional bubbles can show up from residual moisture. You’re looking for steady, growing bubbles that keep forming as long as the pump runs. If bubbles appear evenly around the whole circle, the gasket’s compressed unevenly or damaged throughout. If they concentrate at one spot, check for debris, a dent in the portafilter rim, or a localized crack in the gasket.
Using a Blind Basket Pressure Test to Confirm Gasket Seal Integrity

A blind basket (also called a backflush disk) blocks all water flow, forcing the machine to build and hold maximum pressure against the gasket. Install the blind basket in your portafilter, lock it into the group head, and connect an inline manometer or check your machine’s built in pressure gauge if it reads brew pressure. Start the pump and let pressure climb to around 9 bar, then hold that pressure for 30 to 60 seconds without stopping the pump. Watch the gauge. A properly sealed system will hold steady or drop only slightly because of normal valve behavior. If pressure falls more than 1 bar during the hold, you have a leak.
While holding pressure, look and listen around the portafilter, group head body, and underneath the machine. You might see water dripping, hear hissing, or notice steam escaping from the group housing. If the gauge stays stable but you see a drip, the leak’s small and might not affect extraction much yet. If the gauge drops quickly and water sprays from the portafilter rim, the gasket has failed.
Detailed blind basket pressure hold procedure:
- Install a clean blind basket (backflush disk) in the portafilter
- Lock the portafilter into the group head with normal force
- Attach an inline manometer between the group and portafilter, or rely on the machine’s brew pressure gauge if available
- Place a towel or tray under the group to catch any leaking water
- Turn on the brew pump and let pressure build to around 9 bar
- Hold the pump running for 30 to 60 seconds, watching the pressure reading continuously
- Note where the gauge settles and whether it decays steadily or holds
- Shut off the pump, release pressure, and inspect for wet spots or residue around the portafilter seal, group head, and drip tray
| Pressure Drop | Likely Issue | Action |
|---|---|---|
| Less than 0.5 bar over 60 seconds | Normal valve/system behavior; gasket sealing correctly | No action needed; gasket is functional |
| 0.5 to 1 bar over 60 seconds | Minor leak; possible gasket wear or debris on seating surface | Clean group head and gasket; re-test; replace gasket if issue persists |
| Greater than 1 bar over 30 to 60 seconds | Significant leak at gasket, group seal, or internal valve | Inspect gasket for cracks/flattening; replace gasket; if leak continues, check internal seals or consult technician |
If the gauge holds steady and you don’t see any drips or spray, the gasket’s sealing properly and the leak’s elsewhere. Or there’s no leak at all.
Backflush Leak Testing for Partial or Intermittent Gasket Failure

Some gasket leaks only show up under sustained pressure, or after the gasket’s been heated and compressed several times in a row. A backflush cycle with detergent stresses the seal repeatedly and can reveal intermittent failures that a single pressure hold test might miss. It also helps you figure out whether residue buildup is stopping full compression. Run 5 to 10 backflush cycles per your machine’s manual (usually 10 seconds on, 10 seconds off), then immediately re-run the blind basket pressure hold test and compare the results.
If pressure stability gets better after backflushing, the gasket was partially clogged or coated with oils, and cleaning brought back some sealing ability. If pressure decay stays the same or gets worse, the gasket material itself has failed and cleaning won’t help. You might also notice that the first few backflush cycles produce more water spray or hissing than later cycles, which means the gasket needed break in pressure to seat fully. That’s a sign it’s near the end of its life.
What backflush test results mean:
- Pressure holds better after backflushing: residue was blocking full gasket contact. Clean regularly and monitor gasket condition
- Pressure decay unchanged after backflushing: gasket material has lost compression or cracked. Replace immediately
- More spray or hissing during early backflush cycles, then stabilizes: gasket is worn and seats inconsistently. Plan replacement soon
- Water leaking from group head body (not portafilter rim) during backflush: internal group seal or shower screen gasket failure, not the portafilter gasket
- Pump struggles to build pressure even with blind basket installed: possible OPV issue or internal leak in brew circuit. Check beyond the gasket
Localizing Espresso Pressure Leaks Beyond the Gasket
Not every pressure loss or drip starts at the portafilter gasket. If you’ve confirmed the gasket looks healthy, seats correctly, and the blind basket test still shows pressure decay, check the shower screen, group head bolts, steam valve, and internal plumbing. Remove the shower screen and its retaining screw, then re-run the pressure test with the portafilter locked in. If the leak stops, the shower screen gasket or the screen itself was the problem. If the leak continues, the issue’s in the group head housing, boiler seals, or brew path valves.
Leaks that show up only when the portafilter’s partially rotated (before it locks fully) often mean damaged portafilter ears, a bent lug, or debris stopping the basket from sitting flush against the gasket. Leaks that appear around the group head body with no portafilter installed point to internal seals or a cracked housing. Water pooling under the machine after a shot, but not visible during brewing, suggests a slow drip from a steam line, boiler gasket, or drain valve rather than the portafilter seal.
Checks to isolate non gasket leaks:
- Remove the shower screen and holder. Re-test pressure with blind basket to see if leak persists
- Inspect portafilter lugs and rim for dents, burrs, or damage that stop even contact
- Check the group head mounting bolts and gaskets for seepage around the housing
- Run a steam wand test: open the valve with a closed tip and watch for pressure drop or dripping after shutoff
- Look for water inside the drip tray or under the machine right after a shot, even if no spray was visible during brewing
- Test with the portafilter removed entirely. If pressure builds and holds without the portafilter, the leak’s not in the brew circuit
If the blind basket test shows stable pressure with the portafilter removed but fails when the portafilter’s locked in, the gasket’s the issue.
Verifying Proper Espresso Gasket Seating After Installation
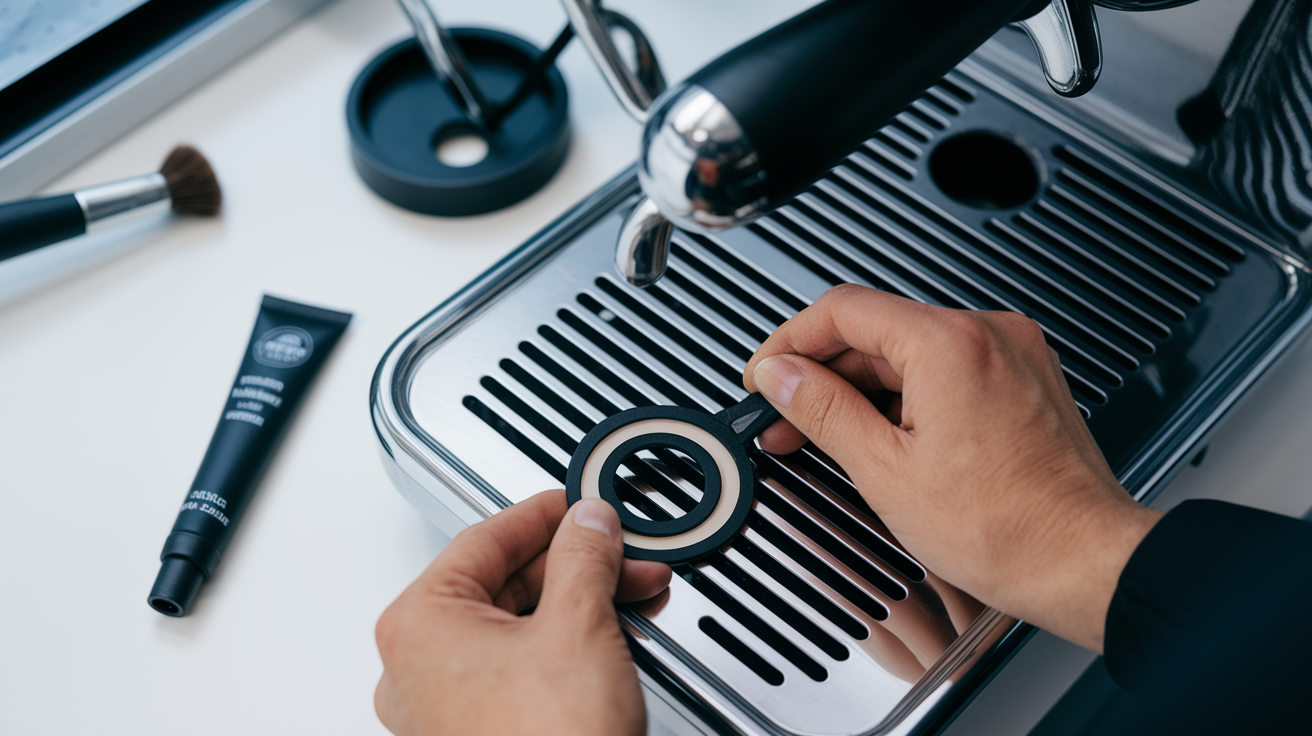
After installing a new gasket, confirm it sits flush in the group head groove with no folds, twists, or gaps. The lip should face downward toward the portafilter, and the gasket should compress evenly around the entire circle when you lock the portafilter in. Wipe both the gasket surface and the group head seating ring clean before installation. Some gaskets benefit from a light coat of food safe silicone grease on the lip to improve initial sealing and reduce friction during the first few lock ins.
Lock the empty portafilter and check the rotation angle. It should feel consistent with the original gasket’s engagement, usually around 30 to 45 degrees from loose to fully locked. If it locks much tighter or stops short, the gasket might be too thick or seated incorrectly. If it feels loose or rotates farther than before, the gasket might be too thin or compressed. Re-run the blind basket pressure test and soapy bubble check to confirm the new gasket holds pressure without leaks.
| Seating Issue | Symptom | Fix |
|---|---|---|
| Gasket folded or twisted in groove | Uneven portafilter resistance; visible gaps; immediate spray during first shot | Remove gasket, flatten it, and reinstall carefully; make sure it sits evenly before locking portafilter |
| Gasket too thick for group head | Portafilter locks very tight or won’t rotate to full lock position | Verify gasket size matches machine spec; replace with correct thickness (usually 8 to 8.5 mm for most 58 mm groups) |
| Gasket too thin or compressed | Portafilter feels loose when locked; spray or drip during brewing | Replace with thicker gasket or check for debris under the old gasket that compressed it |
| Debris or scale on group seating surface | Gasket appears correct but leaks persist at one spot | Remove gasket, scrub group head rim with brush and descaler, rinse, dry, and reinstall gasket |
| Gasket installed upside down or backward | Poor sealing; portafilter won’t lock smoothly; pressure loss during test | Check gasket profile; lip should face down toward portafilter; reinstall with correct orientation |
When to Replace a Worn Espresso Gasket Seal
Replace the gasket right away if you see cracks, missing material, or a flattened lip during visual inspection. Even without visible damage, plan replacement every 6 to 12 months for home machines or every few weeks to months for high volume commercial use. A gasket that no longer compresses when you press it lightly, or one that’s turned hard and brittle, won’t seal reliably under brew pressure. Replacement gaskets cost $5 to $20 and are sold by diameter (most home and prosumer machines use 58 mm; some compact models use 54 mm or proprietary sizes).
To replace, power off and cool the machine, then use a small flathead screwdriver or gasket pick to lift the old gasket out of the groove. Clean the groove and seating surface thoroughly with a brush and mild detergent, removing all coffee oils, scale, and residue. Press the new gasket into the groove evenly, starting at one point and working around the circle to avoid folds. Some people lightly dampen the gasket or apply a thin layer of food safe lubricant to ease installation and initial seating.
Steps and checks for gasket replacement:
- Confirm correct gasket size and thickness by measuring the old gasket or checking the machine manual
- Remove old gasket carefully to avoid scratching the group head groove
- Scrub the groove and seating surface. Rinse and dry completely
- Install new gasket with the lip facing down, pressing evenly into the groove without twisting
- Lock the portafilter (empty or with blind basket) and check rotation resistance and lock angle
- Run a blind basket pressure hold test for 30 to 60 seconds. Confirm pressure stays within 0.5 bar of starting pressure
After replacement, pull a test shot or run a backflush cycle and inspect for spray, drips, or hissing. If the new gasket passes the pressure test and produces no visible leaks, sealing’s restored.
Preventing Future Espresso Gasket Seal Leaks
Routine backflushing removes coffee oils and residue that harden on the gasket and group head, extending gasket life. For home machines, backflush with water weekly and with detergent monthly. Don’t overtighten the portafilter. Lock it with firm, even pressure, but don’t force it past the natural stop point. Excessive torque speeds up flattening and material fatigue.
Inspect accessible gaskets every 6 months. Clean the group head seating surface and gasket lip with a soft brush after heavy use days. Descale the machine on schedule to stop scale buildup on sealing surfaces. Replace gaskets proactively before cracks appear. Waiting until a gasket fails means you’ve already lost shot quality and risked internal water damage. Gaskets are cheap. Replacing one every year costs less than a few wasted bags of coffee from under extracted, leaking shots.
Best practices to extend gasket lifespan:
- Backflush weekly with water, monthly with espresso machine detergent, following manufacturer instructions
- Don’t lock the portafilter with excessive force. Use consistent, moderate pressure
- Wipe the group head and gasket after daily use to remove oils and grounds
- Descale the machine every 1 to 3 months depending on water hardness to stop scale on sealing surfaces
- Inspect the gasket visually every 6 months. Replace at first sign of cracks, flattening, or hardness
- Store the machine with the portafilter removed or loosely locked to avoid constant compression when idle
- Keep replacement gaskets on hand so you can swap immediately when wear appears, minimizing downtime and shot quality loss
When to Seek Professional Espresso Machine Leak Diagnosis
If you’ve installed a new gasket, confirmed proper seating, cleaned all surfaces, and the blind basket pressure test still shows more than 1 bar decay or visible leaks, the problem’s likely internal. Persistent pressure loss despite correct gasket installation means failed brew circuit seals, a cracked boiler gasket, a malfunctioning over pressure valve, or a leak in the steam or water lines inside the chassis. Leaks that appear around the group head body (not at the portafilter rim) or water pooling under the machine with no external drips point to internal seal failures that need disassembly.
Machines that lose pressure gradually over multiple shots, even with fresh gaskets and clean components, might have worn internal check valves or pump seals. If you’re uncomfortable disassembling the group head, working near the boiler, or diagnosing electrical safety around water leaks, contact a qualified espresso machine technician. Internal repairs often involve boiler removal, valve replacement, or re-torquing sealed fittings. Tasks that need specialized tools and experience.
When to escalate to a professional:
- Pressure decay more than 1 bar during blind basket test even after installing a new, correctly seated gasket
- Water leaking from the group head housing, side panels, or base of the machine during brewing or steam use
- Persistent drips or spray with no visible gasket damage and clean seating surfaces
- Pump struggling to build pressure, or pressure spiking erratically during shots
- Burnt smell, electrical issues, or visible corrosion inside the drip tray or around wiring after a leak
Final Words
Start by checking the gasket visually—look for cracks, flattening, or hard spots—and watch for weak crema, side spray, or a hissing sound during a shot. Do a quick soapy-bubble test, then a blind-basket pressure hold and note any drop over 1 bar.
If you see a leak, reseat or replace the gasket, clean the group, and re-test. For a single clear routine on how to test espresso gasket seal for pressure leaks, follow visual → soapy → blind-basket. You’ll get consistent seals and fewer frustrating shots.
FAQ
Q: How to tell if a head gasket is blown without pressure testing?
A: A blown head gasket can be identified without pressure testing by visible cracks or flattening, side spraying or dripping during a pull, weak crema, and a loose portafilter lock; inspect the gasket and run a soapy‑bubble check.
Q: Why is my espresso machine leaking water from the bottom?
A: Water leaking from the bottom usually means a failed internal seal, loose or corroded fittings, a cracked boiler, or a faulty drain/valve; stop using it, unplug, check external fittings and visible seals, then call a technician if internal.
Q: Why is my espresso machine not reaching pressure?
A: Not reaching pressure happens because of pump issues, an open OPV, leaks at the gasket or fittings, scale buildup, or air in the line; check for visible leaks, listen to the pump, and run a blind‑basket pressure test.
Q: How long do espresso gaskets last?
A: Espresso gaskets last about 6 to 12 months for home use; heavy commercial use wears them faster—often around 1,000 shots. Replace sooner if you see cracks, hardening, flattening, or pressure loss on testing.