

Think the same wand angle works for every pitcher? Think again.
Nailing microfoam in a 12 oz pitcher and then getting giant bubbles in a 20 oz is normal — and avoidable.
Wand angle is the simple lever that controls the vortex, how steam moves milk, and whether foam folds in or breaks up.
Match your wand angle to pitcher size and you get repeatable microfoam, not luck.
This post gives practical angle ranges, one clear next move per size, and quick sound-and-visual checks to fix your shots fast.
Understanding Wand Angle Problems Across Pitcher Sizes
Inconsistent microfoam drives home baristas and café staff crazy. You nail the perfect texture in a 12 oz pitcher, then switch to a 20 oz and suddenly you’re getting giant bubbles or sad, flat milk. The reason? Wand angle controls how steam pushes milk around the pitcher, and different volumes need different circulation patterns to fold air into smooth microfoam.
When you tilt the steam wand, you’re aiming that jet of steam at an angle that shoves milk against the side wall and spins up a rolling vortex. Small pitcher? A steep angle (almost vertical) keeps the whirlpool tight and fast. Large pitcher? You need more tilt to generate the torque that moves all that extra milk mass in a wider circle. Get it wrong and the vortex dies or sputters, leaving you with chunky foam or scalded milk.
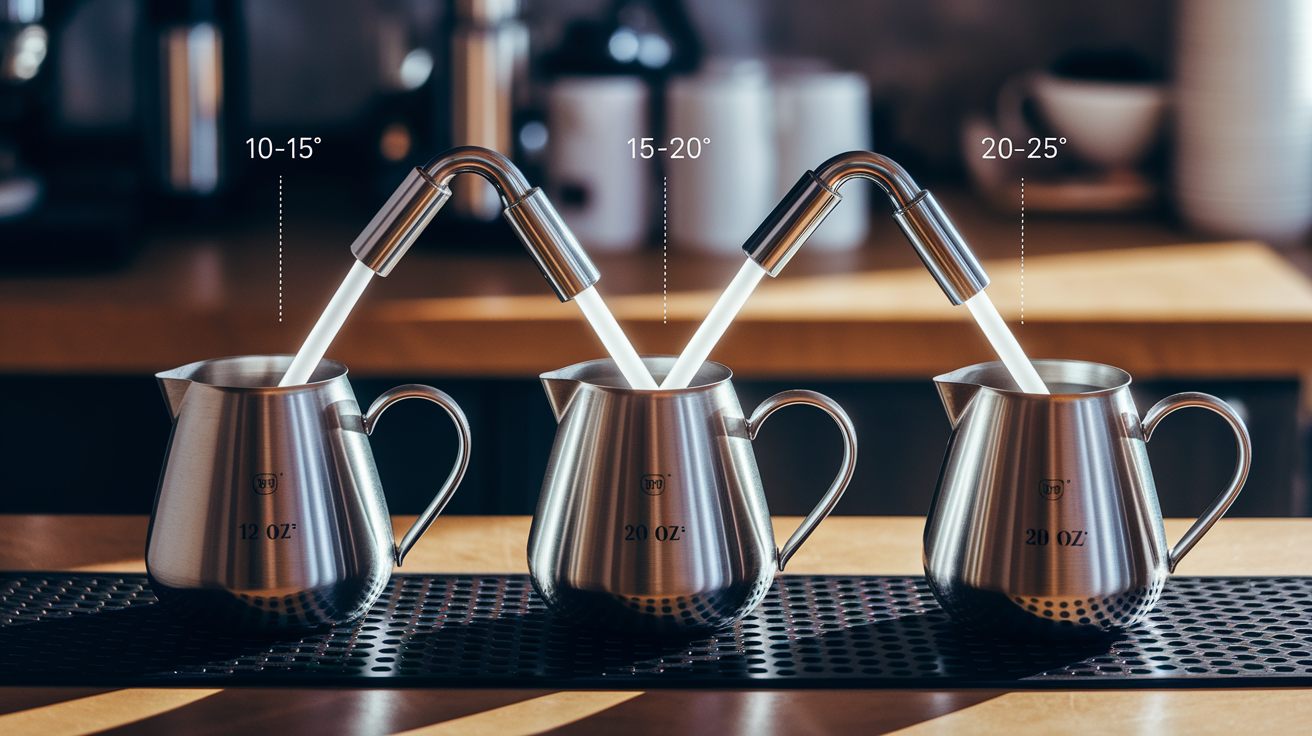
Matching wand angle to pitcher size is the most repeatable way to control microfoam texture. Here’s how the ranges break down:
- 8–12 oz pitchers: 10–15° from vertical (steeper keeps vortex fast)
- 15 oz pitchers: 15–20° from vertical (solid starting point for most home setups)
- 20 oz pitchers: 15–20° from vertical, closer to 20° for stronger circulation
- 32 oz pitchers: 20–25° from vertical (more tilt drives a wider, stronger whirlpool)
- All sizes: position the tip off-center, about 1–2 cm from the pitcher wall, so steam flows tangentially and sustains the vortex
Pick your starting angle based on pitcher size. Then fine-tune by listening for steady hissing and watching for a smooth rolling surface.
Why Wand Angle Behaves Differently in Different Pitcher Sizes
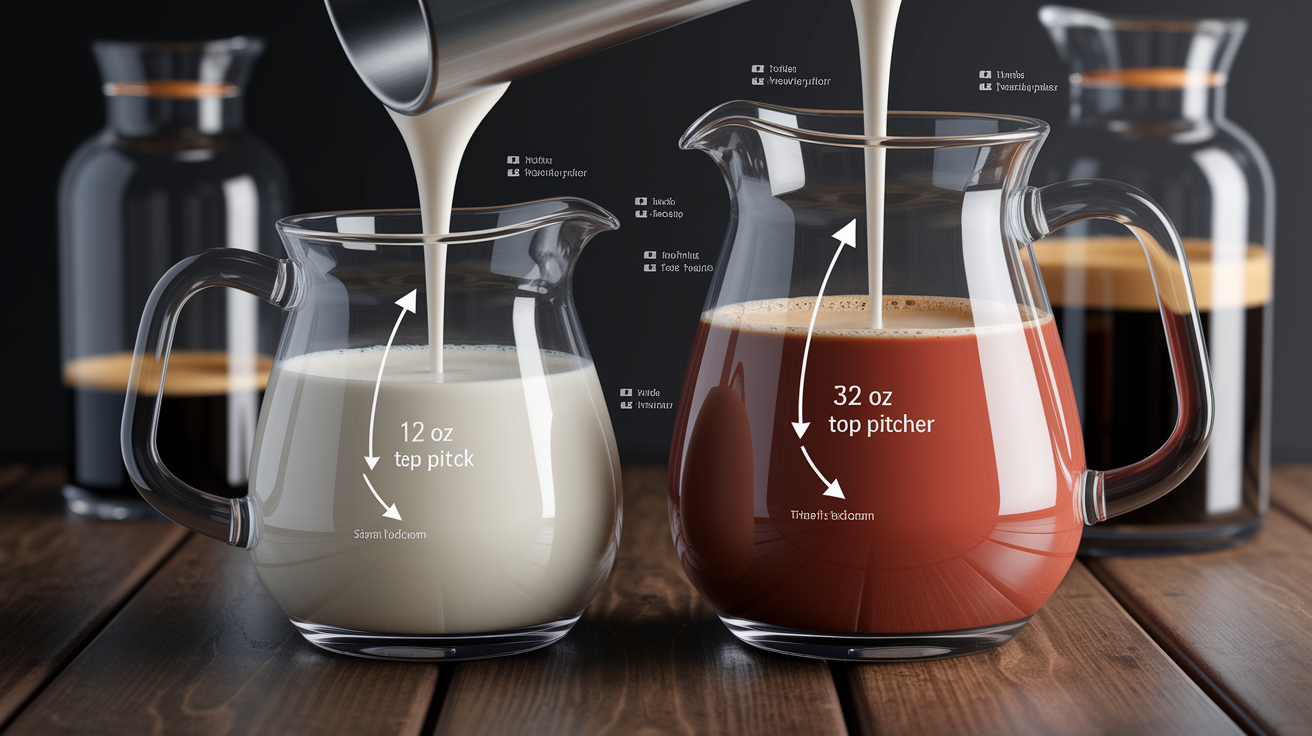
A 12 oz pitcher holds maybe 100–130 ml of milk when you fill it to one-third. A 32 oz pitcher? You’re looking at 450–600 ml at that same fill level. More milk weighs more, sits deeper, requires more energy to spin. That 15° wand angle creating a perfect vortex in the smaller pitcher won’t push hard enough sideways to move the heavier column in the larger one. Steam just bubbles straight up through the center, aerating the top while the bottom stays cold. Larger pitchers need more tilt (20–25°) to angle the steam jet against the wall with enough force to drive circulation from bottom to top.
Base width changes how angle affects circulation too. A wide-bottomed 32 oz pitcher gives the steam more surface area to push against, but the vortex has to travel a longer path around the perimeter. Wand too vertical? Steam doesn’t reach the wall with enough speed, and the whirlpool stalls. Narrow 12 oz pitcher? Even a modest 10° tilt bounces steam off the closer wall and keeps a fast spin going. Steam pressure compounds everything: higher bar pressure boosts jet velocity, so you can get away with a slightly steeper angle in large pitchers without losing circulation. But most home machines run moderate pressure and need the full 20–25° tilt for reliable results.
| Pitcher Size | Circulation Requirement | Angle Sensitivity | Common Issues |
|---|---|---|---|
| Small (8–12 oz) | Fast, tight whirlpool | High—small changes collapse vortex | Over-aeration from shallow angle |
| Medium (15–20 oz) | Moderate vortex with even heat | Moderate—forgiving within 15–20° range | Weak circulation if too vertical |
| Large (32 oz) | Wide, strong whirlpool to move mass | Low—requires consistent 20–25° tilt | Cold bottom and hot top from stalled vortex |
Correct Wand Angle for Small Pitchers (8–12 oz)

Small pitchers work best with a steeper wand angle, usually 10–15° from vertical. The narrow diameter and shallow milk depth let you build a fast, compact vortex without much tilt. Position the tip off-center about 1 cm from the wall and tilt just enough to aim the steam jet at the side. During stretching, keep the tip at or just breaking the surface (0–3 mm depth) to pull in air. You should hear a gentle paper-tearing hiss for 3–6 seconds until milk volume increases by about 20–30%.
Once stretching wraps up and the milk hits around 100°F (38°C), plunge the tip slightly deeper (2–4 mm below the surface) and hold that 10–15° angle to keep the vortex going during texturing. The smaller milk mass heats quickly, so watch temperature closely and stop steaming at 140–150°F (60–65°C). Too-shallow angle or tip depth during texturing will dump large bubbles back in. Too vertical (less than 10°) centers the steam and kills circulation, leaving you with hot milk and a thin foam cap instead of integrated microfoam.
Common mistakes in small pitchers usually come from over-tilting or misjudging depth. Here’s how to correct them:
- Large bubbles during stretching: tip’s too shallow or angle exceeds 15°. Submerge tip an extra 1–2 mm and dial back tilt toward 12°.
- No visible vortex: wand too vertical or centered. Shift tip closer to the wall and bump tilt to 12–15°.
- Milk heats too fast without foam: tip too deep from the start. Raise tip back to surface for the first 3–5 seconds before plunging.
- Screeching or high-pitched noise: tip buried too deep or angle collapsed. Lift tip by 2–3 mm and get back to 10–15° tilt off-center.
- Milk over-expands (excess foam): stretching went too long. Cut stretch time to 3–4 seconds and submerge earlier for texturing.
Stretch vs Texture Angles for Small Pitchers
During stretching, hold the 10–15° angle steady with the tip kissing the surface to pull air in without spluttering. Once you see the milk surface rise and feel slight resistance on the pitcher bottom (milk warming), bump depth to 2–4 mm and keep the same angle. Don’t tilt further. The vortex will tighten as milk volume grows, and that same 10–15° tilt that brought in air will now fold it into smooth microfoam as you heat toward serving temperature.
| Phase | Recommended Angle | Tip Depth | Duration |
|---|---|---|---|
| Stretching (air incorporation) | 10–15° from vertical | 0–3 mm (surface level) | 3–6 seconds |
| Texturing (rolling/heating) | 10–15° from vertical | 2–4 mm below surface | Until 140–150°F |
Correct Wand Angle for Medium Pitchers (15–20 oz)

Medium pitchers do well with a 15–20° wand angle, positioned off-center about 1–2 cm from the pitcher wall to drive a stable whirlpool through the larger milk volume. Start by filling the pitcher to roughly one-third capacity (around 200–300 ml for a 20 oz pitcher). Purge the wand, insert the tip near the surface off-center, and tilt to 15–20°. During stretching, hold the tip at surface level (0–3 mm depth) and listen for a steady, soft hissing sound as you bring in air for 6–8 seconds, shooting for a 25–35% volume increase.
Once the milk reaches about 100°F (38°C) and you see the surface start to roll, plunge the tip to 3–6 mm below the surface and hold the 15–20° angle to spin up a visible vortex. The whirlpool should pull milk from the bottom, roll it up the far wall, and fold foam back down through the center. This circulation blends air into microfoam and heats the milk evenly. Vortex weakens or surface goes flat? Nudge the tip slightly closer to the wall (within that 1–2 cm zone) and make sure your angle hasn’t drifted past 20° or collapsed toward vertical.
Sound cues tell you when your angle is working:
- Gentle paper-tearing hiss during stretching: tip at correct depth and angle, air coming in smoothly.
- Quiet rolling with occasional soft gurgle during texturing: vortex active, microfoam forming, no excess aeration.
- Loud spluttering or popping: tip too shallow or angle too extreme. Submerge tip 1–2 mm deeper and reduce tilt toward 15°.
- Silence or faint sizzle: tip too deep or angle too vertical. Raise tip slightly and increase tilt toward 18–20°.
Adjusting Angle During the Transition from Stretching to Texturing
When you finish stretching and plunge the tip deeper to start texturing, don’t change your wand angle. Keep that same 15–20° tilt you used during aeration. Only depth changes, from surface level to 3–6 mm submerged. Changing angle mid-steam wrecks the vortex you just built and can bring large bubbles back or collapse circulation entirely. Whirlpool feels weak after you plunge? Fix it with a small depth adjustment (raise or lower the tip by 1–2 mm) or a slight shift toward the wall, not a tilt change.
Correct Wand Angle for Large Pitchers (32 oz and Higher)

Large pitchers need a stronger wand tilt, typically 20–25° from vertical, to generate enough sideways force to spin the heavier milk mass in a wide, stable vortex. Fill the pitcher to about half capacity (450–600 ml for a 32 oz pitcher), purge the wand, and position the tip off-center roughly 1–2 cm from the wall. Tilt the wand to 20–25° and start stretching with the tip at or just below the surface (0–3 mm depth). Listen for that paper-tearing hiss and stretch for 8–15 seconds, watching milk volume climb by 20–40%.
Once the milk hits around 100°F (38°C) and you see the surface begin to move, plunge the tip deeper (6–12 mm below the surface) and hold the 20–25° angle to keep a strong whirlpool going. The wider pitcher base and deeper milk column mean the vortex path is longer. Without enough tilt, steam rises straight up the center and leaves cold milk sitting at the bottom while the top overheats. Higher steam pressure on commercial machines can make up for some angle shallowness, but most setups need the full 20–25° tilt to keep circulation reliable. Stop steaming when the milk hits 140–150°F (60–65°C). Larger volumes hold heat longer, so lean toward stopping early to avoid scalding.
Visual and tactile cues tell you you’re using the right angle:
- Visible whirlpool spinning milk against the wall: vortex active, angle and depth correct.
- Surface rolling smoothly without violent bubbling: proper aeration moving into texturing phase.
- Pitcher bottom warming evenly under your hand: circulation moving heated milk from top to bottom.
- Glossy, paint-like surface when you swirl after steaming: microfoam fully integrated, no large bubbles.
- Milk level rising steadily during stretch without spluttering: tip depth and angle balanced for controlled air incorporation.
- No screeching or high-pitched noise: tip not buried too deep, vortex hasn’t collapsed.
| Pitcher Size | Recommended Angle | Stretch Time | Texturing Tip Depth |
|---|---|---|---|
| 20 oz | 15–20° from vertical | 6–8 seconds | 3–6 mm below surface |
| 32 oz | 20–25° from vertical | 8–15 seconds | 6–12 mm below surface |
Adjusting Wand Angle for Milk Types and Machine Variations
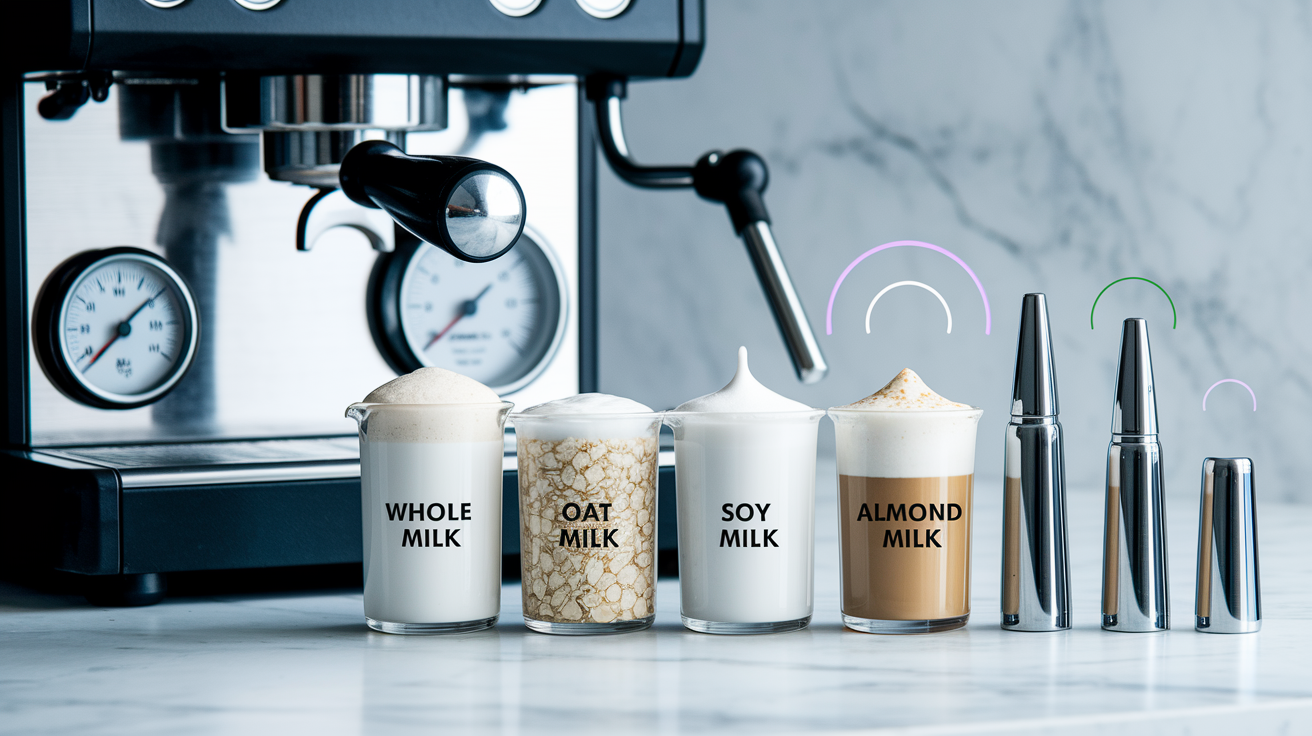
Whole milk follows the standard angle guidelines because its fat and protein content creates stable microfoam with predictable aeration rates. Oat milk and soy milk contain less milk protein and more starch or plant protein, so they often need slightly longer stretching. Add 2–4 seconds to the stretch time and think about tilting the wand an extra 2–3° (toward the higher end of your pitcher’s range) to boost circulation and help the vortex pull in air more aggressively. Almond milk is thinner and froths less easily. Use a shallow tip depth during stretching (right at the surface, 0–2 mm) and stick with a 15–20° angle with deliberate off-center placement to maximize the whirlpool effect and fold in what little foam forms.
Low-pressure home espresso machines (steam output below 1.0 bar) produce a gentler, slower steam jet. To compensate, use a slightly shallower wand angle (toward the lower end of the range for your pitcher size) and keep the tip closer to the surface during texturing to keep vortex strength up without relying on high jet velocity. High-pressure commercial machines let you use steeper angles (closer to vertical) because the powerful steam drives circulation even without aggressive tilt. But most baristas still stick with the 15–20° range for consistency across different machines.
Adapting Angles for Single-Hole vs Multi-Hole Steam Tips
Single-hole steam tips concentrate the jet into one focused stream, making wand angle and off-center placement more important. A 2° tilt error or 5 mm positioning mistake will noticeably weaken the vortex or create large bubbles. Multi-hole tips (two, three, or four holes) spread steam across a wider area, which makes them more forgiving but can soften the sharpness of the whirlpool. With multi-hole tips, aim for the middle of your pitcher’s angle range (15° for small, 17–18° for medium, 22° for large) and focus on depth control rather than chasing the perfect tilt angle.
Angle tweaks by milk type:
- Whole milk: use standard angles (10–15° small, 15–20° medium, 20–25° large). No adjustment needed.
- Oat milk: add 2–3° tilt (toward upper end of range) and stretch 2–4 seconds longer to compensate for lower protein.
- Soy milk: similar to oat. Use 17–22° for medium pitchers and stretch longer to build foam volume.
- Almond milk: keep tip very shallow (0–2 mm) during stretching. Stick with 15–20° angle and accept thinner microfoam texture.
Troubleshooting Wand Angle Issues Across Pitcher Sizes
Large bubbles usually mean a wand angle that’s too shallow or a tip held too close to the surface for too long during texturing. When you see chunky foam or hear loud popping, the fix is to submerge the tip an extra 2–3 mm and pull back your tilt by about 5° (move closer to vertical). For example, if you’re steaming a 20 oz pitcher at 20° and big bubbles show up, drop to 15° and plunge the tip from 3 mm to 5–6 mm below the surface. Then hold that spot and let the vortex fold the bubbles back into the milk. Tap and swirl the pitcher after steaming to knock out any remaining large cells.
No microfoam, just hot flat milk, means your tip was too deep from the start or your wand angle was too vertical, blocking air incorporation during stretching. To fix it, start your next attempt with the tip right at the surface (0–2 mm depth) and bump your wand tilt toward the upper end of your pitcher’s range. For a 15 oz pitcher, move from 15° to 18–20°. Stretch for the full recommended time (6–8 seconds for medium pitchers) and listen for that paper-tearing hiss. Hear silence? Your tip’s still too deep. Raise it in 1 mm steps until you hear aeration, then hold that depth and angle until milk volume increases by 25–35%.
Overheating happens when you stretch or texture for too long, often because a weak vortex forces you to keep steaming to integrate foam. The real problem is usually an angle that’s too vertical (killing circulation) or a tip positioned dead-center instead of off-center near the wall. Fix it by checking your wand tilt matches your pitcher size, shifting the tip 1–2 cm from the wall, and stopping the steam the moment milk reaches 140–150°F (60–65°C). Use the pitcher bottom as a temperature gauge. When it’s uncomfortably warm to hold for more than two seconds, you’re close to target temp. Already scalded the milk past 160°F? Toss it and start fresh. Overheated milk tastes burnt and won’t give you latte-quality microfoam.
Symptom-to-fix mapping for quick corrections:
- Large bubbles / chunky foam: submerge tip 2–3 mm deeper, reduce tilt by 5°, shorten stretch time by 2 seconds next attempt.
- No foam / flat milk: raise tip to surface (0–2 mm), increase tilt by 3–5°, confirm off-center placement, stretch longer.
- Screeching or high-pitched squeal: tip too deep or vortex collapsed. Lift tip 3–5 mm, bump angle toward 20°, reposition near wall.
- Spluttering or spitting milk: tip too shallow during texturing. Plunge to 3–6 mm depth and hold steady angle.
- Cold bottom, hot top (uneven heating): vortex stalled. Increase tilt by 5°, shift tip closer to wall, confirm 1–2 cm off-center placement.
- Milk over-aerated (volume increased more than 40%): cut stretch time in half, start next attempt with tip 1 mm deeper at surface.
To recalibrate angle mid-steam, don’t yank the wand out. Make small moves. Vortex weakening? Tilt the wand an extra 2–3° toward the wall while keeping the tip at the same depth. Hear spluttering or see large bubbles? Reduce tilt by pulling the wand slightly more vertical and at the same time plunge the tip 1–2 mm deeper to get below the turbulent surface layer.
Preventing Angle-Related Microfoam Problems

Consistent fill volume is the simplest prevention habit. Measure your milk in milliliters or use pitcher fill-line markings to pour the same amount every time (one-third capacity for most pitchers). When you start with a repeatable milk level, the same wand angle and tip depth produce the same vortex strength and stretching duration, killing one major variable. Pair consistent fill with a standard pitcher tilt (a slight forward lean to keep the tip submerged during the vortex) and you’ll build muscle memory that transfers across shifts and machines.
Five habits that prevent angle mistakes and improve microfoam consistency:
- Mark your pitcher with tape or a grease pencil at the one-third fill line so you never overfill or underfill, which changes how well the angle works.
- Use a thermometer clipped to the pitcher until you can reliably judge 140–150°F by hand. Overheating ruins texture no matter how perfect your angle.
- Place your hand on the pitcher bottom during texturing to feel circulation. If one side heats faster, your angle or tip placement is off-center unevenly.
- Position the tip 1–2 cm from the wall every time before you open the steam valve. This off-center rule matters as much as tilt angle for vortex formation.
- Purge the wand for one full second before inserting the tip to clear condensation. Water dilutes milk and weakens foam structure even if your angle is correct.
Developing muscle memory takes short, focused drills rather than random practice. Steam one pitcher, check the result (look for glossy surface, smooth pour, 25–35% volume increase), adjust one variable (angle, depth, or stretch time), then steam another pitcher right away. Repeat this cycle five times in a row, changing only the variable you’re testing. For example, hold depth and stretch time constant while you test 15°, 17°, and 20° angles in a 20 oz pitcher, then compare microfoam texture. After a week of deliberate practice, your hand will find the correct angle without thinking, and you’ll catch a failing vortex within two seconds by sound and surface movement alone.
When to Seek Further Guidance or Calibration Help

When you’ve followed pitcher-appropriate angles, confirmed off-center tip placement, and practiced deliberate adjustments but still can’t produce a stable vortex or smooth microfoam, the problem may be mechanical rather than technique. Inconsistent steam pressure (pressure that surges or drops mid-steam) makes it impossible to hold a reliable angle because the vortex strength changes unpredictably. A partially clogged steam tip or a wand with uneven hole wear will deflect the jet at odd angles no matter how you tilt the pitcher.
Signs you need outside help rather than more solo practice: your shots pull consistently well but microfoam quality swings wildly day to day despite identical technique. The steam wand hisses or sputters even when purged and cleaned. Or you can create perfect microfoam in one pitcher size but the same angles fail completely in a different size on the same machine. At that point, professional calibration or servicing will fix the problem faster than more troubleshooting.
When to seek pro training, machine servicing, or workflow auditing:
- Machine servicing: steam pressure fluctuates, wand tip is clogged or corroded, or the boiler struggles to hold temperature during back-to-back steaming sessions.
- Professional barista training: you can create a vortex but can’t turn it into latte-quality microfoam, or you need hands-on feedback to correct a persistent angle or depth habit.
- Workflow auditing: you’re steaming multiple pitchers in sequence and microfoam quality drops with each pitcher, pointing to a timing, temperature recovery, or pitcher-prep issue beyond wand angle alone.
Final Words
Match your wand angle to the pitcher size: small 10–15°, medium 15–20°, large 20–25°. We covered why angle shapes the vortex, the right tip depths, and quick fixes for big bubbles, a weak whirlpool, and overheating.
Start with fill percent, set angle, and tweak by 5° or a few millimeters. Practice short drills and use simple markers before calling for machine help.
For reliable results with steam wand angle for different pitcher sizes, change one thing at a time and you’ll get consistent microfoam.
FAQ
Q: How to angle a steam wand?
A: To angle a steam wand, set it about 15–20° from vertical and adjust for pitcher size: slightly steeper for small pitchers and more tilt for larger ones to create a strong vortex and smooth microfoam.
Q: What size steaming pitcher do I need?
A: The steaming pitcher size you need depends on drink volume: 8–12 oz for single shots, 15–20 oz for doubles and lattes, and 32 oz or larger for batch steaming or busy service.
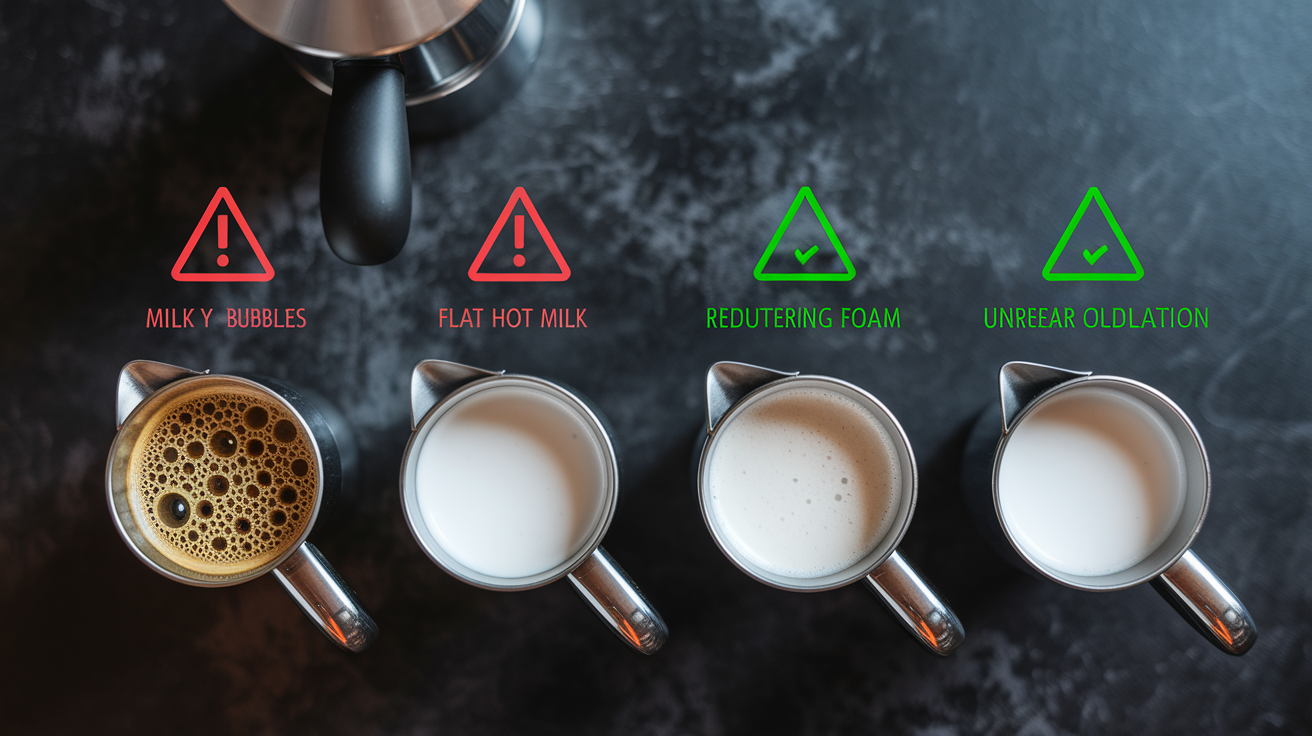
Q: What are some common steamed milk mistakes?
A: The common steamed milk mistakes are wrong wand angle, incorrect tip depth, over-aeration (big bubbles), and overheating; fix one thing at a time, watch sound, flow, and puck cues.
Q: What are common steam wand problems?
A: The common steam wand problems are clogged tips, low or inconsistent pressure, leaks, and screeching; clean or descale the tip, check seals and valves, and get service if pressure stays unstable.