

Think a vertical wand gives the best milk? Think again.
A 15-degree tilt is the move that makes stretching easy and repeatable.
That slight angle keeps the tip skating just under the surface, pulls in air gently, and starts the off-center vortex you need for true microfoam.
This post shows the exact setup—15-degree tilt, tip about 0.5 cm below the surface, and one-third placement from the pitcher edge—so your milk expands cleanly for 3–5 seconds and finishes glossy every time.
First, set the wand at 15 degrees and submerge the tip about 0.5 cm.
Optimal Wand Angle and Starting Position for Milk Stretching

You want a 15–20 degree tilt from vertical, with the tip sitting about 0.5–1.0 centimeter below the milk surface. That slight angle sends steam skimming across the top layer, pulling in controlled air while staying shallow enough to give you that gentle hissing sound you’re after.
Off-center placement is just as important. Drop the wand about one-third of the way from the pitcher’s edge toward the center. This asymmetric flow is what kicks off the vortex you’ll rely on later.
Here’s how to position it:
- Fill your pitcher to around one-third capacity so there’s room for the milk to expand.
- Purge the wand for a second before you insert it. Clears out condensation that’ll water down your milk.
- Insert the wand at that 15–20 degree angle, submerging just the very tip, roughly half a centimeter below the surface.
- Place it one-third of the way from the edge instead of dead center, angling the tip toward the far wall to get the milk spinning.
Angle is what controls air entry. A vertical wand drives steam straight down, heating fast but adding almost no air. Tilt to 15–20 degrees and you’re deflecting the steam jet across the surface, breaking the tension and pulling air into the liquid. Go past 30 degrees and you lose depth control. The wand either skips across the surface (big bubbles) or plunges too deep (missing the aeration window). That 15–20 degree range keeps your tip shallow enough to incorporate air and deep enough to stay submerged as the milk expands, letting you stretch for the full 3–5 seconds without having to reposition.
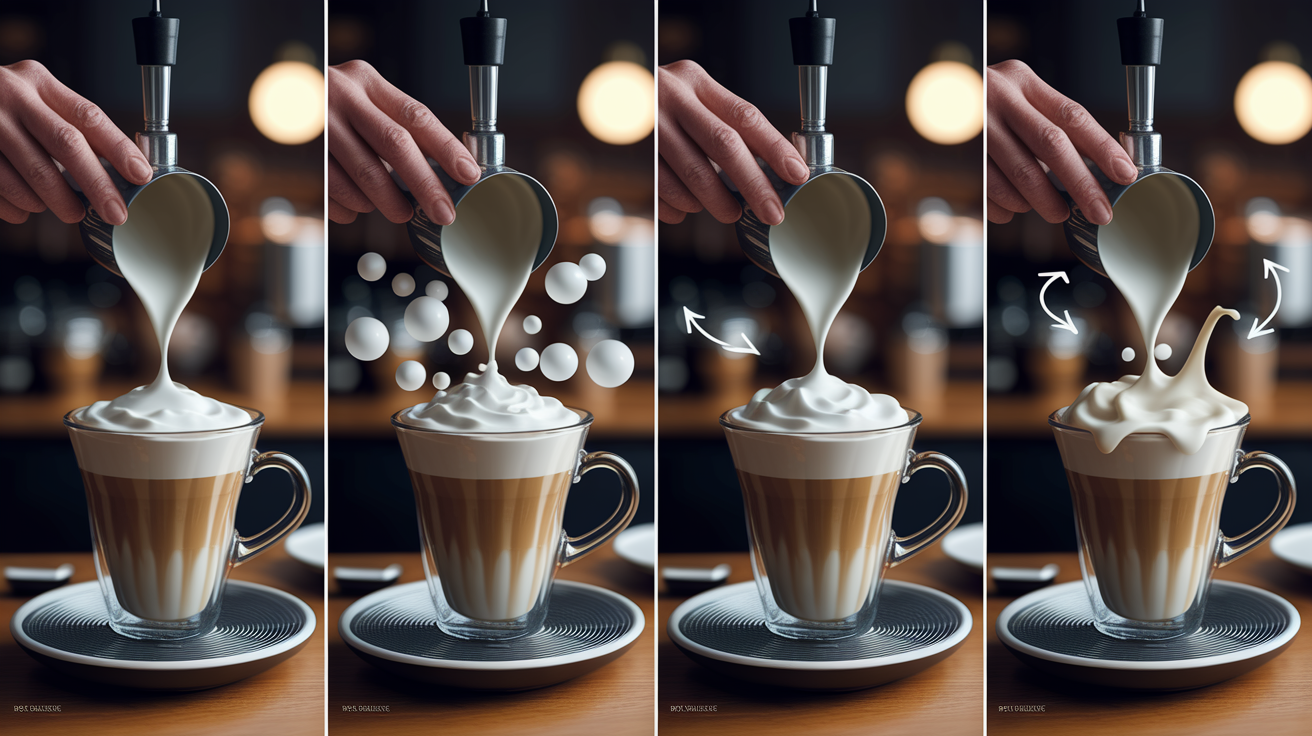
Step-by-Step Process for Stretching and Texturing Milk

Each phase builds on the one before. Rush the stretch and you’ll get giant bubbles. Skip the vortex and those bubbles never break down into microfoam.
Here’s the full sequence:
- Insert the wand at 15–20 degrees, tip 0.5–1 cm below the surface, and open the steam valve all the way. You should hear a consistent paper-tearing hiss, not a roaring screech.
- Hold this shallow position for 3–5 seconds (3 for a latte, 5 for a cappuccino) while the milk volume increases by about 20–30 percent. Stop stretching when the pitcher feels warm to the touch, around 100°F.
- Lower the pitcher a bit or angle the wand deeper so the tip moves to about halfway down, roughly 2–3 centimeters from the bottom. The hissing should stop as the tip submerges fully.
- Keep the off-center placement and tilt to create a whirlpool. You should see the milk rolling in a smooth, circular current from top to bottom.
- Keep that vortex spinning until the milk hits 140–150°F. The pitcher will get too hot to hold comfortably. A lot of baristas use the “three-second rule,” you can hold the pitcher bottom for three seconds before it’s uncomfortable, which means you’re near 140°F.
- Turn off the steam, pull the wand out, wipe it right away, and purge it for a second. Tap the pitcher base once on the counter and swirl hard to collapse any leftover large bubbles and blend the microfoam into a glossy, paint-like consistency.
Each step targets something different. Stretching increases volume by pulling air in. Texturing breaks those large pockets into thousands of tiny bubbles and spreads them evenly. Finishing polishes the texture and integrates stray foam. Skip step three and you’ll either under-aerate (thin milk, no body) or over-aerate (dry cappuccino foam floating on hot milk). The numbered sequence isn’t random. It’s the order that gets you repeatable microfoam every time.
Distinguishing Between Stretching and Texturing

Stretching injects air into cold milk. Texturing refines that air into microfoam by spinning the milk and breaking large bubbles into smaller ones. Most beginners treat them as one continuous motion and wind up with either a pitcher full of froth or plain hot milk with no body.
During stretching, the wand stays shallow and the hiss is loud and steady. You’re actively pulling air downward through surface tension. This phase lasts 3–5 seconds and stops when the milk feels noticeably warm. If you keep stretching past 100°F, you’ll create dry, soapy foam that won’t integrate.
Texturing starts the moment you submerge the wand deeper and the hissing stops. Now the steam circulates the milk, folding the incorporated air into the liquid and heating it toward your target temperature. Wand angle shifts from shallow and tilted (to break the surface) to deeper and tilted (to drive the vortex). The sound changes from a hiss to a quieter, rolling hum. If you hear hissing during texturing, your wand has drifted back toward the surface and you’re adding unwanted air. Lower the pitcher or deepen the angle. If you lose the vortex, tilt the pitcher more or shift the wand closer to the edge. Correct texturing feels almost automatic once your angle and depth are set. You’re just holding position and watching the temperature climb.
How Wand Angle Influences Vortex Formation and Microfoam Quality

Wand angle determines whether milk spins in a stable whirlpool or churns all over the place. A vertical wand heats the bottom layer fast but leaves the top cold and still. Tilting the wand redirects steam diagonally, pushing milk toward the pitcher wall, where it rises, rolls across the surface, and sinks back down in a continuous loop.
Flow Patterns Created by Wand Orientation
A 15-degree angle from vertical, combined with off-center placement, creates an asymmetric flow. The steam jet strikes the milk at an angle, deflecting it toward one side of the pitcher. Milk climbs that wall, rolls across the top, descends the opposite wall, and returns to the wand tip. This circulation pattern moves every molecule of milk through the steam zone multiple times, evening out temperature and bubble size.
Increase the angle to 25–30 degrees and the deflection gets too shallow. Milk skims along the surface instead of diving deep, and you get a weak vortex with cold milk at the bottom and hot foam on top. Reduce the angle below 10 degrees and the steam drives straight down, heating a narrow column in the center while the edges stay cool.
The sweet spot is 15–20 degrees with the wand about one-third of the way from the pitcher edge. That setup produces a fast, tight spiral that stretches and textures at the same time once you transition from shallow to deep.
Small adjustments make measurable differences. Tilt the pitcher forward (increasing the effective wand angle) and the vortex speeds up but becomes less stable. Tilt it back and the spin slows, giving you finer control but taking longer to reach temperature. Shift the wand closer to the center and circulation weakens. Move it toward the edge and the roll tightens, sometimes creating a hollow cone of milk that leaves the middle motionless. Track your angle, tilt, and placement for five consecutive pitchers and you’ll notice the same settings produce the same texture and timing every time.
Troubleshooting Common Steaming Problems
Screeching means your wand tip is too shallow. That high-pitched squeal comes from steam breaking the surface and vibrating the top layer of milk. Lower the pitcher half a centimeter or tilt the wand slightly deeper so the tip submerges fully. The screech should soften into a hiss right away. If it continues, you’re either holding the wand dead vertical (no angle to keep it submerged as milk expands) or your milk level is too low to cover the tip. Check that you’ve filled the pitcher to about one-third.
If screeching starts midway through stretching, the milk has expanded enough to expose the tip again. That’s your cue to transition to texturing by lowering the pitcher or deepening the wand angle. Don’t keep stretching past that point or you’ll over-aerate.
Large bubbles show up when you introduce too much air or introduce it too violently. Stretching for longer than 5 seconds, holding the wand too shallow (less than 0.5 cm deep), or using a steep angle (more than 25 degrees from vertical) all dump excess air into the milk before it can integrate. Fix it by shortening your stretch phase to 3 seconds for a latte, keeping the wand angle at 15–20 degrees, and listening for a gentle paper-tearing sound instead of a roaring blast.
If you already see big bubbles in the pitcher, you can sometimes rescue the texture by extending the texturing phase. Keep the vortex spinning for an extra 5–10 seconds and tap the pitcher base on the counter twice after steaming. Swirl hard for 10 seconds. Most large bubbles will collapse into microfoam, though the texture won’t be as glossy as a properly stretched pitcher.
No vortex means your wand placement or angle isn’t creating the asymmetric flow you need. Check three things. First, confirm the wand is off-center, about one-third of the way from the pitcher edge. A centered wand drives milk straight down with no rotation. Second, verify your tilt. A vertical wand doesn’t deflect steam, so milk heats in a column instead of spinning. Tilt to 15 degrees minimum. Third, make sure your pitcher has enough milk. Below one-quarter full, there isn’t enough liquid mass to sustain circulation.
If milk is swirling but weakly, increase your tilt or shift the wand closer to the edge. A stronger deflection angle produces a faster, tighter spiral.
Uneven texture, hot at the top and cold at the bottom, tells you your vortex stopped or never formed properly. Milk needs to circulate continuously from the moment you finish stretching until you hit 140°F. If the roll dies halfway through, check your wand angle and depth. Drifting toward the center or letting the tip rise back toward the surface both kill circulation. Reposition the wand one-third from the edge and 2–3 centimeters from the bottom, tilted 15 degrees, and watch for the rolling motion to resume.
If texture is uneven but the vortex looked fine, you may have stretched too long. Excess foam floats and resists mixing. Next pitcher, shorten your stretch to 3–4 seconds and focus on a strong texturing phase with an aggressive swirl at the end.
Influence of Pitcher Shape, Milk Type, and Quantity on Wand Angle
Pitcher design changes how milk flows. A narrow, cylindrical pitcher with straight walls encourages a fast, vertical vortex. The same wand angle that works in a standard conical pitcher might create an overly aggressive spin in a narrow one, pulling the wand tip toward the surface and reintroducing air during texturing. Compensate by reducing your tilt to 10–12 degrees and placing the wand slightly deeper, closer to 3 centimeters from the bottom.
Wide, shallow pitchers spread milk in a thin layer, making it harder to form any vortex at all. In a wide pitcher, increase your angle to 20 degrees and move the wand farther off-center to generate enough deflection for circulation.
Pitcher spout shape matters too. A sharp, narrow spout funnels milk into a tight stream for latte art but leaves less room at the top for stretching. Fill a narrow-spout pitcher to only one-quarter capacity instead of one-third, and adjust your initial wand depth to 0.5 centimeters instead of 1 centimeter to avoid over-aerating the smaller volume.
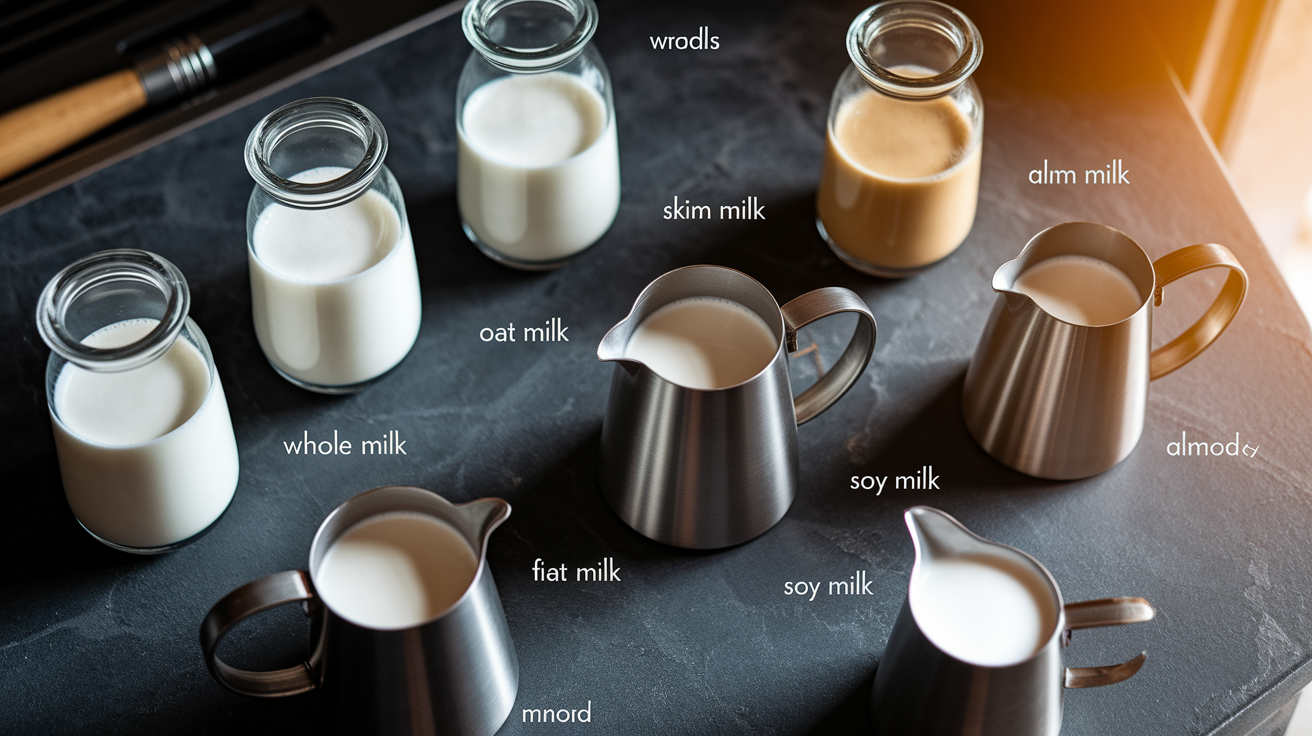
Different milk types respond to angle adjustments in measurable ways. Whole dairy milk produces stable microfoam with the standard 15-degree angle and 3–5 second stretch. Skim milk froths easily because it has more protein and less fat, so it needs a shorter stretch (2–3 seconds) and a slightly steeper initial angle (18–20 degrees) to avoid creating dry foam.
Oat milk, especially barista formulations, behaves close to whole dairy but often needs 1–2 extra seconds of stretching because its proteins don’t denature as readily at lower temperatures. Start your stretch at the standard 15 degrees, listen for the hiss, and if foam isn’t forming by 4 seconds, tilt another 3–5 degrees to introduce more air.
Soy and almond milk are less forgiving. They need a shallower angle (12–15 degrees) and very brief stretching (2 seconds maximum) because their proteins break down quickly above 140°F, causing separation.
Milk quantity determines optimal wand depth and tilt throughout the process. A half-full pitcher (about 10 ounces of milk) gives you room to stretch and texture without repositioning the wand. Use the standard 15-degree angle, 0.5–1 cm initial depth, and transition smoothly to 2–3 cm for texturing.
A quarter-full pitcher (5–6 ounces) heats faster and expands more relative to volume, so you’ll hit your stretch target in 2–3 seconds and reach 140°F within 10–12 seconds total. Reduce your initial angle to 12 degrees and keep the wand shallower during texturing (1.5–2 cm from the bottom) to avoid overheating the small volume.
A nearly full pitcher (12+ ounces) takes longer to heat and needs a more aggressive setup. Increase your angle to 18–20 degrees, start 1 cm deep, and move the wand to 3–4 cm from the bottom during texturing to make sure the vortex reaches the entire volume before the top layer overheats.
Track your pitcher fill level, note your angle and depth, and compare the resulting texture. Repeatable microfoam comes from matching your technique to the volume in front of you.
Final Words
In the action, you learned the exact placement to start stretching: about 15–20 degrees off center with the tip just below the surface to form a steady vortex.
We ran the timeline—3–5 seconds of stretch, then texturing after 30–35°C—and the six-step steaming flow. You saw how angle, pitcher shape, and milk type change the result and how to fix screeching or big bubbles.
Tweak one variable at a time. With the right steam wand angle to stretch milk, your microfoam will get smoother. Keep practicing; better shots are ahead.
FAQ
Q: What angle for steaming milk?
A: The best angle for steaming milk is about 15–20 degrees off‑center, with the wand tip just below the surface to introduce air and create a stable vortex for consistent microfoam.
Q: What happens if I steam milk beyond 70 degrees?
A: Steaming milk beyond 70°C overcooks proteins, causing a burnt taste, thin texture, and poor microfoam; stop heating around 65–68°C to keep sweetness and velvety texture.
Q: What is the angle for frothing?
A: The angle for frothing is similarly about 15–20 degrees off‑center, but place the tip at or just breaking the surface so more air enters while you maintain a spinning vortex.
Q: How much should milk expand when steaming?
A: Milk should expand about 10–20% for lattes and roughly 25–35% for cappuccinos; aim for a subtle rise and velvety texture rather than big, airy peaks.