

Think you need a $5,000 machine to pour latte art like a barista?
You don’t.
This guide shows how to froth milk for latte art at home with simple, repeatable steps: pitcher setup, stretching and rolling, target temps, milk choice, and basic pours.
You’ll learn the exact hand positions, timing, and tiny cues, like the ripping sound, a wet glossy surface, and no big bubbles, that turn steamed milk into pourable microfoam.
Follow one change at a time and you’ll pour clear hearts, rosettas, and tulips in a week.
Immediate Step-by-Step Method to Froth Milk for Latte Art at Home
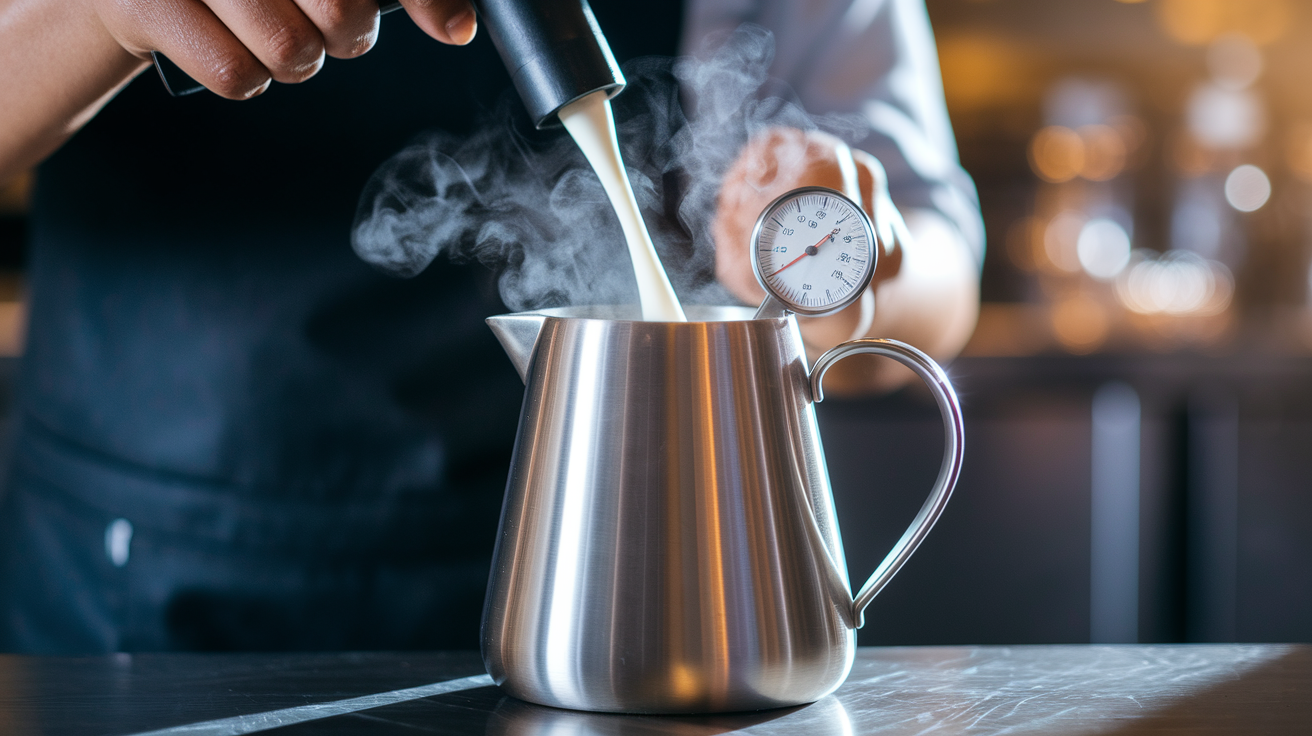
Start with the coldest milk and a clean metal pitcher. Fill the pitcher to about a finger below the spout. Cold milk traps air better and gives you more time before it overheats. Milk will expand about 30 to 50 percent when textured, so leave headroom.
Purge the steam wand for one second to clear condensation. If you use a thermometer, clip it so the probe sits in the milk without touching the bottom. Aim for a final cup temperature near 140 to 150°F, but stop steaming a few degrees early because the milk keeps warming after you turn the steam off.
The whole stretch and texture cycle takes roughly 20 to 40 seconds. Do it like this:
- Purge the wand briefly.
- Set the tip just under the surface, slightly off center.
- Open the valve fully and listen for a light ripping or hissing sound. That means air is being drawn in.
- Stretch for 2 to 6 seconds. You should see the milk level rise.
- Submerge the tip about halfway and angle it to create a rolling whirlpool that breaks big bubbles.
- Keep the roll going until the pitcher feels warm or the thermometer reads about 135 to 145°F.
- Cut the steam while the tip is still submerged, then remove the wand and set the pitcher down.
- Tap the pitcher on the counter twice and swirl gently to integrate foam and milk into a glossy, uniform texture.
Proper microfoam looks wet and shiny with no large bubbles on top. That’s the texture you need for latte art.
Understanding Microfoam Texture for Latte Art at Home

Microfoam is tiny, evenly distributed air pockets suspended in liquid milk. It pours like a thick syrup and gives clear contrast on espresso. Cappuccino foam is different. It traps more air, makes larger bubbles, and sits on top like a soft cap. Good for eating, not for detailed pouring.
Proteins and fat do the work. Heat and turbulence unfold proteins so they stabilize bubbles. Fat adds body and mouthfeel, which is why whole milk usually wins for latte art. Heat past 160°F and the proteins break down, leaving thin, overcooked milk that won’t pour well.
You’ve nailed microfoam when you see these cues:
- Wet, glossy surface, not matte.
- No visible large bubbles.
- Foam and liquid move as one when you tilt the pitcher.
- Pitcher feels a bit heavier but not stiff when you swirl.
- Pour is steady and syrupy, not ploppy.
Choosing the Best Milk for Frothing at Home
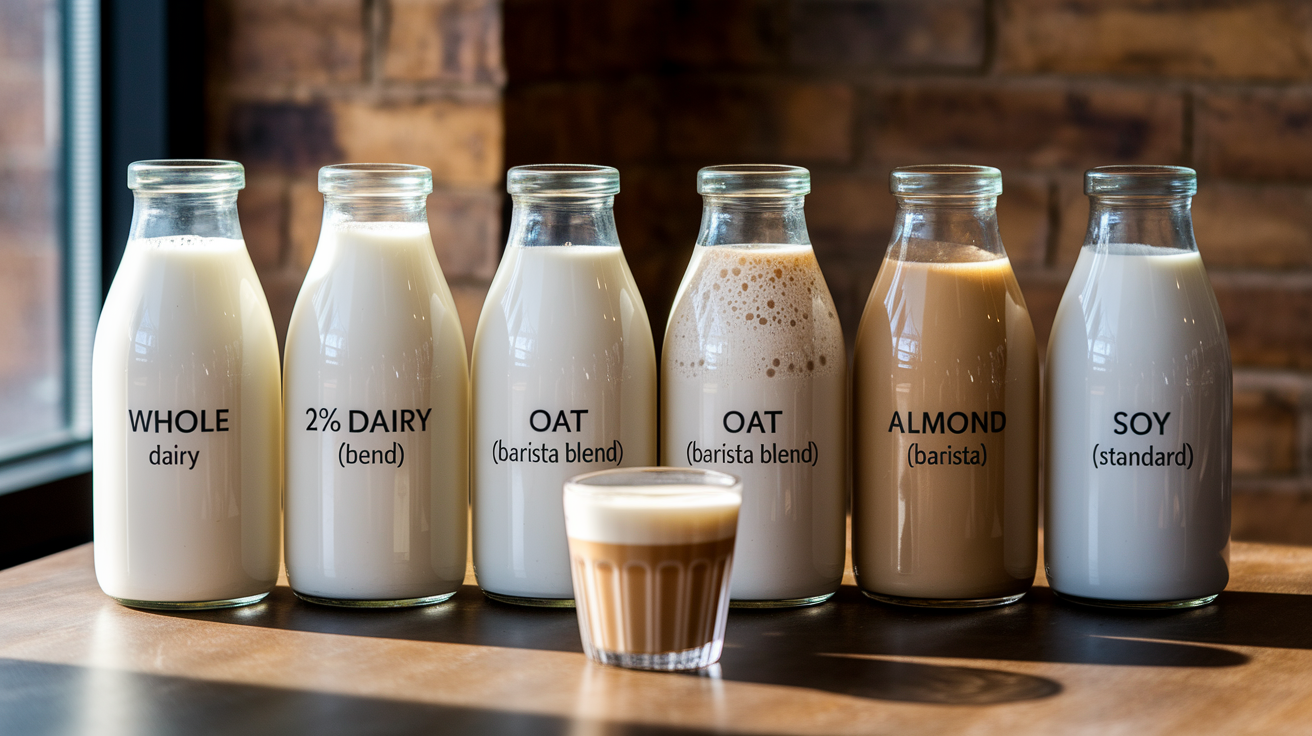
Whole milk is the easiest place to start. It balances about 3.5 percent fat with enough protein to give stable, sweet, pourable microfoam. If you need a lower-fat option, 2 percent still works well but feels slightly thinner and has a shorter window before bubbles collapse.
Skim froths easily but produces larger, airier bubbles and a dryer texture that won’t integrate with espresso. For plant milks, pick barista blends. They add proteins and stabilizers to behave more like dairy. Barista oat milk is currently the most consistent plant-based option for latte art.
| Milk Type | Frothing Score (out of 15) | Notes |
|---|---|---|
| Whole Dairy | 15 | Best texture, sweetness, and stability. Easiest to learn on. |
| 2% Dairy | 13 | Workable microfoam. Slightly thinner body and a shorter window before bubbles collapse. |
| Skim Dairy | 9 | Large, airy bubbles. Difficult to pour clean patterns. |
| Oat (Barista Blend) | 12 | Good stretch and pour. Mild, slightly sweet flavor. Top plant-based choice. |
| Almond (Standard) | 8 | Thin foam, quick separation. Barista versions improve performance to about 10. |
| Soy (Standard) | 7 | Can curdle with very acidic espresso. Barista blends score about 9 to 10. |
Ideal Milk Temperature for Latte Art at Home

Milk tastes sweetest and textures best between 135 and 150°F. Below that it feels cool and underdeveloped. Above 160°F the milk tastes cooked and the proteins collapse.
Most baristas stop steaming around 140 to 145°F because carry-over heat raises the milk 5 to 10°F after you stop. Thermometer lag is real, so don’t wait for an exact readout. Aim for 135 to 145°F on the dial and let the metal finish the rise. Once you’ve steamed a dozen pitchers you can switch to the touch method.
Four practical cues without a probe:
- Pitcher feels cold under 100°F. Milk hasn’t stretched yet.
- Warm and comfortable around 120 to 130°F. Safe zone to continue texturing.
- Too hot to hold for more than two seconds around 140 to 150°F. Time to stop.
- Steam pitch lowers as the milk heats. Experienced hands use that audio cue too.
Frothing Milk at Home Without an Espresso Machine

You don’t need a steam wand to get pourable microfoam. Handheld frothers, electric automatic frothers, and a French press all work if you control temperature separately. Heat first, then aerate.
Handheld frother: heat milk to 140 to 150°F, pour into a half full pitcher, insert the whisk halfway, and hold steady to create a vortex. Froth 20 to 30 seconds, then raise the whisk slowly to add a touch more air. Tap and swirl to finish.
Electric frother: load cold milk and press start. These machines heat and froth in one cycle, usually 45 to 90 seconds. They’re easy, but tend to make slightly thicker foam.
French press: heat milk to 140 to 150°F, fill the press about one third, then pump the plunger vigorously for 15 to 30 seconds. Tap and swirl after plunging.
Other options: whisk on the stove, or use an immersion blender near the surface for 10 to 15 seconds. All methods finish the same way. Tap the pitcher, swirl to blend, then pour.
Essential Pitcher Setup and Pouring Technique for Latte Art at Home

Pitcher size and spout shape matter. A 12 ounce stainless steel pitcher holds enough milk for one or two drinks and gives you the wrist control you need. Fill below the spout so you have room for expansion. A medium thickness of metal helps you feel temperature changes.
Pick a pitcher with a sharp spout for fine lines. Wider, forgiving spouts help when you’re practicing large rosettas. Avoid blunt spouts if you want clean cuts.
Pouring basics: tilt the cup 30 to 45 degrees. Start pouring from 2.5 to 4 inches high so milk sinks through the crema and mixes with the espresso. When the cup is about two thirds full, lower the spout to within a quarter to a half inch of the surface and speed up slightly. That’s when the white foam appears and your pattern forms. Finish by raising the pitcher and pulling a thin stream through the design to cut and define the shape.
Basic patterns for beginners:
- Heart: Pour high until two thirds full. Lower close to the surface, grow a white circle, then raise and pull back to finish with a point.
- Rosetta: Start the same, then wiggle the pitcher side to side about 1 centimeter while moving backward. The wiggle forms the leaves. Pull through to finish.
- Tulip: Stack small hearts on top of each other. Each layer should overlap the last by about half. Cut through quickly to tie the layers together.
All patterns depend on three things. Pour height, flow steadiness, and a confident finishing cut.
Troubleshooting Milk Frothing Problems at Home

Large bubbles mean too much air or a tip that stayed too shallow. Shorten stretch time to 2 to 3 seconds and submerge the tip to roll the milk. If you end up with soapy foam, tap and swirl hard. You can scoop off the top layer and briefly re-steam the rest.
Flat milk means not enough air or starting too warm. Always begin cold. Listen for the ripping sound in the first seconds to confirm air intake.
Quick fixes for common issues:
- Pebbled or soapy foam: limited air intake and too long stretching. Next time limit aeration and roll longer.
- No foam: missed aeration or overheated milk. Start colder and reintroduce air early.
- Cooked taste: overheated past 160°F. Stop at 140 to 145°F and rely on carry-over.
- Separated layers: under-texturized. Tap, swirl, and re-steam briefly with the tip submerged.
- Weak steam: machine not ready or low boiler pressure. Purge the wand, wait for the ready light, and check water level.
- Baked-on wand residue: didn’t wipe immediately. Wipe while hot and purge to prevent clogs.
At-Home Latte Art Practice Drills and Skill Development

Practice without wasting milk. The soap-water drill is gold. Fill the pitcher with cold water and add a drop or two of dish soap. Run your stretch and roll routine, pour the soapy water into a cup, and watch how it behaves. You can repeat this many times with almost no cleanup.
Colored-water pouring works too. Put a drop of food coloring in hot water to mimic white milk against dark coffee. Record short videos of pours and watch where your hand moves, when you lift early, or when your wiggle is too big.
Progressive drills to build skill:
- Twenty-cycle steam drill: steam soapy water 20 times, focus only on consistent stretch time and rolling motion.
- Height-control drill: pour plain water from three heights and note how flow and mixing change. Repeat each height 10 times.
- Single-pattern focus: pick one shape and pour it 10 times using colored water. Repeat regularly.
- Weekly benchmark: once a week pull a real shot, steam milk, pour your best and photo it to track progress.
- Timed challenge: five minutes of consistent pours to build speed and calm under pressure.
Cleaning and Safety When Frothing Milk at Home

Wipe and purge after every steam. Milk burns onto metal fast. The routine is simple: purge, wipe, purge. Purge for a second before steaming to clear condensation. Wipe the wand with a damp cloth immediately after steaming while it’s hot, then purge for two seconds to clear any milk inside the tip.
Skip the second purge and you risk milk getting sucked into the boiler. That causes clogs, bad smells, and bacteria. Single-boiler machines are especially sensitive to this.
Follow this four step cleaning order every time:
- Purge before steaming for one second.
- Wipe the wand immediately after steaming with a damp cloth.
- Purge again for two seconds to clear the tip.
- At the end of the day, run a longer purge, wipe, and soak the tip in warm water for 30 seconds to dissolve hidden buildup.
Final Words
Start steaming cold milk: purge the wand, fill the pitcher, introduce air 2–6 seconds with the tip just under the surface, then drop the tip and create a rolling motion until about 140–150°F. Tap and swirl to finish.
We covered microfoam cues, best milk choices, pitcher and pouring technique, simple troubleshooting, zero-waste practice drills, and cleaning routines. One change at a time.
Keep going. Mastering how to froth milk for latte art at home is absolutely within reach.
FAQ
Q: How to perfectly froth milk for latte art?
A: Perfectly froth milk for latte art by starting cold, filling the pitcher just below the spout, stretching 2–6 seconds with the tip near the surface, then submerge, roll, heat to ~140–150°F, tap and swirl.
Q: What common mistake should be avoided when frothing milk?
A: The common mistake to avoid when frothing milk is adding air too long; over-stretching makes big bubbles and weak texture, so limit stretching to 2–6 seconds and focus on a steady rolling motion.
Q: Can I froth 1/2 and 1/2?
A: You can froth half-and-half, but it produces heavier, less stable microfoam; whole milk gives the most reliable gloss and pour. If using half-and-half, steam gently and expect thicker texture and quicker separation.
Q: How many seconds to froth milk for latte art?
A: You should introduce air for 2–6 seconds when frothing milk for latte art, then submerge the tip and texture until the pitcher reaches about 140–150°F to achieve glossy, pourable microfoam.