

Think big bubbles are just part of learning to steam milk? They are not.
Big bubbles mean you or your gear are letting too much air in at the wrong time or depth.
I’ve made the same mistakes: too-high tip, over-aerating, warm milk, and fixed them with small, repeatable moves.
Read on for six practical fixes you can try now: correct wand depth, shorten aeration to 3 to 5 seconds, start cold, purge the wand, build a whirlpool, then tap and swirl.
Do one thing at a time and you’ll get glossy, pourable microfoam.
Why Big Bubbles Happen and Quick Fixes

Big bubbles show up when you blast in too much air too fast or stick the steam wand in the wrong spot. Most of the time it’s because the tip’s hanging too high over the milk, you’re aerating way longer than you should, or the milk was already warm when you started. If that tip sits too shallow, it gulps in big chunks of air instead of the fine mist you need for microfoam. Dirty steam tips or ones that are half-blocked spray all over the place, which traps air pockets that never mix in.
Equipment problems don’t help either. A clogged tip forces air through in bursts instead of a smooth flow. Milk that’s been sitting out or heated before won’t emulsify right because the proteins already started breaking down. Cold, fresh milk straight from the fridge is your cleanest starting point.
Here are six fixes you can use right now:
- Drop the wand tip so it sits just 1 to 3 mm below the surface instead of floating above it.
- Cut aeration time to 3 to 5 seconds max for one drink.
- Start with cold milk straight from the fridge at 35 to 45°F (2 to 7°C).
- Purge the steam wand for 1 to 2 seconds before and after steaming to clear out condensate and gunk.
- Get a steady whirlpool going by angling the pitcher 20 to 30 degrees and putting the tip off-center.
- Tap and swirl the pitcher hard on the counter 2 to 3 times after steaming to pop any big bubbles that are left.
These tweaks shift your approach from dumping air into the milk to gently stretching it. When you ease air in slowly at the right depth and then drop the wand to keep a vortex running, the bubbles break into thousands of tiny cells. That’s microfoam. Smooth, glossy, dense enough to hold latte art. Big bubbles vanish when you control where, when, and how much air gets in.
Correct Frothing Technique for Smooth Microfoam

A process you can repeat gets rid of the guessing and keeps every pitcher the same. Following the same steps every time means you’ll know exactly which part to tweak when something goes sideways.
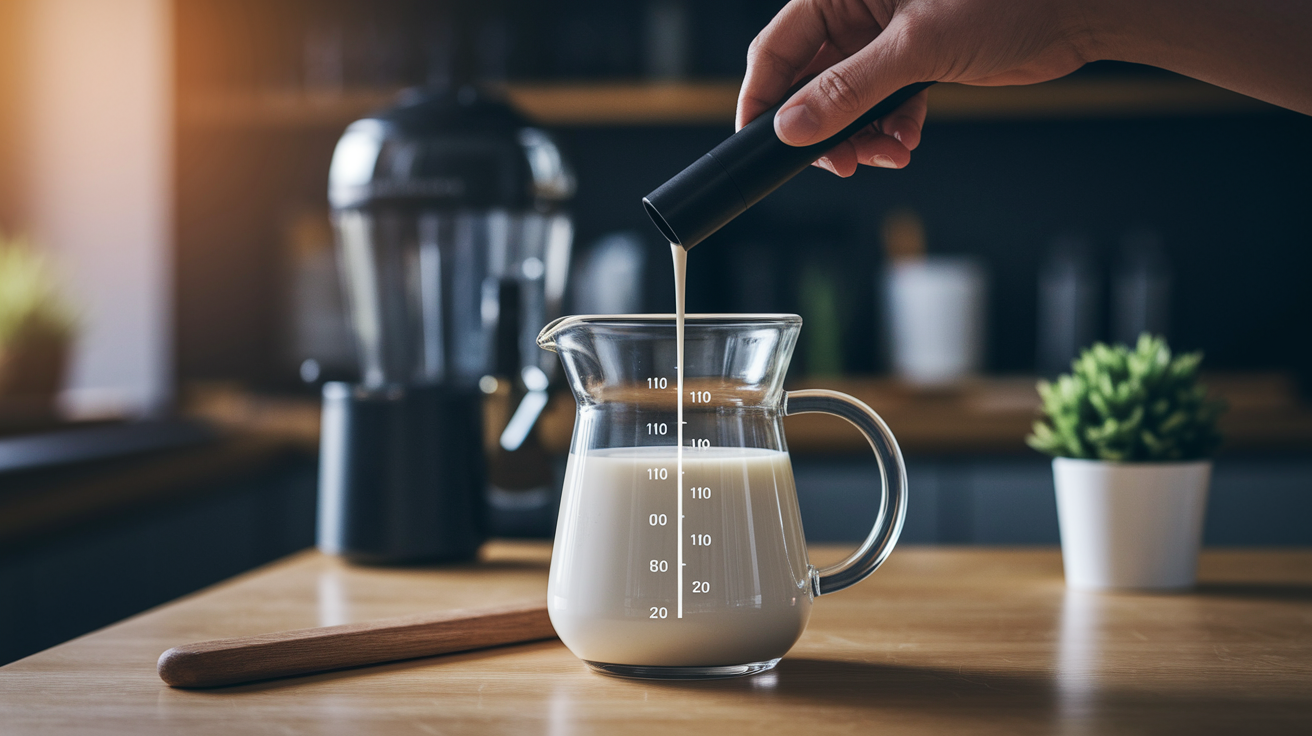
- Fill the pitcher about one-third full. For a 12 oz (350 ml) pitcher that’s roughly 150 ml of cold milk.
- Purge the steam wand for 1 to 2 seconds to blow out water stuck in the tip.
- Put the tip just under the surface at 1 to 3 mm depth, angled a little off-center to one side.
- Open the steam all the way and let the milk start spinning.
- Add air for 3 to 5 seconds by keeping the tip near the surface until you hear a soft hiss and see the milk rise a bit.
- Drop the tip 1 to 2 cm deeper to keep the whirlpool going and stop adding new air. Keep steaming until the pitcher feels warm to touch.
- Stop at 140 to 150°F (60 to 65°C). The pitcher should be just too hot to hold comfortably for more than a couple seconds.
This separates the two jobs: stretching (adding air) and texturizing (smashing bubbles down). Stretch first, texture second. The whirlpool pulls those big air pockets into the current and breaks them into microfoam. Skip the whirlpool or keep adding air while the milk heats and those pockets stay whole, floating to the top as big bubbles. Dropping the wand after the initial stretch gives the vortex time to blend everything before the milk gets too hot to move.
Steam Wand Positioning and Aeration Control
The wand tip decides how air gets into the milk. When it sits right at the boundary between milk and air, it pulls in a fine stream that mixes smoothly. Move it too high and the tip breaks the surface completely, gulping air in chunks. Push it too deep and no air enters at all. You just get hot milk with no foam.
Depth matters in millimeters. At 1 to 3 mm below the surface you’ll hear a light chirping or paper-tearing sound as tiny bubbles rush in. At 5 mm or deeper the sound stops and the milk just spins. The sweet spot is where you hear steady aeration without seeing the milk splash or spray. Tilt the pitcher 20 to 30 degrees so the steam enters at an angle, not straight down. This angle starts the whirlpool and keeps it running.
Once you’ve added enough air, drop the tip another 1 to 2 cm and let the whirlpool run. The vortex should pull the surface down into a smooth, rolling wave with no bubbles riding the top. If foam piles up on one side, adjust the angle or shift the tip slightly toward the center. A stable whirlpool means the milk’s doing the work while you just hold the pitcher steady. Lose the whirlpool and large bubbles stick around because nothing’s forcing them to integrate.
Milk Temperature and Its Impact on Foam Quality

Temperature changes how milk proteins act. Below 100°F (38°C) the milk stretches easily but won’t hold foam for long. Above 160°F (71°C) the proteins start breaking down and the milk tastes scalded, with a flat, cooked flavor that no technique can fix. The window for stable, sweet microfoam sits in the middle.
Stop steaming between 140 to 150°F (60 to 65°C) and the milk will taste naturally sweet and hold its texture for several minutes. At this range the proteins have bonded enough to trap air in tiny cells, but they haven’t been stressed into falling apart. Go past 155°F (68°C) and you’ll notice the foam starts separating, with watery liquid pooling under a layer of dry bubbles.
| Temperature Range | Foam Result | Notes |
|---|---|---|
| Below 100°F (38°C) | Stretches easily but collapses fast | Proteins not activated yet |
| 140–150°F (60–65°C) | Stable, sweet, velvety microfoam | Ideal range for texture and flavor |
| 150–160°F (65–71°C) | Firm foam, sweetness fading | Safe but losing optimal taste |
| Above 160°F (71°C) | Scalded, separating, flat flavor | Proteins breaking down |
Use a thermometer clipped to the pitcher or learn to read the warmth by touch. When it’s just too hot to hold comfortably for more than a second or two, you’re in the target zone. Consistency comes from stopping at the same point every time, not guessing when it “feels done.”
Common Frothing Errors and How to Avoid Them
Starting with warm milk ranks high on the mistake list. Room temperature or previously steamed milk already lost the protein structure needed to build stable foam, so even perfect technique won’t save it. Always pull milk straight from the fridge and use it within a few minutes of pouring it into the pitcher.
Over-aerating is the second big error. Beginners often keep the wand near the surface for 10, 15, even 20 seconds, thinking more air equals better foam. Really, 3 to 5 seconds of controlled stretching is enough for a single drink. After that you’re just adding volume without improving texture. The result is a pitcher full of stiff, bubbly froth that looks more like shaving cream than microfoam.
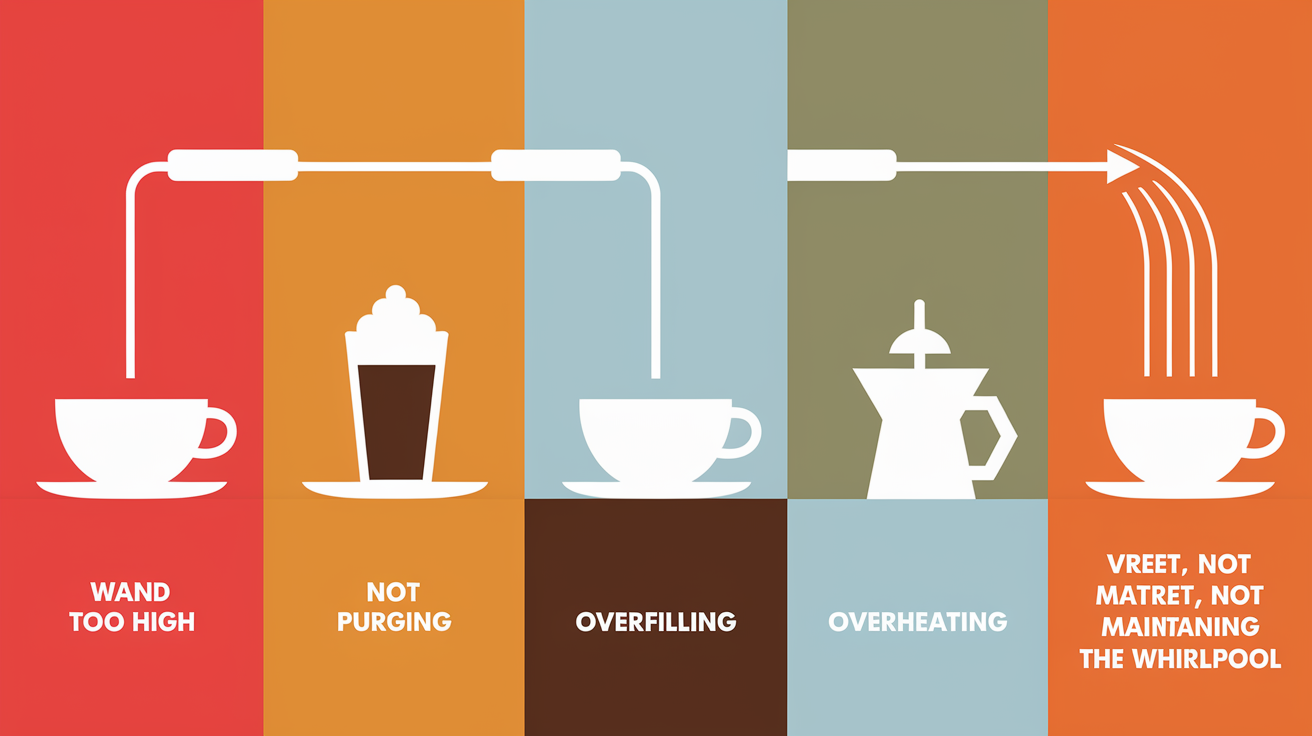
Here are five errors that create big bubbles:
- Skipping the wand purge and letting condensate spray into the milk at the start
- Holding the tip too high above the surface so it gulps air instead of drawing it in smoothly
- Letting the wand touch the bottom or side of the pitcher, which kills the whirlpool
- Continuing to aerate after the milk hits 120°F (49°C), when proteins start setting and can’t integrate new air properly
- Using a pitcher that’s too small or too full, leaving no room for the milk to expand and circulate
Fixing these comes down to watching the milk instead of the machine. If you see splashing, lower the tip. If you hear loud gurgling, raise it a little. If the whirlpool stops, adjust the angle. The milk shows you what’s working.
Milk Type Selection for Best Microfoam

Fat content and protein structure decide how milk acts under steam. Whole milk at around 3.25% fat gives you the creamiest, most stable microfoam because the fat cushions the protein network and slows bubble collapse. The texture feels dense and smooth, and it holds together long enough to pour detailed latte art.
Two-percent milk works almost as well. Slightly less body but still plenty of stability. Skim milk stretches faster and creates more volume, but the bubbles are larger and the mouthfeel is thinner. If you’re learning, start with whole milk so you can feel what proper microfoam should be like. Plant-based options vary a lot. Barista-blend oat and soy milks are made with added stabilizers and fat to mimic dairy, while standard almond or coconut milk often produce weak, bubbly foam that separates fast.
| Milk Type | Foam Stability | Bubble Size Characteristics |
|---|---|---|
| Whole (3.25% fat) | Very stable, long-lasting | Fine, tight microfoam |
| 2% fat | Stable, slightly thinner | Small bubbles, good texture |
| Skim (0% fat) | Less stable, faster collapse | Larger bubbles, airier feel |
| Oat barista blend | Stable with added oils | Medium-fine, creamy |
| Standard almond/coconut | Weak, separates quickly | Large, unstable bubbles |
Equipment Maintenance and Its Role in Foam Texture

A clean steam wand gives you consistent airflow. Dried milk inside the tip narrows the opening and forces steam to spray unevenly, creating bursts of large bubbles instead of a smooth stream. After every use, wipe the wand with a damp cloth and purge it for 1 to 2 seconds to blow out any milk that snuck inside.
Weekly deep cleaning stops buildup you can’t see. Remove the tip if your machine lets you and soak it in warm water with a drop of dish soap or a milk-system cleaner for 10 to 15 minutes. Rinse thoroughly and screw it back on. If you notice weak steam pressure or sputtering even after cleaning, check for scale buildup in the boiler and descale according to your machine’s manual.
Four maintenance steps that cut down big bubbles:
- Wipe and purge the wand right away after each pitcher to stop milk from drying inside the tip.
- Soak removable steam tips weekly in warm soapy water to dissolve hidden buildup.
- Descale the boiler every 1 to 3 months depending on water hardness and how much you use it.
- Check and replace worn O-rings or screens at the tip if you see weird steam flow or leaks.
Machines with clogged or scaled parts can’t keep steady pressure, so even correct technique gives you inconsistent results. A monthly check of the steam tip and a quick descale cycle keep your equipment predictable. When the wand works the way it’s supposed to, your only variable is technique. And that’s easier to fix than a broken machine.
Final Words
Fix the foam by checking wand depth, dialing aeration, and watching milk temperature. We covered quick fixes for oversized bubbles, a clear microfoam technique, precise wand placement, why heat matters, common mistakes, milk choices, and simple maintenance.
Try one change at a time. Adjust wand depth first, shorten aeration by 1-2 seconds, and wait for a steady whirlpool; watch the stream and the puck for clues.
Use these steps to learn how to fix big bubbles when frothing milk. You’ll get smoother microfoam and more confident pours.
FAQ
Q: Why is my milk frothing with big bubbles or so foamy?
A: Milk frothing with big bubbles or too foamy happens when you add too much air or the wand sits at the wrong depth; try shallower wand placement, 1–3 seconds aeration, colder milk, and purge the wand.
Q: What common mistake should be avoided when frothing milk?
A: The common mistake to avoid when frothing milk is over-aerating by leaving the wand at the surface; stop aeration after 1–3 seconds, then focus on a steady whirlpool for smooth microfoam.
Q: What happens if you oversteam milk?
A: Oversteaming milk scalds proteins, destroys sweetness, and breaks foam into large, unstable bubbles, giving a flat, burned taste; aim for 55–65°C (130–150°F) to keep good microfoam.