

What if you could stop a spraying portafilter in 90 seconds?
Don’t let a leaking gasket ruin your morning.
This post gives three fast, safe repairs you can do now: wipe the gasket seat and portafilter rim, run a 3 to 5 second manual flush, then reseat the portafilter or drop your dose by 1 to 2 grams.
You’ll see what success looks like and when the seal really needs replacing.
Immediate Actions to Stop Espresso Machine Gasket Leaks Fast
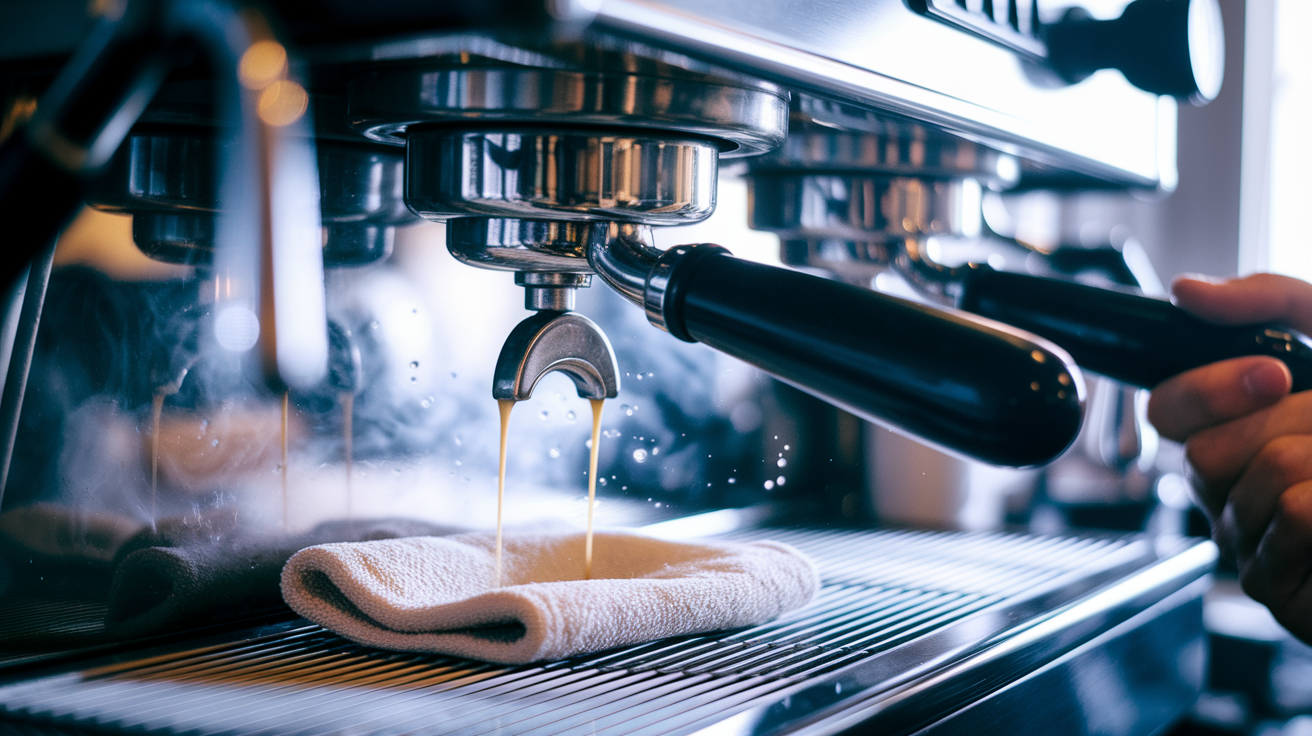
When water starts spraying or dripping around your portafilter mid-shot, stop pulling. Grab a dry white towel, hold it under the group head, unlock the portafilter, and run a quick 3 to 5 second manual flush. Watch where the water hits. If the wet spot spreads evenly from the center, your shower screen’s probably clear. If water tracks to one side or shoots out in a narrow jet, you’ve got debris in the gasket groove or a damaged seal. Wipe the gasket seat and portafilter rim with the towel. Look for stuck grounds, scale flakes, coffee oils.
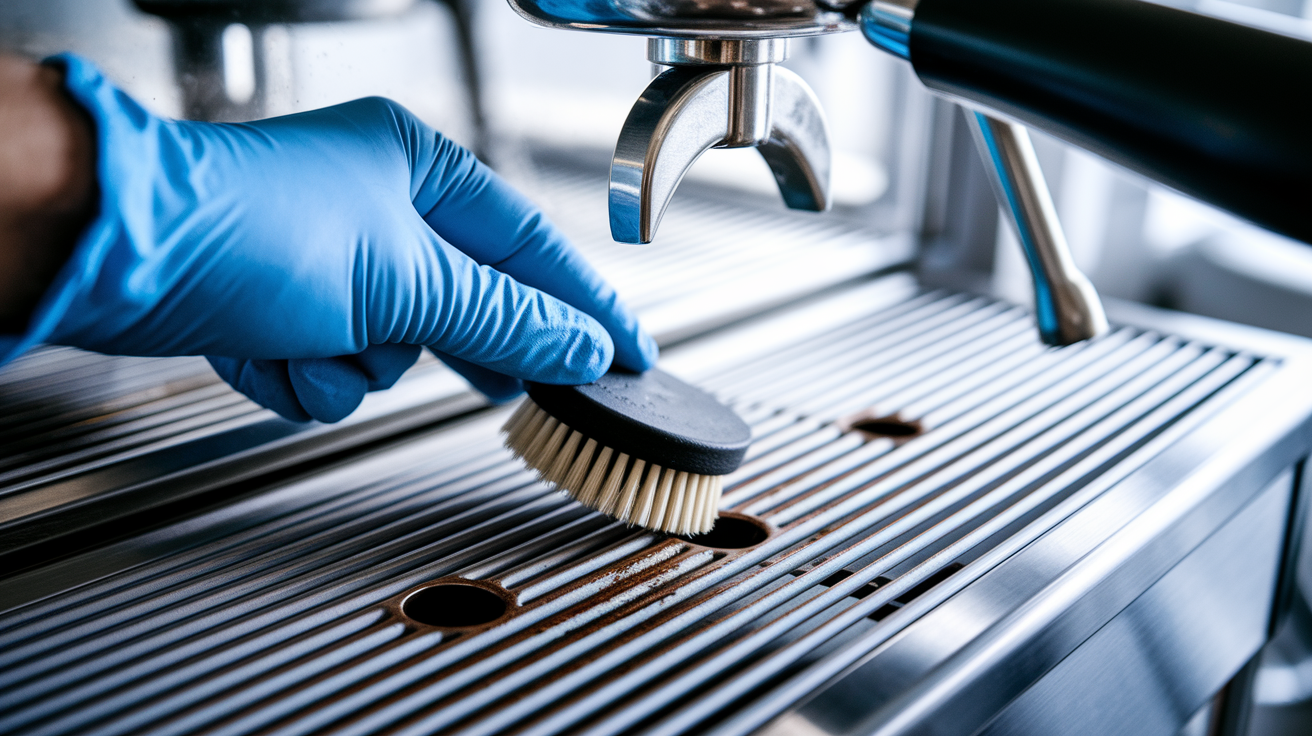
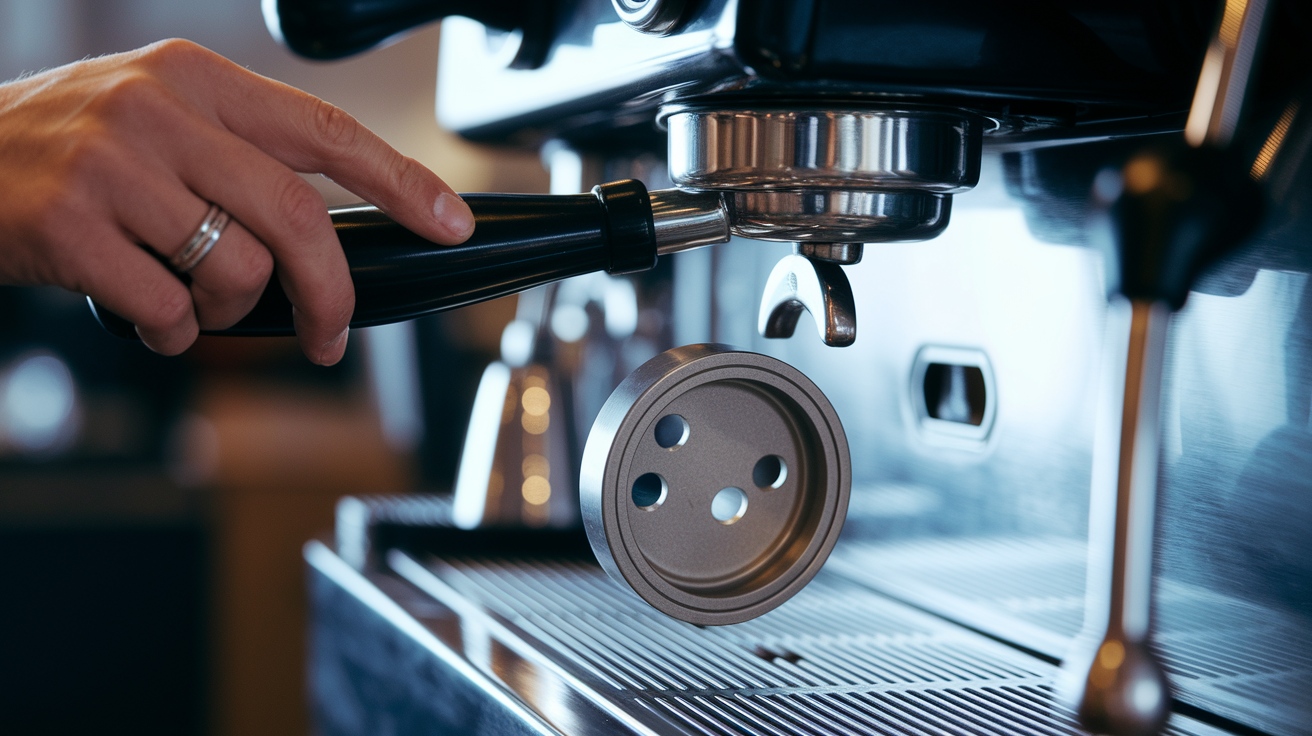
Next, clean the gasket groove with a group head brush or a damp lint-free cloth wrapped around your finger. Work around the entire circumference and pull out any visible buildup. Wipe the portafilter basket rim clean. Check for coffee residue or small dents. Reseat the portafilter firmly, locking it straight into the group head without forcing or angling. Run another controlled extraction and watch the seal. If the leak stops or slows significantly, the problem was debris or misalignment, not gasket failure.
If the leak persists or gets worse as pressure builds during the shot, you’re likely overdosing or the gasket is too compressed to hold 9 bar. Reduce your dose by 1 to 2 grams, level the puck, tamp with steady pressure. Lock the portafilter again and pull a test shot. If the handle angle feels different than usual, or you have to muscle the portafilter to stop the spray, the gasket is hardening and compression is uneven.
You can do these in under 90 seconds:
- Wipe the gasket seat and portafilter rim with a dry towel to clear loose grounds.
- Run a 3 to 5 second blind flush to dislodge scale or coffee particles in the groove.
- Unlock and reseat the portafilter, confirming it locks smoothly without force.
- Reduce dose by 1 to 2 grams and pull a short test shot to check if pressure was the cause.
- Check the handle angle at lock-in. If it’s shifted higher or lower than normal, the gasket is worn.
- Empty the drip tray and confirm the leak is from the group head, not an overflow or tank issue.
Understanding Why Espresso Gaskets Leak Under Pressure

The group head gasket seals by compression. When you lock the portafilter, the basket rim presses the rubber ring against the group seat, creating a tight boundary that holds roughly 9 bar of brew pressure at the puck. Over time, heat cycles and constant pressure cause the rubber to harden, flatten, and lose elasticity. A gasket that’s compressed even a tenth of a millimeter less than spec allows pressurized water to find a path around the seal. That’s when you see steady weeping, lateral sprays, or one-sided drips during extraction.
Portafilter rim damage accelerates leaks. A small burr or dent on the basket edge creates a bypass channel where water can escape instead of flowing through the coffee. Misalignment does the same thing. If the portafilter doesn’t seat concentrically, pressure concentrates on one side of the gasket, and that side sprays while the opposite side stays dry. Pump or boiler pressure spikes above 10 bar can blow past even a healthy gasket, especially if the OPV isn’t adjusted correctly.
| Symptom | Likely Cause | Expected Fix |
|---|---|---|
| Steady drip around entire portafilter rim | Gasket worn, flattened, or hardened | Replace gasket |
| One-sided spray or tracking along rim | Portafilter rim burr, dent, or misalignment | Inspect and smooth rim; reseat portafilter; check group rails |
| Narrow jet or slit spray | Torn or cut gasket; embedded coffee grounds | Clean groove; replace gasket if torn |
| Multiple spray points; poor distribution | Damaged or warped shower screen | Replace shower screen; clean dispersion plate |
How to Clean the Group Head and Gasket Groove to Stop Leaks Quickly
Most quick leaks come from coffee oils, grounds, and scale buildup in the gasket groove and on the sealing surfaces. Cleaning those surfaces often restores the seal without replacing any parts. This works best when the gasket is still soft and the leak is intermittent or just starting.
- Remove the portafilter and wipe the gasket seat and shower screen with a dry, lint-free cloth to clear loose debris.
- Use a group head brush or a small nylon brush to scrub the gasket groove, working around the full circle to dislodge stuck grounds and oils.
- Run a 3 to 5 second manual flush to rinse particles out of the groove and check the water flow pattern.
- Inspect the shower screen for flatness. Press gently with your finger. If it flexes or you see a gap at the edge, it may need reseating or replacement.
- Retest the seal by locking a clean, empty portafilter and running another short flush. Watch for spray or drips.
After cleaning, if the gasket seats evenly and the portafilter locks smoothly at the usual angle, you’ve likely solved the problem. If the leak returns within a few shots or the handle angle has shifted, the gasket has lost compression and replacement is the next step.
Fast Portafilter Adjustments That Reduce Gasket Leaks
Sometimes the leak isn’t the gasket. It’s how the portafilter sits in the group. A portafilter that doesn’t lock straight puts uneven pressure on the gasket, and that creates a bypass on one side. If your handle angle changed or you have to force the lock, the dose is too high or the gasket is worn. Reducing dose by 1 to 2 grams often brings the portafilter back into proper alignment and stops lateral sprays.
Check the basket rim with your fingertip. Run it slowly around the top edge, feeling for burrs, dents, or sharp spots. Even a small deformation can break the seal. If you find a burr, lightly smooth it with fine sandpaper or a small file, then wipe the rim clean. Relock the portafilter and confirm it seats without rocking or gaps.
- Reduce dose by 1 to 2 grams if the portafilter feels tight or won’t lock fully.
- Confirm the basket rim is smooth and free of dents by running your finger around the edge.
- Lock the portafilter straight into the group without angling or forcing. It should slide in smoothly and lock with moderate pressure.
- Check the handle angle at lock-in. If it’s higher or lower than usual, the gasket is compressing unevenly.
- Wipe the portafilter lugs and group rails to remove grounds that might prevent full seating.
Temporary Seal Tricks for Stubborn Espresso Gasket Leaks

If cleaning and dose adjustments slow the leak but don’t stop it completely, you can apply a very light coat of food-safe silicone grease to the outer lip of the gasket, only if your machine manual allows it. Spread a thin layer with a clean fingertip, wipe off the excess, and lock the portafilter. The grease fills micro-gaps and can buy you a few more days of brewing while you wait for a replacement gasket to arrive. Don’t use petroleum-based grease, plumber’s grease, or non-food-safe products. They’ll break down under heat and contaminate your espresso.
Avoid wrapping the portafilter rim with plumber’s tape, Teflon tape, or any adhesive sealant. Those materials can flake off, clog the shower screen, or introduce unsafe chemicals into the brew path. They also create uneven compression and make the problem worse once they degrade. The same goes for liquid sealants, caulks, or epoxy. None of them are food-safe, heat-stable, or designed for the pressure and flow of espresso extraction.
Temporary fixes work only when the gasket still has some elasticity and the leak is minor. If you see a torn gasket, a flattened section, or water spraying from multiple points, no amount of grease or adjustment will restore the seal. At that point, replacement is the only reliable fix.
When Emergency Fixes Fail: Knowing When Gasket Replacement Is Required

When you’ve cleaned the groove, adjusted the dose, and reseated the portafilter multiple times and the leak keeps coming back, the gasket has reached the end of its functional life. Rubber gaskets harden from heat cycling, flatten under constant compression, and develop small cracks that you can’t always see. Once the material has lost its ability to compress evenly and spring back, water will find a path around the seal no matter how carefully you lock the portafilter. Replacement costs about $10 and takes 20 to 40 minutes for most home and prosumer machines, as detailed in “Why Espresso Machine Leaks: $10 Gasket Fix”.
Visual and Functional Signs of Failure
Look at the gasket under good light. If you see visible cracks, a flattened section that doesn’t spring back when you press it, or torn edges, the gasket is done. Run your finger around the groove. If the rubber feels hard, brittle, or slick with baked-on oils, it won’t seal. Check the portafilter handle angle at lock-in. If it sits noticeably higher or lower than when the machine was new, the gasket has compressed permanently and can’t hold the pressure boundary anymore.
Situations Cleaning Cannot Fix
Portafilter rim damage or burrs create bypass channels that cleaning won’t close. If you’ve smoothed the rim and the leak persists, the basket or portafilter may need replacement. Pressure spikes from a miscalibrated pump or OPV can blow past a healthy gasket repeatedly, leading to rapid re-failure even after replacement. Warped or damaged shower screens prevent even compression across the gasket, causing localized leaks that look like gasket failure but won’t resolve until the screen is replaced.
| Condition | Temporary Fix? | Next Step |
|---|---|---|
| Hardened, cracked, or torn gasket | No | Replace gasket |
| Portafilter rim burrs or dents | Light sanding may help briefly | Smooth rim or replace basket/portafilter |
| Repeated gasket blowouts or violent spray | No | Check pump/boiler pressure; adjust OPV or service machine |
Essential Tools for DIY Espresso Leak Repair and On-the-Spot Fixes

Having the right tools on hand means you can diagnose and stop most gasket leaks in minutes instead of waiting days for a service call. Keep these items in a small kit near your machine or in your café’s tool drawer.
- Replacement gasket (Viton or silicone preferred for heat resistance; confirm size and fit for your group head model)
- Hex and Phillips bits (small set to remove group covers and shower screen screws)
- Pick tool or small flathead screwdriver (to pry out old gaskets without gouging the metal seat)
- Lint-free cloths (microfiber or coffee filter material to wipe seats and grooves without leaving fibers)
- Group head brush (stiff nylon bristles to scrub the gasket groove and shower screen)
- Food-safe silicone grease (only if your machine manual permits; use sparingly on gasket outer lip)
- Magnifier or reading glasses (to inspect portafilter rim for tiny burrs and gasket for cracks)
- Spare portafilter basket (worn or dented baskets are a common leak source in commercial setups)
If you run a commercial machine or pull more than ten shots a day, keep a spare gasket, shower screen, and basket on hand. Gasket failure can happen mid-service, and having parts ready means you’re back online in under an hour instead of losing a shift.
Preventing Future Espresso Gasket Leaks Through Routine Care
Regular inspection and cleaning extend gasket life and catch problems before they turn into mid-shot sprays. Check the gasket, portafilter rim, and shower screen once a month if you’re brewing daily. Look for early signs of hardening, coffee buildup in the groove, or changes in how the portafilter locks. Gaskets typically harden after 6 to 12 months of home use. Commercial machines under heavy load may need quarterly replacement, as noted in “Leak at the Group Head”.
Cleaning the group head after every use is the single most effective prevention step. Brush the gasket groove and shower screen to remove oils and grounds before they bake on. Run a quick blind flush weekly to clear particles from the dispersion plate and keep water flow even. Descale on the manufacturer’s schedule. Scale buildup around the group seat creates uneven surfaces that break the seal faster.
- Clean the group head and gasket groove with a brush and wipe after every session to remove oils and grounds.
- Check the portafilter rim monthly for burrs, dents, or wear. Smooth any rough spots immediately.
- Follow the descaling schedule for your water hardness to prevent scale from damaging sealing surfaces.
- Verify locking angle and feel each time you brew. A shift in handle position is an early gasket-wear signal.
- Inspect the shower screen for flatness and gaps. Replace if it flexes or shows corrosion.
- Store a spare gasket in a cool, dry place away from oils and solvents so it’s ready when you need it.
Final Words
Start by doing the dry-towel test, looking for debris, and reseating the portafilter.
Those three checks stop most leaks fast.
If that doesn’t fix it, clean the gasket groove and shower screen, try safe temporary seals, and watch for hardened or torn rubber.
When cleaning and reseating fail, replacement is usually the next step.
Keep a small tool kit and a spare gasket, follow a monthly cleaning habit, and use these quick fixes for leaks from espresso machine gasket as your go-to emergency playbook.
You’ll save shots and stress, and get back to pulling steady, tasty espresso.
FAQ
Q: How to stop an espresso machine from leaking?
A: To stop an espresso machine from leaking, do a dry‑towel test (3–5s flush), clear debris from the gasket groove, reseat and lock the portafilter, reduce dose/back‑to‑back shots, and replace the gasket if it keeps leaking.
Q: Why does my Breville Barista Express seal keep leaking?
A: The Breville Barista Express seal keeps leaking due to a worn or hardened gasket, debris in the groove, misaligned portafilter, or overdosing; clean the seat, check the basket rim, then replace the gasket if needed.
Q: How long do espresso gaskets last?
A: Espresso gaskets typically last 6–12 months in home use; heavy commercial use may need replacement quarterly. Replace sooner if you see cracking, hardening, flattened compression, or persistent leaks after cleaning.
Q: What sealant espresso machine?
A: The sealant for an espresso machine should be food‑grade silicone grease applied sparingly to the outer gasket rim as a short‑term aid if the maker allows; avoid non‑food caulk or plumber tape on brew surfaces.