

Think a little spray at the portafilter is normal?
It isn’t.
It’s often a gasket giving up.
Left alone, a bad gasket ruins shots, stresses the pump, and leaves puddles under the machine.
This post lays out the clearest signs to spot now, from spray and hissing to pressure drops and rubber bits in your cup.
You’ll get one simple diagnostic test to run and the exact first step to take so shots get steady again and you avoid bigger repairs.
Key Warning Signs That Indicate an Espresso Machine Gasket Needs Replacing
Your machine doesn’t stay quiet when the gasket’s failing. It shows you.
- Water spraying from the portafilter sides during the shot
- Portafilter feels loose even when you’ve locked it tight, or you’re cranking it further than usual just to seal
- Pressure drops halfway through, or the gauge won’t hit 9 bar
- Cracks, flat spots, or that dark oily gunk stuck to the gasket
- Hissing or steam escaping from the group head while you’re brewing
- Water under the machine after it cools
- Grounds or rubber bits in your cup
- Burnt rubber smell around the group or boiler
- Weak crema even though your grind and dose are right
- Pump groaning, sputtering, or just louder than it should be at startup
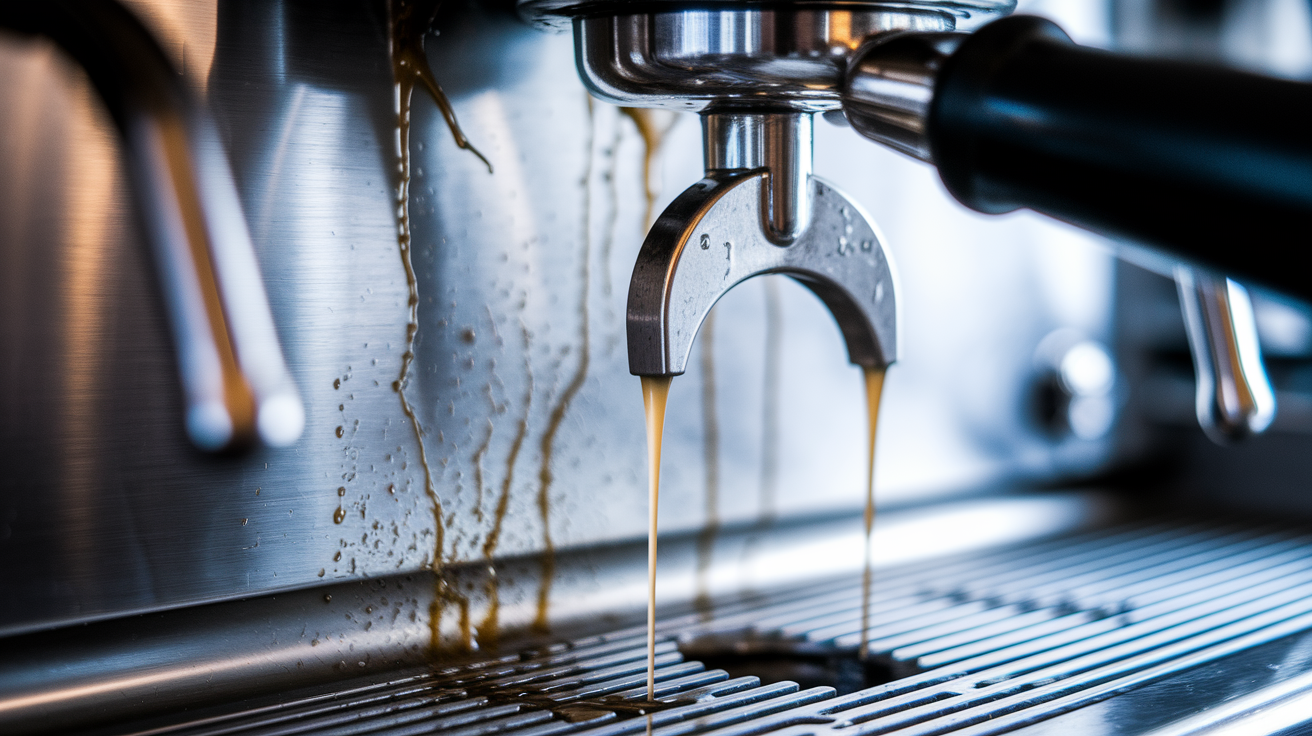
Espresso Machine Leak Issues That Point to Gasket Failure

Leaks are the clearest red flag. Water or espresso spraying from the portafilter sides during extraction means the seal between group head and portafilter is gone. Could be a fine mist, steady drips, or full spray depending on how bad the gasket’s gotten. It’s messy, sure. But it’s also pressure loss that wrecks the shot and can damage internals if you ignore it.
Some leaks wait until you’re not looking. Water pooling underneath after you shut down? That’s usually internal gasket or seal failure, often in the boiler circuit or around the steam valve. These only show up once the machine cools and contracts. Check for rust on the drip tray supports, swollen wood on the cabinet, or that mildew smell near the base.
- Water dripping from the group when the machine’s just sitting there or warming up
- Spray around the portafilter rim the second you start extraction
- Dampness on the counter or inside the cabinet hours after shutdown
- Rust stains on metal under the group or near the boiler
- Drip tray overflowing even when you haven’t made that many drinks
Pressure and Extraction Problems Caused by a Worn Espresso Gasket
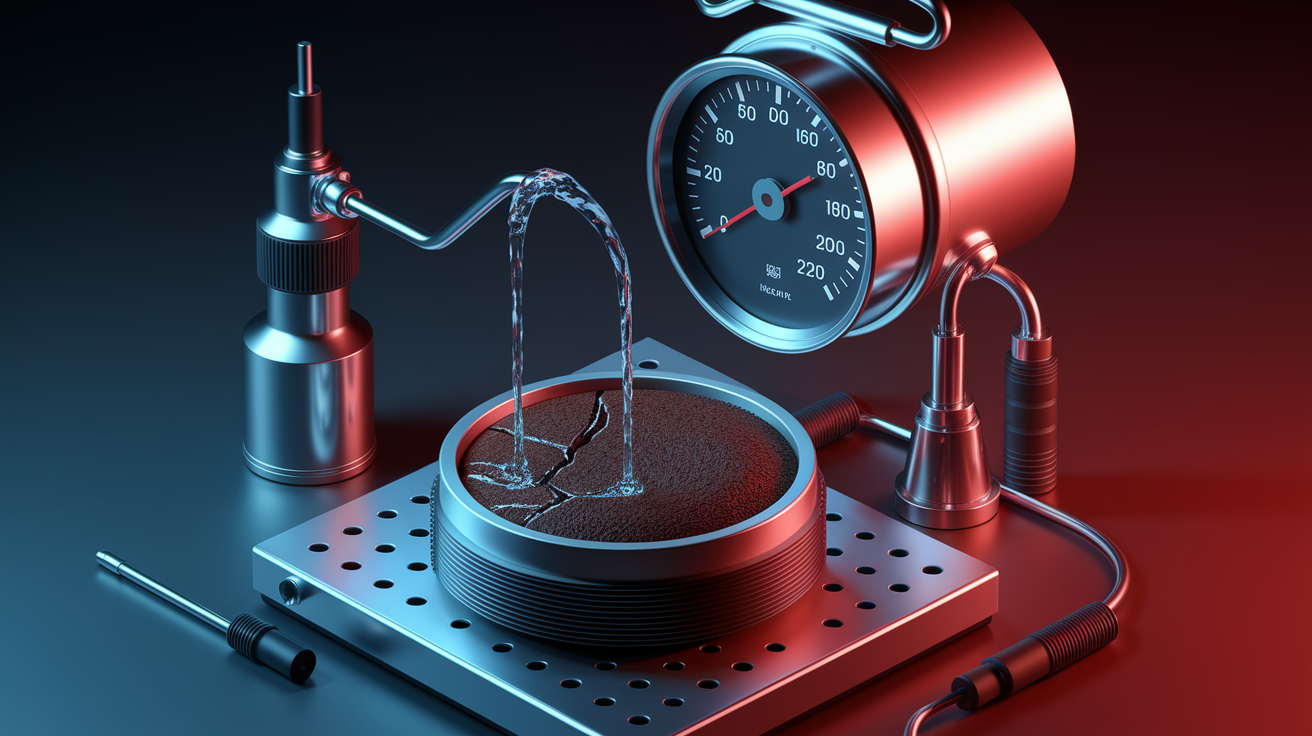
A failing gasket can’t hold the 9 bar you need. Shots take longer, crema’s thin, flavor’s weak because water’s escaping instead of pushing through the puck. The gauge jumps around, drops suddenly mid pull, or never gets to target. Usually starts gradual, then accelerates once the gasket hardens or cracks.
When the seal fails, the pump compensates. You’ll hear it running louder or longer, maybe sputtering with air pockets at startup. The machine might even shut down mid cycle if pressure sensors detect something’s wrong. All that extra work shortens pump life and increases the odds of other seal failures.
Uneven extraction’s another clue. One side of the puck looks darker or wetter, or you’re seeing channeling that wasn’t there last week? Check the gasket. A deformed or partially seated gasket creates uneven contact, so water finds the easy path instead of flowing through the coffee evenly.
| Symptom | What It Indicates |
|---|---|
| Pressure gauge reads below 9 bar during extraction, or fluctuates | Seal’s leaking internally. Water’s bypassing the puck instead of forcing through it |
| Pump runs longer or louder. Groaning or sputtering sounds at startup | Pump straining to compensate for lost pressure. Air pockets in the brew circuit from seal leaks |
| Weak crema, thin body, or sour/underextracted flavor despite correct grind | Insufficient pressure and contact time due to seal failure. Water escaping before full extraction |
Visual and Tactile Inspection Signs of Espresso Gasket Wear
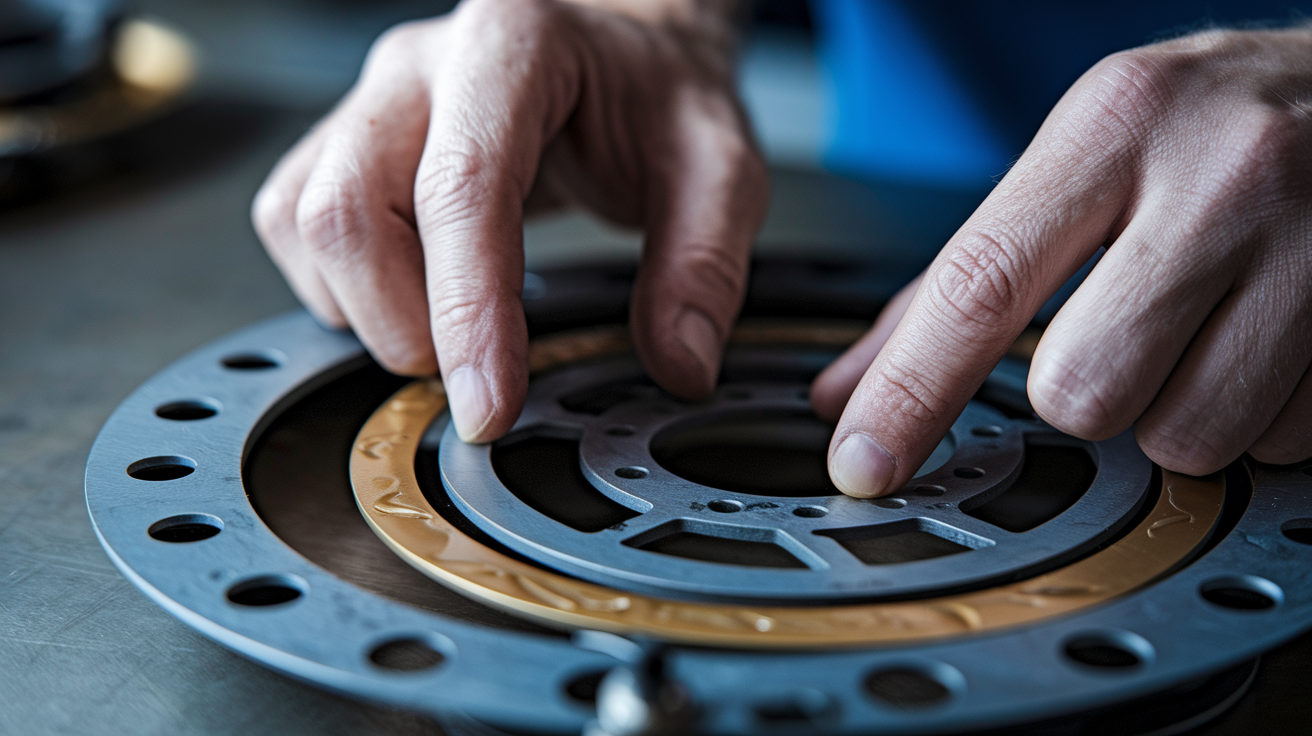
Pull the portafilter and look at the gasket in the group head. Healthy one’s smooth, evenly shaped, flexible. A failing gasket shows damage you can see and feel. Run your finger around the surface gently. Hard, brittle, uneven? It’s done.
Check for radial cracks running across the surface or around the edges. Even small cracks let water escape under pressure. Flattening’s common too. The gasket should have a rounded profile. If it looks squashed or sits flush with the metal, it won’t compress enough to seal. Dark, oily residue embedded in the rubber means coffee oils have broken it down. You might also see chunks missing, melted spots, or deformation where the gasket doesn’t fit the groove evenly anymore.
- Cracks radiating from center or around the circumference
- Flattened profile with little to no rounded edge left
- Hardened rubber that doesn’t flex when you press it
- Discoloration, dark streaks, or embedded coffee oils and grounds
- Swollen or soft sections that feel different from the rest
- Missing pieces, torn edges, or uneven thickness around the ring
Diagnostic Tests to Confirm an Espresso Gasket Is Failing

Start with a visual check. Remove the portafilter and inspect for cracks, flattening, or embedded debris. If it looks questionable, move to a fit test. Insert the portafilter without locking, then rotate it into position. Excessive play, difficulty locking, or the handle sitting at a different angle than usual all point to wear.
Run a test shot. Lock the portafilter with coffee and watch extraction closely. Look for spray from the sides, listen for hissing at the group, check the pressure gauge. Good seal holds steady pressure throughout the pull. If the gauge drops suddenly or never reaches 9 bar, the gasket’s leaking. After the shot, check the puck. Grounds in the cup or around the group head rim suggest a poor seal or fragments breaking off.
For a more controlled test, run a blind basket cycle if your machine supports it. This forces the pump to build full pressure without coffee to slow the flow. Watch and listen. Any spray, hissing, or pressure drop confirms a leak. Let the machine cool completely, then check underneath for damp spots or pooling. Some internal gasket leaks only show after thermal contraction. Smell near the group head and boiler. Burnt rubber odor means shutdown and inspection, immediately.
- Remove the portafilter and visually inspect the gasket for cracks, flattening, discoloration, or embedded grounds.
- Insert the portafilter and test the fit. Check for play, difficulty locking, or unusual handle position.
- Pull a test shot and observe for spray around the portafilter, hissing sounds, or visible leaks during extraction.
- Monitor the pressure gauge throughout the pull. Note any failure to reach 9 bar or sudden drops mid cycle.
- Run a blind basket test (if available) to check seal integrity under full pump pressure without coffee resistance.
- Let the machine cool, then inspect underneath for dampness, rust marks, or pooling water that appears after shutdown.
- Smell near the group head and boiler area for burnt rubber. Power down immediately if detected.
Burnt Smells, Noise, and Vibration: Secondary Signs of Espresso Gasket Failure
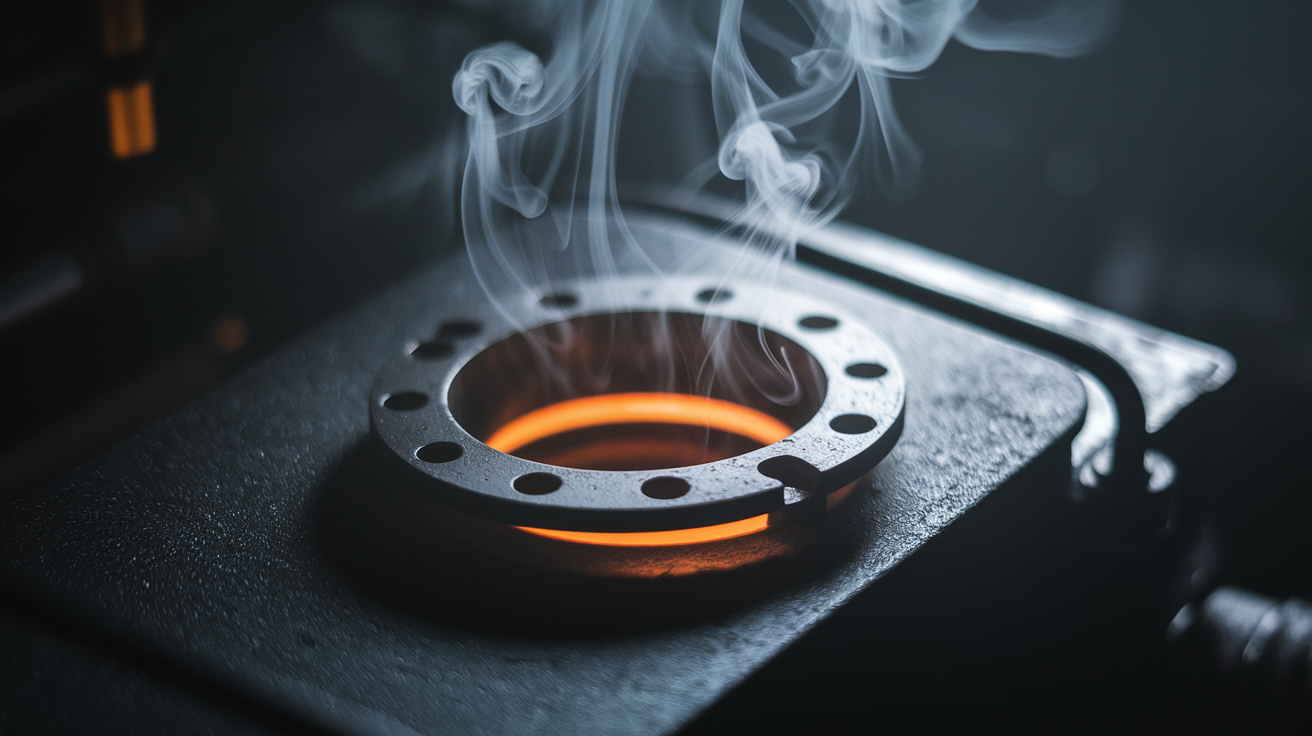
Burnt rubber smell near the group or boiler? That’s a red flag. The gasket material’s overheating, melting, or degrading from prolonged contact with high temps. Usually happens when a gasket’s already failed and water or steam is escaping onto hot metal, or when the gasket itself is stuck and friction’s generating heat. If you smell burnt rubber, power down and let it cool before inspecting. Keep running it and you risk permanent damage to sealing surfaces and internals.
Unusual pump noise and vibration are indirect but reliable. When gaskets leak internally, air enters the brew circuit and creates pockets that make the pump groan, sputter, or sound like it’s struggling at startup. You might feel stronger than normal vibrations through the housing. These symptoms often come with pressure instability and mean the pump’s working harder to maintain flow because water’s leaking past failed seals instead of moving efficiently.
How Often Espresso Gaskets Need Replacing and What Affects Lifespan

For home machines, inspect the group head gasket every six months and replace it roughly every six to twelve months depending on use. Pulling multiple shots daily? Expect closer to six months. Light users who make a few drinks a week can stretch to a year or slightly beyond, but should still check condition regularly instead of trusting the calendar alone.
Commercial machines see heavier use and harsher conditions. Gaskets in high volume café environments typically need replacement every six months, sometimes more if the machine runs all day. Heat cycling, constant pressure, exposure to coffee oils all speed up wear. Water hardness plays a role too. Scale buildup on sealing surfaces and inside the gasket groove prevents proper contact and increases stress on the rubber, shortening lifespan.
Long storage or infrequent use can also damage gaskets. Rubber and silicone dry out and harden when exposed to air and temperature swings without the regular moisture and oils from brewing. Machine sits unused for months? Inspect the gasket before putting it back into service. You may find it’s cracked or brittle even with low total shot count.
Tools and Supplies for Replacing an Espresso Machine Gasket

Replacing a gasket doesn’t require a full toolbox, but having the right items makes the job faster and safer. Most home replacements can be done with basic hand tools and a few specialty picks.
- Gasket pick, awl, or small flathead screwdriver to pry out the old gasket without scratching the group head
- Stubby screwdriver or hex key (size depends on your machine) to remove the shower screen retaining screw
- Degreasing cleaner and soft brush to remove coffee oils and residue from the gasket groove and sealing surfaces
- Calipers or a ruler to measure inner diameter, outer diameter, and thickness if you need to verify gasket size
- Food grade silicone lubricant to help seat the new gasket and protect the rubber during installation
- Heat resistant gloves and safety glasses for handling hot components and cleaning chemicals
Step-by-Step Process for Replacing an Espresso Gasket Safely
Preparing the Machine
Power down and unplug. Let it cool for at least 30 minutes, longer if you’ve been pulling shots recently. Hot metal and pressurized water are the main safety risks, so don’t rush this. Once cool, remove the portafilter and any accessories from the group head. If your machine has a three way solenoid valve, run one final flush to release residual pressure in the brew circuit.
Removing the Old Gasket
Use a stubby screwdriver or hex key to remove the shower screen retaining screw. Lift out the screen and set it aside. You’ll see the gasket sitting in a groove around the inside of the group head. Slide a gasket pick or awl under one edge and work it gently around the circumference to lift it out. Old gaskets often come out in pieces, especially if they’re brittle or cracked. That’s normal. Just make sure you remove every fragment.
Once the gasket’s out, inspect the groove and sealing surface. Use a degreaser and a soft brush to clean away coffee oils, grounds, and any stuck on residue. A clean surface is critical for the new gasket to seal properly. If you see scratches, corrosion, or pitting on the metal, note it. Minor surface damage can sometimes be lived with, but deep scoring may require professional resurfacing.
Installing and Testing the New Gasket
Check the new gasket’s orientation. Smooth side should face down toward the portafilter. Apply a thin layer of food grade silicone lubricant to the gasket and the groove to make installation easier and protect the rubber. Press the gasket into the groove evenly, working around the circumference to avoid twisting or stretching it. It should sit flush and uniform all the way around.
Reinstall the shower screen and retaining screw. Don’t overtighten. Snug is enough. Plug the machine back in, power it on, and let it heat fully. Run water through the group head without the portafilter to rinse and check for leaks. Then lock in the portafilter (empty or with a blind basket) and pull a test cycle. Watch for spray, listen for hissing, and check that the handle locks at the normal position. If everything looks and sounds right, pull a real shot and confirm pressure, flow, and extraction quality are back to normal.
Cost and Professional Repair Considerations for Espresso Gasket Replacement

Group head gaskets typically cost between $5 and $20 for home machines, with some specialty or oversized gaskets reaching $50. The part itself is cheap, which is why replacing it early makes financial sense. A $10 gasket replaced on schedule can prevent hundreds in downstream damage to the pump, boiler seals, or group head threads.
Professional service runs $100 to $300 per hour depending on location and the technician’s experience. For a simple group head gasket, most techs can finish in under an hour if there are no complications. That said, many home users handle this repair themselves without trouble. The tools are basic, the steps are straightforward, and online resources show the process for most common machines.
Professional help’s worth considering in a few situations:
- Multiple gaskets or seals failing at once, suggesting a systemic problem
- Internal boiler or steam valve seals that require partial disassembly and depressurization beyond home comfort levels
- Gasket replacement that didn’t solve the problem, indicating possible damage to the sealing surface or other components
- Machines still under warranty, where DIY work may void coverage
Final Words
Check the group head now. Watch for leaks during brew, hissing, pressure drops, visible cracks, or a puck full of grounds. These are the quick signs we walked through.
We covered leak patterns, pressure and extraction clues, visual and tactile checks, simple tests to confirm, expected replacement intervals, the tools you need, and a safe step-by-step swap.
If you see any of these, act. Replace the gasket or call a tech—these are the key signs your espresso machine gasket needs replacing. You’re set to keep shots steady and waste low.
FAQ
Q: When should I replace my espresso machine gasket, and how do I know the first signs it needs replacing?
A: You should replace your espresso machine gasket when you see leaks or spraying at the portafilter, hissing or pressure drops during extraction, difficulty locking the portafilter, visible cracks, burnt rubber smell, or grounds in the cup.
Q: What is the average lifespan of an espresso machine?
A: The average lifespan of an espresso machine is about 5–15 years depending on build quality and maintenance; home machines often last 5–10 years, and gaskets typically need replacement every 6–12 months.