

Think pitcher size is just a style choice?
It’s actually the main reason home lattes go flat, sputter, or spill during steaming.
Pick a too-small pitcher and you choke the milk; pick one too big and you never build a proper whirlpool.
This quick guide gives exact pitcher sizes, pre-steam fill amounts, and the one change to try first for single shots, doubles, or batch steaming.
Follow it and you’ll get repeatable microfoam, less waste, and cleaner pours every time.
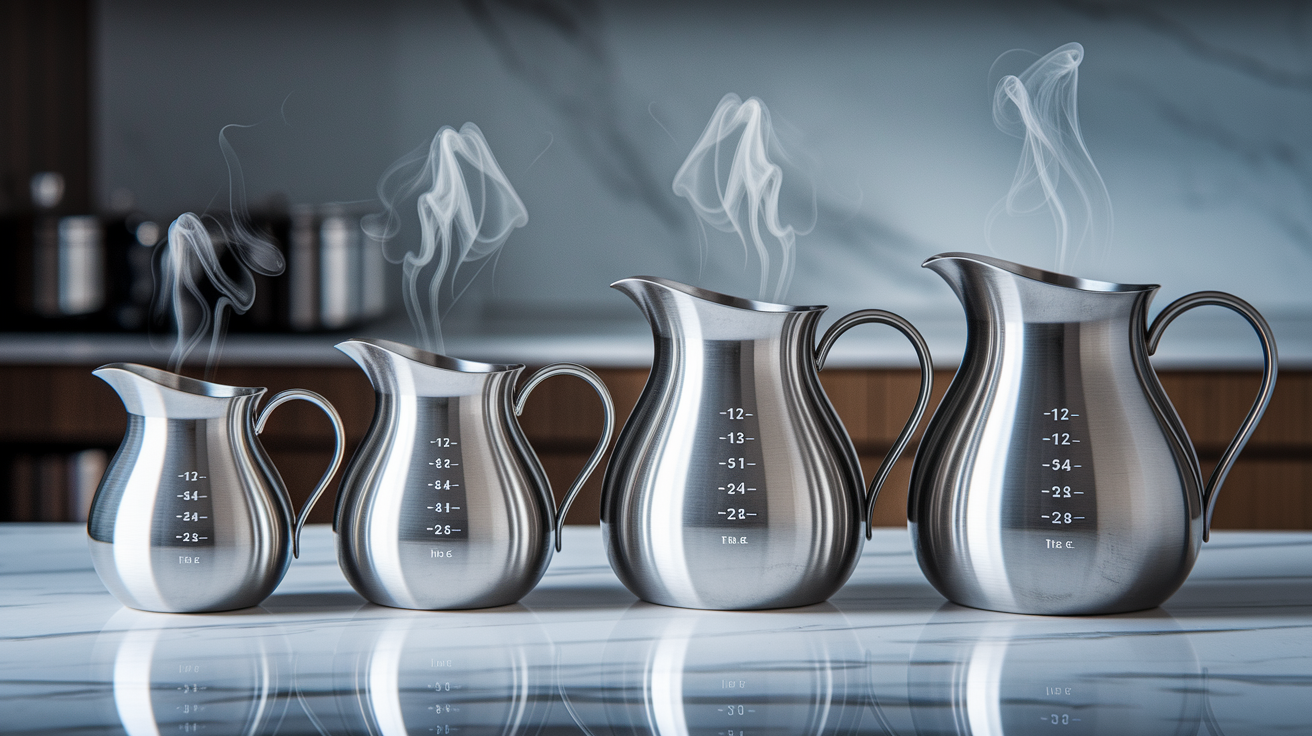
Definitive Pitcher Size Recommendations for Home Espresso
For single-shot drinks like an 8–10 oz latte or cappuccino, grab a 12 oz (355 ml) pitcher. Fill it with 100–150 ml of cold milk before you steam. About one-third of total capacity. After 20–50% expansion during steaming, you’ll land at 130–225 ml of textured milk, which covers a small latte or cappuccino perfectly. This size gives you enough room to create a tight whirlpool without making a mess, plus the control you need for precise latte art.
For double-shot drinks or bigger lattes (12–16 oz finished), go with a 20 oz (591 ml) pitcher. Start with 200–300 ml of milk and leave yourself generous headroom. You’ll get 240–450 ml post-steam, enough for a big latte or two small cortados. The 20 oz pitcher is the most versatile choice for home espresso. It handles typical drink sizes without forcing you to overfill or toss milk. If you’re regularly making two small drinks in one go, a 24 oz (710 ml) pitcher filled with 250–400 ml pre-steam works well, expanding to 300–600 ml to cover two 8–10 oz drinks.
The headroom rule is straightforward: fill to one-third of pitcher capacity for latte-art microfoam, or up to half for cappuccino-style froth. Milk expands 20–50% depending on how much air you work in, so planning your pre-steam volume stops spills and gives the steam wand room to do its job. A 32 oz (946 ml) pitcher suits batch steaming. Fill with 400–700 ml and get 480–1,050 ml post-steam, enough for 2–4 drinks back-to-back at café pace or when you’ve got people over.
Quick pitcher-to-drink recommendations:
- Single 8 oz cappuccino or latte → 12 oz pitcher, around 120 ml milk pre-steam
- Double-shot 12–14 oz latte → 20 oz pitcher, around 240 ml milk pre-steam
- Flat white (6–8 oz) or cortado (4–6 oz) → 12 oz pitcher, 100–140 ml milk
- Two small lattes in one session → 24 oz pitcher, around 300 ml milk pre-steam
- Household of 3–4 lattes or entertaining → 32 oz pitcher, around 500 ml milk pre-steam
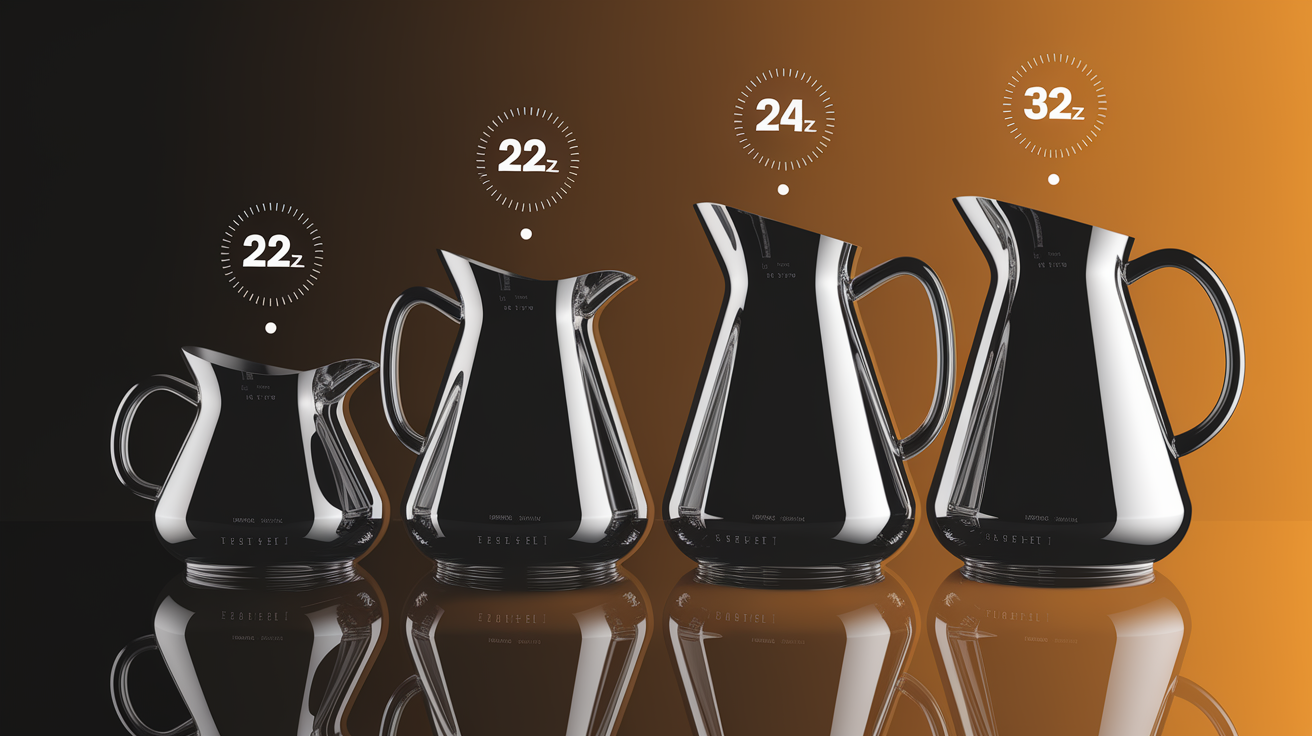
Detailed Comparison of Common Milk Steaming Pitcher Sizes
The 12 oz (355 ml) pitcher shines for single small drinks and latte-art practice. It forces you to work with the right volume. There’s no room to overfill and lose control. Fill to about 100–150 ml, steam, and you’ve got enough milk for one cappuccino or piccolo without wasting product. The smaller diameter also tightens the whirlpool, making it easier to integrate microfoam. If you mostly pull single shots and want to dial in pouring technique, this size builds muscle memory fast.
The 20 oz (591 ml) pitcher is the all-rounder for home espresso. It fits double-shot drinks comfortably, gives you margin to experiment with different fill levels, and doesn’t feel cramped when the wand is submerged. Most home baristas settle on 20 oz because it handles a 12 oz latte, a 10 oz flat white, or even two small cortados without forcing a second steam session. It’s also light enough to control during the pour but substantial enough that heat retention stays consistent through the whole steaming cycle.
A 24 oz (710 ml) pitcher bridges the gap between single-household and small-batch use. If you’re regularly making two 8 oz drinks or one very large latte, this size lets you steam once and pour twice. The extra width compared to a 12 oz pitcher makes it easier to create a vigorous whirlpool with higher milk volumes. The additional headroom prevents splashing when you’re still learning wand placement. It’s less common than 12 or 20 oz but solves specific workflow problems for couples or small families.
The 32 oz (946 ml) pitcher is built for volume. Two to four drinks in one steam session. Home users who entertain, run micro home-café setups, or practice multiple pours back-to-back appreciate the efficiency. You can fill it with 400–700 ml and have enough textured milk for a full round of lattes without reheating. The trade-off is weight and bulk. Pouring precision drops slightly, and smaller hands may find it awkward. It’s overkill for everyday single-drink use but essential if you’re steaming for groups.
| Size | Pre-steam Volume | Post-steam Yield | Best Use |
|---|---|---|---|
| 12 oz (355 ml) | 100–150 ml | 130–225 ml | Single small drinks, latte art practice |
| 20 oz (591 ml) | 200–300 ml | 240–450 ml | Double-shot lattes, versatile home use |
| 24 oz (710 ml) | 250–400 ml | 300–600 ml | Two small drinks or one large latte |
| 32 oz (946 ml) | 400–700 ml | 480–1,050 ml | Batch steaming 2–4 drinks |
Drink Ratios and Practical Milk-to-Pitcher Conversions

Matching milk volume to pitcher size prevents waste and improves texture. A standard single-shot latte uses about 120–180 ml of milk before steaming, which fits comfortably in a 12 oz pitcher when you follow the one-third fill rule. A double-shot latte or 12–16 oz drink needs 200–300 ml pre-steam, putting you squarely in 20 oz pitcher territory. If you’re steaming for two people at once, plan on 300–400 ml of cold milk and reach for a 24 or 32 oz pitcher to leave adequate headroom for stretching and whirlpool formation.
Latte, Flat White, and Cappuccino Capacities
A typical home latte runs 10–12 oz finished. About 2 oz espresso and 8–10 oz steamed milk. Start with 200–240 ml cold milk in a 20 oz pitcher, steam to 55–65°C (130–150°F), and you’ll land in the right zone after expansion. A flat white uses less milk, around 120–150 ml pre-steam for a 6–8 oz drink, so a 12 oz pitcher keeps things tight and gives you the precision needed for microfoam integration. Cappuccinos demand more foam, which means more headroom. Fill a 12 oz pitcher to half (about 180 ml) or a 20 oz pitcher to one-third (200 ml) depending on final drink size, then stretch aggressively for the drier, airier texture.
Cortado, Macchiato, and Piccolo
Small drinks like a 4 oz cortado or 3 oz macchiato need minimal milk. Typically 80–120 ml pre-steam. An 8 oz or 12 oz pitcher handles these volumes without forcing you to underfill dangerously low. Underfilling makes it hard to submerge the steam wand tip and create a whirlpool, so stick to pitchers where your target volume sits near the one-third or half mark. A piccolo (single ristretto shot with 80–100 ml milk) works perfectly in a 12 oz pitcher filled to about 100 ml. Enough to texture properly and pour a clean pattern.
Multi-Drink Steaming for Families or Guests
When you’re making two to four drinks, batch steaming saves time and keeps milk temperature consistent. For two 8 oz lattes, use 300–350 ml cold milk in a 24 oz pitcher. After expansion you’ll have 360–525 ml, enough to pour both drinks from one steam session. For three or four drinks, a 32 oz pitcher filled with 500–700 ml gives you the volume and headroom needed. The key is maintaining the same stretching and texturing phases, just scale the duration slightly longer to heat the larger mass of milk evenly.
Exact milk-to-pitcher conversions for common drinks:
- Single 10 oz latte (double shot): 200 ml milk → 20 oz pitcher
- Two 8 oz cappuccinos: 320 ml milk → 24 oz pitcher
- One 6 oz flat white: 120 ml milk → 12 oz pitcher
- Four 10 oz lattes for a group: 640 ml milk → 32 oz pitcher
Understanding Fill Levels, Milk Expansion, and Headroom in Pitchers
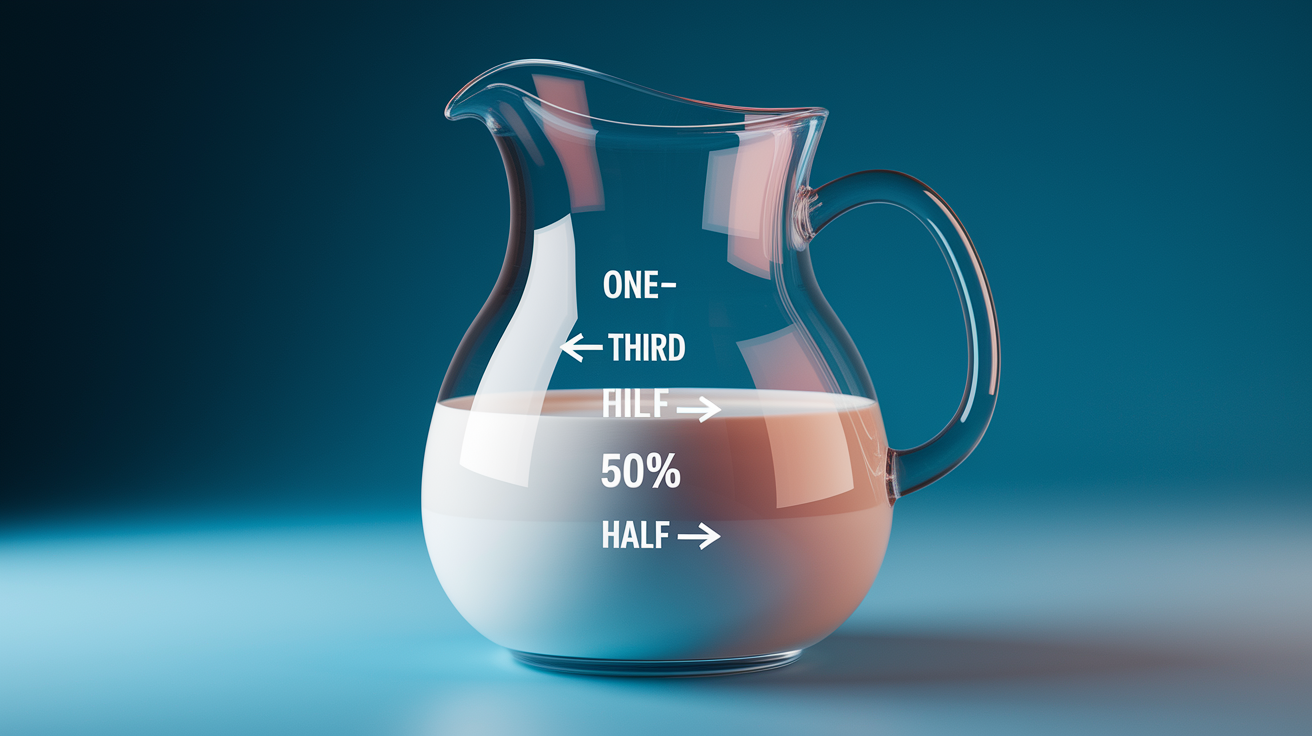
Milk expands 20–50% during steaming depending on how much air you introduce and what type of milk you’re using. Whole dairy milk reliably hits 25–35% expansion with standard microfoam technique, while skim milk can push 40–50% if you stretch aggressively. So a 200 ml pour of cold milk becomes 250–300 ml of textured milk. Filling your pitcher past halfway guarantees overflow or forces you to stop aerating early. Leave one-third of the pitcher empty when targeting latte-art microfoam (tight, glossy, barely expanded) or fill to half when making cappuccino foam with more visible bubbles and volume.
Headroom also affects your ability to create a whirlpool. The steam wand tip needs to sit just below the surface during the stretching phase, then drop slightly deeper to spin the milk and break up large bubbles. If the pitcher is too full, the wand can’t move through those positions without splashing. If it’s underfilled, the wand tip may expose above the milk line, sucking in too much air and creating a screechy mess. The one-third rule keeps you in the sweet spot. Enough milk to submerge the wand, enough space to stretch and roll.
After steaming, swirl the pitcher for 5–10 seconds and tap it gently on the counter to knock out any remaining large bubbles. This integrates the foam and milk into a uniform texture. If you’ve filled correctly and expanded within the 20–50% range, the final milk should have a glossy, paint-like consistency with no visible separation between foam and liquid.
Common fill-level mistakes to avoid:
- Filling above half and losing headroom. Milk climbs up the pitcher walls during stretching, spills over the spout, and you stop before reaching target temperature.
- Underfilling below one-quarter. Steam wand tip breaks the surface too easily, screeching and creating large, dry bubbles instead of microfoam.
- Ignoring pitcher size and pouring the same 200 ml into a 32 oz pitcher. Milk sits too shallow, whirlpool formation weakens, and texture becomes uneven.
Spout and Lip Design: How Shape Influences Pour Control

Spout shape determines how milk exits the pitcher and how much control you have over flow speed and width. A narrow, pointed spout funnels milk into a thin, precise stream that’s essential for fine latte art. Rosettas, tulips, swans, where you need to draw delicate lines and control exactly where foam lands. The tapered geometry also lets you slow the pour to a trickle without breaking the stream, which is critical when finishing intricate patterns. Narrow spouts demand more wrist control and are less forgiving if your pouring angle drifts.
Wide, rounded spouts pour faster and produce a broader milk stream. They’re easier for beginners learning basic hearts or simple rosettas because the flow is more stable and forgiving. Small angle changes don’t immediately ruin the pattern. If you’re steaming for cappuccinos or drinks where speed matters more than detail, a wide spout gets milk into the cup quickly and reduces the risk of the pitcher cooling mid-pour. The trade-off is less precision. You won’t draw the sharp lines that competition baristas rely on.
Narrow vs Wide Spouts for Art Styles
Narrow spouts suit traditional rosettas, layered tulips, swans, and any pattern that requires changing pour speed or drawing fine contrast lines. Baristas working on advanced free-pour designs or etching almost always choose a sharp-tipped spout for the control it offers. Wide spouts excel at hearts, simple waves, and speed-focused pouring. Common in high-volume café settings or home setups where consistency and ease outweigh artistic complexity. Hybrid spouts with a slightly tapered but not razor-sharp lip offer a middle ground, handling both basic and intermediate patterns without forcing you to switch pitchers. Lip thickness also matters: thin, beveled edges produce sharper flow separation and cleaner pattern definition, while thicker rolled lips create a softer, more rounded stream.
Pitcher Material, Thickness, and Construction for Home Espresso

Stainless steel 18/8 or 18/10 (304 grade) is the standard material for milk pitchers because it’s durable, non-reactive, and easy to clean. The numbers refer to chromium and nickel content. 18/10 has slightly more nickel, which improves corrosion resistance and gives a shinier finish, but both perform nearly identically in daily use. Interior polish matters more than you’d expect: a smooth, mirror-finished inside helps microfoam slide cleanly and makes rinsing faster. Rough or brushed interiors can trap milk protein and create uneven texture during steaming.
Wall thickness typically ranges from 0.6 mm to 1.0 mm. Thicker walls near 1.0 mm retain heat better, feel more solid in hand, and resist denting if you knock the pitcher on the counter. Thinner walls around 0.6 mm heat up faster, useful if you want tactile feedback from the pitcher’s exterior to gauge milk temperature, but they flex slightly under pressure and dent more easily. For home use, 0.8–1.0 mm strikes the best balance between heat retention, rigidity, and weight.
Double-wall or insulated pitchers sandwich an air gap or vacuum layer between inner and outer shells. They keep milk hotter longer, which helps if you’re pouring multiple drinks or your workflow is slow. The downside is reduced tactile feedback. You can’t feel temperature rise through the pitcher wall, so you’ll rely entirely on a thermometer or timing. Single-wall pitchers give direct heat feedback, letting experienced baristas steam by touch once they’ve dialed in their technique. For beginners still learning temperature control, single-wall plus a clip-on thermometer is the safer choice.
| Material | Pros | Cons |
|---|---|---|
| Single-wall stainless (0.8–1.0 mm) | Direct heat feedback, lightweight, easy to clean, affordable | Cools faster, exterior gets hot to touch |
| Double-wall insulated | Retains heat longer, exterior stays cool, good for slow pours | No tactile temperature cues, heavier, higher cost |
| Thin-wall stainless (~0.6 mm) | Heats quickly, lighter weight, budget-friendly | Dents easily, less stable heat retention, flexes under pressure |
Ergonomics, Handle Design, and Pitcher Shape for Better Milk Steaming

A comfortable handle changes how confidently you steam and pour. Look for a handle that allows at least two fingers to fit underneath with enough clearance that your knuckles don’t scrape the pitcher body. Your thumb should rest naturally on the rim or upper handle, giving you leverage to tilt the pitcher smoothly during the pour. Handles that are too narrow or too close to the body force an awkward grip and cause hand fatigue, especially during back-to-back steaming sessions.
Pitcher shape affects both whirlpool formation and pour control. A wide base creates more surface area for the steam wand to spin the milk, producing an even, vigorous whirlpool that breaks up bubbles and integrates microfoam. Narrow-necked pitchers taper toward the spout, focusing the milk flow and giving you finer control during the pour. Ideal for latte art. Wider-bodied pitchers pour faster and are easier to steam large volumes in, but require more wrist strength to control the stream. Balance matters too: a well-designed pitcher feels stable when you tilt it to pouring angle, not top-heavy or prone to tipping.
Ergonomic must-haves for home steaming:
- Two-finger handle clearance to avoid knuckle contact and improve grip security
- Thumb rest on the rim or upper handle curve for precise tilt control during pouring
- Wide enough base (at least 3 inches / 7.5 cm diameter) to support a strong whirlpool with home steam wand pressure
- Balanced weight distribution so the pitcher doesn’t feel nose-heavy when half-full or back-heavy when you lift it by the handle
Pitcher Size Effects on Steaming Technique: Small vs Large Pitchers

Small pitchers like 12 oz demand tighter wand placement and faster reaction times. The milk volume heats quickly, often reaching 55–65°C (130–150°F) in 15–25 seconds, so you have a narrow window to stretch and texture before overshooting target temperature. Position the steam wand tip 0.5–1.0 cm below the surface, stretch for 3–4 seconds, then drop the tip slightly deeper to spin the milk and finish heating. Because there’s less thermal mass, small pitchers are less forgiving if you introduce too much air or lose the whirlpool angle.
Large pitchers (24–32 oz) give you more time and thermal stability. The greater milk volume takes 30–50 seconds to reach serving temperature, which means you can stretch for 5–6 seconds and still have plenty of time to texture and integrate. The downside is that a weak whirlpool in a large pitcher leaves cold spots. Milk near the walls heats unevenly, and you end up with separated foam. You’ll also need to hold the pitcher at a steeper angle during stretching to keep the wand tip properly submerged without splashing.
Medium pitchers (20 oz) balance these extremes. They heat in 20–35 seconds, give you a comfortable stretch phase, and create a reliable whirlpool with standard home steam-wand pressure. The timing feels natural: stretch until you hear the paper-tearing hiss fade, then let the whirlpool spin and heat the milk to temp. Most home baristas find their technique stabilizes fastest with a 20 oz pitcher because mistakes are visible but not instant disasters.
Practical adjustments when switching pitcher sizes:
- In a 12 oz pitcher, shorten your stretching phase to 3–4 seconds and monitor temperature closely. You’ll hit 60°C faster than you expect.
- In a 32 oz pitcher, extend stretching to 5–6 seconds and confirm the whirlpool is vigorous before moving to the texturing phase. Weak spin leaves clumps of foam.
- Keep wand-tip depth consistent across sizes (start 0.5–1.0 cm below surface), but adjust pitcher tilt more aggressively in larger pitchers to maintain proper aeration without splashing.
Plant-Based Milk Steaming: How Pitcher Size Choice Affects Results
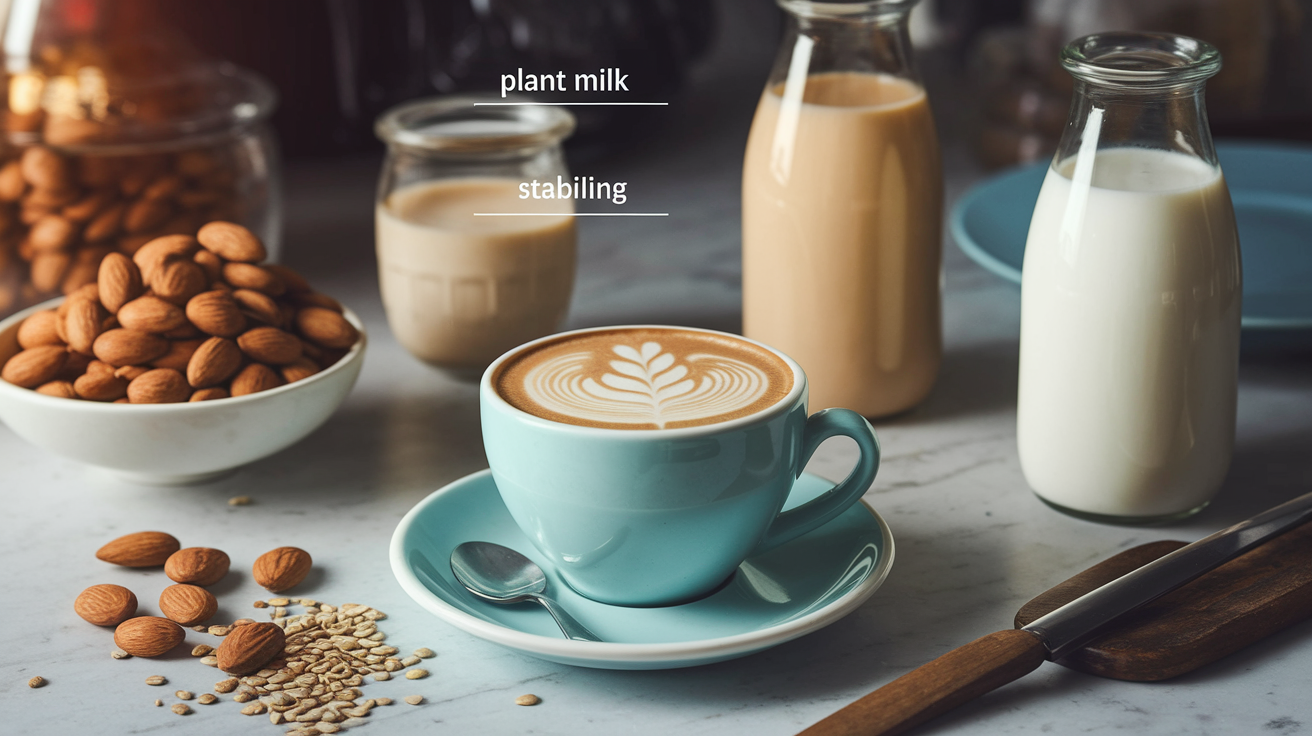
Plant-based milks (oat, almond, soy) steam differently than dairy because their protein and fat structures don’t stabilize foam as reliably. Oat milk is the most forgiving. It stretches and holds microfoam nearly as well as whole dairy milk, but it’s more sensitive to overheating and can separate if you push past 65°C. Almond milk struggles to hold foam. Bubbles collapse quickly, so you need to pour almost immediately after steaming. Soy milk can create decent foam but curdles if introduced to steam too aggressively or heated above 60°C.
Pitcher size matters because plant-based milks benefit from extra headroom and controlled stretching. Fill to one-third capacity or slightly less to give yourself room for aeration without forcing the issue. A 12 oz pitcher works well for single oat-milk lattes, but underfill slightly (to about 100 ml instead of 120 ml) so you can stretch gently and avoid over-aerating. For almond or soy milk, a 20 oz pitcher filled to just 150–200 ml gives you the space to introduce air slowly and assess foam stability before committing to a full drink.
Because foam collapses faster, steaming plant-based milk in oversized pitchers (32 oz with only 200 ml milk) creates problems. Too much surface area, weak whirlpool, and uneven heating. Stick to pitcher sizes where your target volume sits near the one-third mark, and pour immediately after texturing. Letting plant-based milk sit even 10–15 seconds can visibly degrade foam quality.
Quick comparison of common plant-based milks and pitcher strategy:
- Oat milk: stable foam, handles standard 20 oz pitcher steaming. Fill to one-third, stretch 3–5 seconds, aim for 60–65°C, pour within 10 seconds of finishing.
- Almond milk: weak foam retention. Use smaller pitcher (12–16 oz) to reduce volume and pour immediately. Avoid overheating past 55°C.
- Soy milk: moderate foam, risk of curdling. Fill to one-quarter of pitcher, introduce steam gently, keep below 60°C, pour quickly.
- Coconut milk (barista-style): light foam, quick collapse. Fill 12 oz pitcher to around 80 ml, stretch minimally, serve within seconds.
Cleaning, Maintenance, and Longevity Tips for Milk Pitchers

Rinse your pitcher with cold water immediately after pouring. Ideally below 20°C, to stop milk proteins from bonding to the stainless steel. Hot water sets proteins and makes scrubbing harder later. A quick cold rinse, a wipe with a soft cloth, and a second rinse removes most residue before it becomes a problem. If you’re steaming multiple drinks in a row, rinse between sessions to prevent buildup from drying on the interior surface.
For daily deep cleaning, use pH-neutral dish soap and a soft-bristle brush to scrub the spout, interior walls, and handle joints. Avoid abrasive scouring pads or steel wool. They scratch the polished interior and create microscopic grooves where milk can hide. If your pitcher develops a dull film or faint odor, soak it in a 1:1 mix of white vinegar and warm water for 10–15 minutes, then scrub and rinse. For tougher stains (common with oat or soy milk) make a paste from baking soda and a few drops of water, apply it to the stained areas, let it sit for 20 minutes, then scrub gently and rinse.
Commercial cleaners work fast for stubborn buildup. Dissolve 1 teaspoon of Cafiza (espresso machine backflush powder) in hot water, pour it into the pitcher, and let it soak for 5 minutes. Rinse thoroughly. Cafiza is alkaline and will leave a soapy taste if not fully removed. Enzymatic cleaners like Urnex Rinza target milk proteins specifically and are gentler on stainless steel. Follow the product’s dilution instructions and soak for the recommended time. Never use bleach. It corrodes stainless steel, leaves chemical residues, and can pit the interior finish.
Stain-removal techniques that work:
- Light discoloration or odor: 1:1 white vinegar and warm water, soak 10–15 minutes, scrub with soft brush, rinse.
- Scorched or blackened stains from plant milk: baking soda paste, apply, wait 20 minutes, scrub gently, rinse thoroughly.
- Persistent protein buildup: 1 tsp Cafiza in hot water, soak 5 minutes, rinse multiple times to remove all cleaner residue.
Final Words
Pick the right pitcher: 12 oz (355 ml) for single drinks with about 100–150 ml pre-steam, 20 oz (591 ml) for doubles with ~200–300 ml, and 24–32 oz (710–946 ml) when you steam for two or more.
Milk expands 20–50% during steaming. Leave headroom — about 1/3 full for latte-art microfoam, 1/2 for cappuccino — so you don’t spill and can create a strong whirlpool.
Use this milk steaming pitcher size guide for home espresso as a quick decision tool: test one size with a scale, change one thing at a time, and enjoy smoother, repeatable pours.
FAQ
Q: What size milk pitcher for espresso? How big should my milk jug be?
A: The right pitcher size depends on drinks: 12 oz (355 ml) for single-shot lattes, 20 oz (591 ml) as an all-rounder for doubles, and 24–32 oz (710–946 ml) for large or multiple drinks.
Q: How much milk to steam for 1 shot of espresso?
A: For one shot latte steam about 100–150 ml (3.5–5 oz) pre-steam; expect 20–50% expansion and leave headroom—fill roughly one-third of a 12 oz pitcher for latte art.
Q: How to choose a milk frother pitcher?
A: Choose by matching capacity to your typical drinks, pick a tapered spout for precision or wide spout for beginners, use 18/8 stainless, check wall thickness, and ensure a comfortable handle and headroom.