

Think the steam wand angle is a small detail?
It’s not. Bad angle ruins microfoam more than grind or fancy gear.
This post shows exact fixes: where the tip should sit, how to tilt the wand and pitcher, and when to switch from stretching to heating.
You get concrete cues, 0.5 to 1 cm for stretch, 10 to 25 degrees shaft angle, and the soft ripping sound to listen for.
Fix one angle, get repeatable glossy microfoam.
Understanding Common Wand Angle Errors and What They Do to Milk

Steam wand angle mistakes are the biggest reason home baristas end up with separated foam, chunky bubbles, or thin milk that won’t pour. The angle controls how the steam tip interacts with the milk’s surface and whether you get a whirlpool going inside the pitcher. When the wand sits wrong, the whirlpool dies, air gets trapped in weird pockets, and heat spreads unevenly. No amount of expensive gear fixes that.
Most angle problems come down to depth, tilt, and how long the tip stays put. A wand plunged straight down doesn’t create the rolling motion you need to fold air into smooth microfoam. A wand held too flat scrapes the bottom or pushes steam sideways into the pitcher wall, killing the vortex before it starts. Both give you the same result: milk you don’t want to pour.
The most common steam wand angle mistakes:
Wand held straight down (vertical): Kills circulation, creates big bubbles, splatters milk, heats unevenly.
Wand too horizontal or touching the pitcher wall/bottom: Scalds milk, scrapes metal, messes up airflow, destroys the whirlpool.
Tip plunged too deep from the start: Keeps air from entering. You get flat, lifeless milk with no microfoam.
Tip held at the surface too long: Adds air beyond the first 15 to 20 seconds, creating chunky foam and separated layers.
Failing to adjust depth as milk volume rises: Keeps adding air when you need heating, or loses circulation when you need texture.
Correct steam wand positioning starts with the tip 0.5 to 1 cm below the milk surface during the first 15 to 20 seconds (the stretching phase), then deepens to 1 to 2 cm for the heating phase. The wand shaft should sit at an angle of 10 to 25° from vertical, with the pitcher tilted 20 to 30° to create a steady, off-center whirlpool. Target final milk temperature is 150 to 155°F (65 to 68°C). Never exceed 160°F (71°C). For alternative milks, aim lower, around 140°F (60°C), with less air and shorter total steaming time.
Why Steam Wand Angle Problems Happen

Angle mistakes usually start with misunderstanding the two-phase steaming process. Stretching (air incorporation) happens only during the first 15 to 20 seconds, then you switch to heating and texturing for the remaining time. Total steaming takes about 30 to 45 seconds. Many baristas either skip the phase change entirely or hold the wand in one position the whole time, which is why the milk either stays flat or turns into cappuccino topping.
The other big cause is failing to track milk volume as it expands. Fresh cold milk might fill one third of your pitcher at the start, but after 10 seconds of stretching it climbs higher. If you don’t gradually lower the pitcher to keep the tip at the right depth, the wand either stays too shallow (adding unwanted air) or drifts too deep (killing the whirlpool). Keeping the same hand position for 45 seconds guarantees inconsistent results.
Common causes of angle problems:
Treating steaming as static rather than dynamic: Milk rises as it heats and aerates. The tip depth that worked at second 5 is wrong by second 25.
Holding the wand fully vertical: Stops the tangential flow needed to create a rolling vortex. Steam punches straight down instead of spinning the milk.
Ignoring pitcher tilt: A flat pitcher base and a centered wand create turbulence, not circulation. Tilt the pitcher 20 to 30° to guide the flow.
Overexposing the tip at the surface: Causes violent splattering, loud hissing, and big bubbles instead of the soft “paper-tearing” sound of controlled aeration.
Fixing the Too-Vertical Steam Wand Angle

A steam wand pointed straight down collapses the vortex before it starts. The steam hits the milk and either splashes back up toward the surface or drives straight to the bottom without creating any sideways motion. You end up with large, unstable bubbles floating on top, uneven heating (cool spots near the spout, scalding near the wand), and milk that looks foamy but pours thin. The whirlpool is what breaks bubbles down and folds air into microfoam. No roll, no texture.
The fix is simple but requires deliberate hand positioning. Tilt the wand 10 to 25° away from vertical so the tip aims slightly toward the inner wall of the pitcher, not straight down into the center. Pair that with a 20 to 30° pitcher tilt in the opposite direction to create an off-center placement. When you turn on the steam, the angled tip pushes milk toward the side, starting a clockwise or counter-clockwise roll within the first 3 to 5 seconds.
Step by step corrections for a too-vertical wand:
Start with the tip 0.5 to 1 cm below the milk surface, positioned near the side of the pitcher (not dead center).
Tilt the wand shaft 10 to 25° from vertical. Imagine the tip pointing toward “10 o’clock” or “2 o’clock” depending on your hand.
Tilt the pitcher 20 to 30° away from the wand to encourage circulation. The milk should start rolling toward the spout within a few seconds.
Lower the pitcher gradually as the milk rises so the tip moves to 1 to 2 cm depth for the heating phase (after the first 15 to 20 seconds of air introduction).
Once you see a steady whirlpool and hear a consistent rolling sound instead of violent bubbling, hold that position. The vortex will break down large bubbles and distribute heat evenly, giving you glossy, paint-like milk by the time you hit 150 to 155°F (65 to 68°C). Don’t chase perfection by moving the wand around. Stability is what creates repeatability.
Fixing the Too-Horizontal or Wall-Contact Wand Angle

When the wand sits too horizontal or the tip presses against the pitcher wall or bottom, airflow gets disrupted and the milk scalds in patches. You’ll hear metal-on-metal scraping, see irregular bursts of steam breaking the surface, and smell burnt sweetness before you even check the temperature. The vortex can’t form because the steam is either blocked by the wall or aimed sideways into dead space instead of driving circulation.
Symptoms of a too-horizontal wand angle:
Scorched or bitter milk taste, even at temperatures below 160°F.
Irregular hissing or a rattling sound as the tip vibrates against the pitcher.
Flat texture with separated liquid and foam, or patches of dense foam and watery milk.
The correction is to lift the wand slightly and re-angle it so the tip sits 1 to 2 cm off the bottom of the pitcher and doesn’t touch the side wall. Keep the shaft angled 10 to 25° from vertical and position the tip off-center, aiming it toward the inner curve of the pitcher to create tangential flow. Maintain a 20 to 30° pitcher tilt to help the steam push milk into a whirlpool rather than straight across the bottom. If you’re consistently hitting the bottom, you may be overfilling the pitcher. Leave at least 1 to 2 cm of headspace and start with milk filling only about one third of the volume.
Fixing Wand Depth Problems (Too Deep or Too Shallow)
Depth is where most baristas lose control of the stretching phase. If the tip starts too deep, no air enters the milk during the critical first 15 to 20 seconds, and you end up with hot liquid that won’t hold latte art. If the tip sits too shallow or breaks the surface too aggressively, you get violent splattering, milk spraying onto the drip tray, and large bubbles that never break down. Both mistakes share the same root cause: the wand stayed in the wrong position at the wrong time.
Too shallow usually sounds like an angry hiss or a sputtering explosion. Too deep is quieter, just a low rumble with no “paper-tearing” sound during the stretch. The milk might look shiny when you’re done, but it pours flat because there’s no incorporated air to create body. You want to hear a soft, consistent ticking or ripping noise during the first 15 to 20 seconds, which tells you the tip is intermittently breaking the surface just enough to pull air in without creating chaos.
| Depth Error | Outcome | Fix |
|---|---|---|
| Tip 2+ cm deep from the start | No air incorporation, flat milk, weak or no microfoam, poor whirlpool formation | Start at 0.5 to 1 cm depth; introduce air for first 15 to 20 seconds before deepening |
| Tip at or above surface during stretching | Loud splatter, large unstable bubbles, milk spraying, inconsistent aeration | Lower tip to just below surface (0.5 to 1 cm); tilt pitcher 20 to 30° to stabilize flow |
| Tip held at 0.5 to 1 cm for entire steaming time | Continuous air introduction, chunky stiff foam, separated layers | After 15 to 20 seconds, lower pitcher so tip sits 1 to 2 cm deeper for heating phase |
| Tip touching pitcher bottom | Scalding, metal scraping sound, broken vortex, uneven heating | Lift wand so tip clears bottom by 1 to 2 cm; maintain off-center placement |
| Depth not adjusted as milk rises | Unwanted late aeration or loss of circulation mid-steam | Gradually lower pitcher to track milk expansion and maintain target depth |
Start every steam session with the tip 0.5 to 1 cm below the surface, positioned off-center. Introduce air only for the first 15 to 20 seconds. Listen for that gentle ripping sound. Then lower the pitcher so the tip drops to 1 to 2 cm depth for the heating phase, maintaining the same 10 to 25° wand angle and 20 to 30° pitcher tilt. Stop steaming when the milk reaches 150 to 155°F (65 to 68°C). Carryover heat will bring it up a few degrees more. For alternative milks, target around 140°F (60°C) and shorten the stretch phase slightly since proteins and fats behave differently.
Adjusting Steam Wand Angles for Different Pitcher Sizes

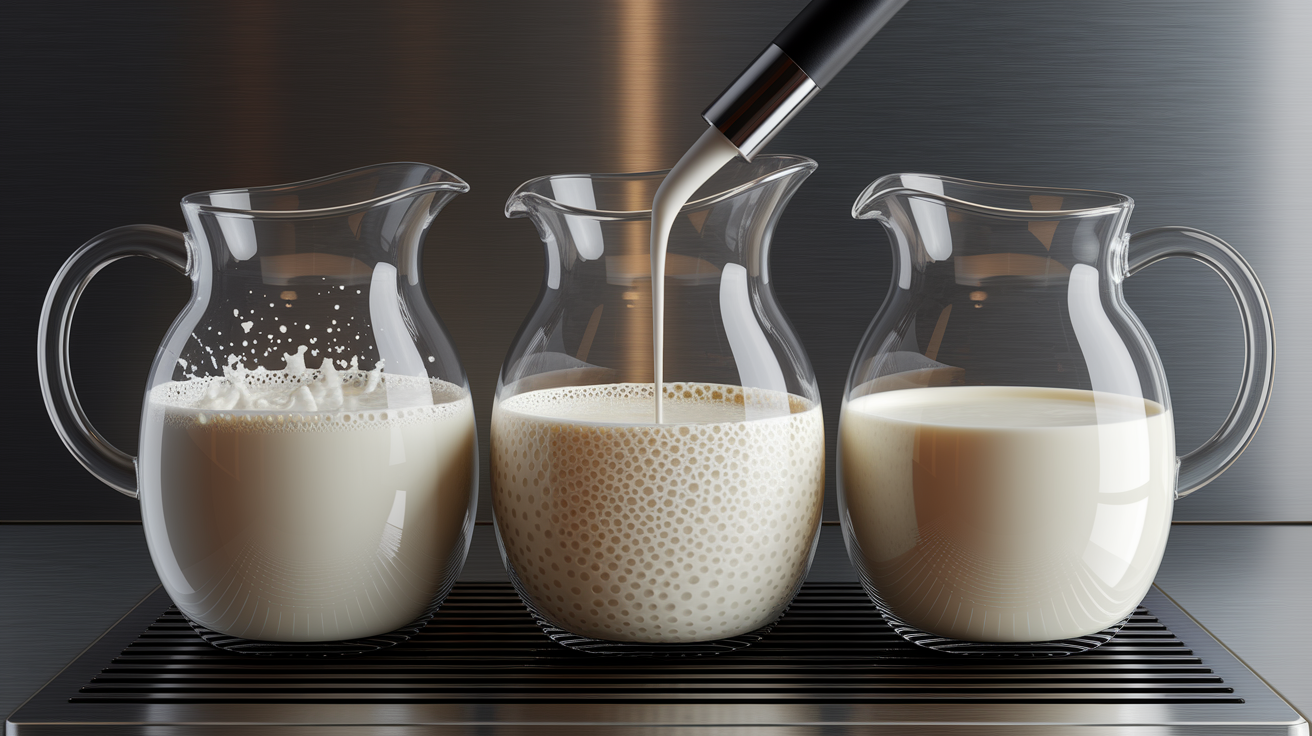
Pitcher size changes how quickly the vortex forms and how deep the tip needs to sit to maintain circulation. A small 12 oz (350 ml) pitcher filled one third full gives you maybe 4 oz (120 ml) of starting milk. The tip only needs to move a centimeter or two during the entire steam. A large 32 oz (950 ml) pitcher half-filled with 16 oz (470 ml) of milk expands much more and requires a stronger, more deliberate tilt and angle to keep the whirlpool stable.
Smaller pitchers are less forgiving. The milk heats faster, the margin between “perfect stretch” and “over-aerated” shrinks to a few seconds, and the tip can drift into the wrong zone with a tiny hand movement. You’ll often need to hold the wand slightly more vertical (closer to 15° than 25°) but still off-center, and tilt the pitcher closer to 20° to avoid overwhelming the smaller volume. Larger pitchers need more aggressive tilt (up to 30°), a more pronounced off-center placement, and sometimes a slightly deeper starting position to drive enough steam through the greater mass of milk.
Pitcher-size adjustments:
8 to 12 oz (250 to 350 ml) pitchers: Use 20° pitcher tilt, 15° to 20° wand angle. Start tip at 0.5 cm depth. Total steam time often 25 to 35 seconds. Target 140 to 145°F (60 to 63°C) for small drinks.
12 to 20 oz (350 to 600 ml) pitchers (standard latte size): Use 20° to 25° pitcher tilt, 10° to 20° wand angle. Start tip at 0.5 to 1 cm. Stretch 15 to 20 seconds, total time 30 to 40 seconds. Target 150°F (65°C).
20 to 32 oz (600 to 950 ml) pitchers (large drinks or multiple servings): Use 25° to 30° pitcher tilt, 15° to 25° wand angle. Start tip at 1 cm depth and deepen to 2 cm for heating. Stretch 18 to 20 seconds, total time 40 to 45 seconds. Target up to 155°F (68°C).
Overfilled pitchers (any size): Leave at least 1 to 2 cm headspace for expansion. Overfilling kills your ability to control depth and creates spillage when the whirlpool kicks in.
Always fill the pitcher to about one third of its total volume when starting with cold milk. That gives you room for the 20 to 30% expansion during stretching and keeps the wand tip within the effective working range. If you’re regularly fighting to maintain the vortex, check your fill level first. It’s often the easiest variable to fix.
Adjusting Wand Angle for Different Milk Types

Wand angle and pitcher tilt stay mostly the same across milk types: 10 to 25° shaft angle, 20 to 30° pitcher tilt, tip starting at 0.5 to 1 cm depth. What changes is how long you stretch, how aggressively you introduce air, and what final temperature you target. Whole dairy milk has enough fat and protein to stabilize microfoam with a standard 15 to 20 second stretch and heating to 150 to 155°F (65 to 68°C). Alternative milks have different protein structures and often added stabilizers, so they foam differently and scald at lower temperatures.
Oat and soy milks typically require a slightly shorter stretch phase (12 to 15 seconds instead of 15 to 20) because their proteins denature and lose foaming ability faster. You still start at the same 0.5 to 1 cm depth, but you transition to the heating phase earlier and aim for a final temperature around 140°F (60°C) to preserve sweetness. Almond milk, which is naturally low in protein, may need a more aggressive early stretch. Keep the tip closer to the surface for the first 10 to 12 seconds to incorporate enough air before the limited proteins give up.
Milk-type adjustments:
Whole dairy milk: Standard technique. Stretch 15 to 20 seconds at 0.5 to 1 cm depth, heat to 150 to 155°F (65 to 68°C), total time 30 to 45 seconds.
Oat milk and soy milk: Shorten stretch to 12 to 15 seconds, lower final temp to around 140°F (60°C), maintain same wand angle and pitcher tilt. Some barista-blend oat milks tolerate up to 145°F.
Almond milk and other low-protein alternatives: Stretch more aggressively (tip slightly closer to surface) for first 10 to 12 seconds to build foam before proteins collapse. Target 135 to 140°F (57 to 60°C). Expect thinner body and faster breakdown.
The core positioning remains constant: off-center tip, angled wand, tilted pitcher, and a deliberate two-phase process. What you’re adjusting is timing and temperature to match the milk’s chemistry. Practice with one milk type until the angle, depth, and tilt feel automatic, then carry that muscle memory to the next type and tweak only the stretch duration and final temp.
Troubleshooting Angle-Related Steaming Symptoms

When the milk comes out wrong, the symptom usually points straight to which part of your wand positioning failed. Large bubbles that won’t break down mean the tip stayed too shallow or the angle never created a vortex. Separated foam floating on top of thin liquid means you added air for too long or the whirlpool collapsed halfway through. A scalded, burnt-sugar smell means you either exceeded 160°F (71°C) or the tip sat on the bottom and scorched a patch of milk. Weak, glossy milk with no microfoam means the tip stayed too deep and never pulled in air during the critical first 15 to 20 seconds.
Most of these problems trace back to wand angle, tip depth, or the timing of the stretch-to-heating transition. If you’re getting consistent bad results, isolate one variable per session. Steam a pitcher focused only on nailing the 10 to 25° wand angle and 20 to 30° pitcher tilt. Next session, focus only on moving from 0.5 to 1 cm depth to 1 to 2 cm depth at the 15-second mark. Then combine them. Trying to fix everything at once just adds more variables and makes it harder to track what actually worked.
Common symptom-cause pairs:
Large, chunky bubbles that persist after steaming: Tip too shallow (breaking surface too aggressively) or wand angle too vertical (no vortex to fold bubbles in). Fix: lower tip to 0.5 to 1 cm depth, tilt wand 10 to 25° off vertical, establish whirlpool within first 5 seconds.
Separated foam layer on top, watery milk below: Air introduced beyond the first 15 to 20 seconds, or no circulation to integrate foam. Fix: stop stretching after 15 to 20 seconds, deepen tip to 1 to 2 cm, confirm steady rolling motion.
Scalded, burnt, or bitter milk flavor: Temperature exceeded 160°F (71°C) or wand tip touched the pitcher bottom. Fix: stop steaming at 150 to 155°F, lift tip 1 to 2 cm off bottom, use thermometer or hand-on-pitcher test.
Flat, shiny milk with little or no microfoam: Tip too deep from the start (no air incorporation during stretch phase). Fix: start tip at 0.5 to 1 cm below surface, introduce air for full 15 to 20 seconds with gentle paper-tearing sound, then deepen.
If you correct the angle and depth but still see problems, check your steam pressure, make sure the machine is fully warmed up, and confirm the wand tip isn’t clogged or worn. Technique can only do so much if the equipment isn’t delivering consistent dry steam. But nine times out of ten, the fix is repositioning the wand and holding it steady long enough for the vortex to do its work.
Preventing Recurring Steam Wand Angle Mistakes

The best way to stop making the same angle mistakes is to build a repeatable routine and remove the guesswork. Purge the steam wand for 1 to 2 seconds into the drip tray before you insert it into the milk. Residual water dilutes foam and throws off your timing. Set your pitcher tilt to 20 to 30° and your wand angle to 10 to 25° before you turn on the steam, not after. Mark the starting position mentally or even with a tiny piece of tape on the pitcher if you’re still learning the feel.
Practice steaming with just water in the pitcher. You won’t get foam, but you’ll see the vortex form, hear the sound change as you adjust depth, and build the muscle memory for keeping the wand stable while gradually lowering the pitcher. Water is free and you can run ten reps in the time it takes to steam two pitchers of milk. Track your depth changes. Start at 0.5 to 1 cm, count to 15, then drop the pitcher so the tip sits at 1 to 2 cm. Do it until the motion feels automatic.
Preventive habits to lock in consistent angles:
Purge before and after every steam session: 1 to 2 seconds into the drip tray clears condensation and milk residue. Wipe the wand immediately after.
Set pitcher tilt and wand angle before engaging steam: Tilt pitcher 20 to 30°, position wand 10 to 25° from vertical, place tip 0.5 to 1 cm below surface, then open the valve.
Use a timer or count seconds during the stretch phase: Introduce air for exactly 15 to 20 seconds, then transition to heating. Total steaming time 30 to 45 seconds.
Lower the pitcher gradually as milk rises, not the wand: Adjust pitcher position to maintain target tip depth. Keep wand angle steady.
Stop at 150 to 155°F (65 to 68°C) and trust carryover heating: Thermometer reads lag a few degrees. Pulling early prevents scalding and preserves sweetness.
Consistency comes from repeating the same physical sequence every time. Your hands should know where to go without conscious thought: pitcher tilt, wand angle, starting depth, 15-second stretch, deepen, listen for the roll, watch the temp, stop at 150°F, purge, wipe. Lock that in and angle mistakes disappear.
When to Seek Additional Help With Wand Angle Issues
Sometimes the problem isn’t your technique. If you’ve corrected your wand angle to 10 to 25° from vertical, positioned the tip at the right depths, maintained a steady 20 to 30° pitcher tilt, and you’re still getting inconsistent results, the issue is likely equipment-related. Worn steam wand tips, clogged holes, failing steam valves, or inconsistent boiler pressure all sabotage good positioning. A rattling or vibrating wand that won’t hold steady no matter how you grip it needs mechanical attention, not more practice reps.
Check for a few clear signs that technique isn’t the limiting factor. If your machine struggles to build a vortex even with water (no milk), steam pressure is probably too low or the tip is partially blocked. If the wand hisses loudly at full steam but produces weak foam even when you follow every angle guideline, the tip holes may be worn or scaled over. If shots and steaming were consistent for months and suddenly both decline, your boiler or pressure stat may need servicing.
Signs that require a technician or equipment check:
Inconsistent steam pressure between sessions, or pressure that drops off mid-steam even with proper angle and depth.
Rattling, vibrating, or wobbly steam wand that won’t hold a stable position. Loose wand ball-joint or damaged mounting bracket.
Worn, clogged, or damaged steam wand tips that produce uneven spray patterns or whistle loudly. Replace tips per manufacturer service intervals.
Routine maintenance helps preserve the steaming technique you’ve worked to build. Backflush the group head weekly if your machine allows it, descale the boiler per the manual’s schedule, and inspect the steam wand tip every few weeks for scale buildup or worn holes. Good equipment and good technique work together. If you’ve nailed the angles and depths outlined here and the milk still isn’t cooperating, it’s time to call for service or swap out worn parts. Target temps remain 150 to 155°F (65 to 68°C) regardless of equipment age. Anything higher masks problems instead of solving them.
Final Words
Set the wand 10–25° off vertical, tip 0.5–1 cm for the first 15–20 seconds, then 1–2 cm for heating. That small change fixes most texture problems.
We showed how vertical, horizontal, and depth errors break the vortex, create big bubbles, or scald milk. We also covered pitcher and milk tweaks, timing, and simple drills to stay consistent.
If you’re facing common steam wand angle mistakes and fixes, test the angle-depth routine on your next steam — you’ll get smoother microfoam fast.
FAQ
Q: How to properly clean a steam wand?
A: The proper way to clean a steam wand is to purge, wipe with a damp cloth immediately after each use, periodically soak and brush the tip, and perform a daily deep clean or backflush per your machine instructions.
Q: Why should you purge the steam wand before each use, and how often should the milk wand be wiped?
A: You should purge the steam wand before each use and wipe it after every steam because purging clears condensed water and prevents spit, while wiping removes milk residue; wipe immediately after each use and deep clean daily.
Q: How to froth milk with a steam wand?
A: To froth milk with a steam wand, purge, place the tip 0.5–1 cm below the surface for 15–20 seconds to stretch, then drop 1–2 cm to heat with a 20–30° pitcher tilt, finishing at 150–155°F (140°F for alternatives).