

Tamping alone won’t save your espresso.
If your shot sprays or tastes uneven, the problem usually starts before you press down.
Distribution tools and tamping do different jobs: distribution evens particles and breaks clumps; tamping creates the puck’s density and resistance.
Use distribution first to level and center the dose, then tamp to make that bed repeatable.
This post shows when to prioritize WDT (needle stirring) or a rotor distributor, when a steady tamp is enough, a quick machine test you can run in under a minute, and the single tweak that fixes most channeling.
Key Workflow Differences That Define Distribution Tools vs Tamping
Distribution tools level grounds and break up clumps before water touches the coffee. Tampers compress that even bed into a stable, sealed puck. They’re working on the same coffee, just at different stages for different reasons. Distribution creates the even starting point. Tamping builds the resistance that pushes water through every particle uniformly.
The order’s fixed. Distribution first. Skip it and jump straight to tamping? You’re locking in whatever clumps and gaps the grinder left behind. Tamping won’t fix an unlevel bed. It just preserves the problem under pressure. Running the sequence backward is like trying to smooth concrete after it’s set.
Distribution reduces macro channeling by moving particles from dense zones into voids, removing static clumps, and centering the dose inside the basket. Tamping takes over once the surface is flat, applying downward force to create uniform resistance and a seal against the basket walls. Even 30 pounds of perfect tamp pressure won’t stop water from racing through a lopsided bed.
Standard puck prep sequence with timing and force targets:
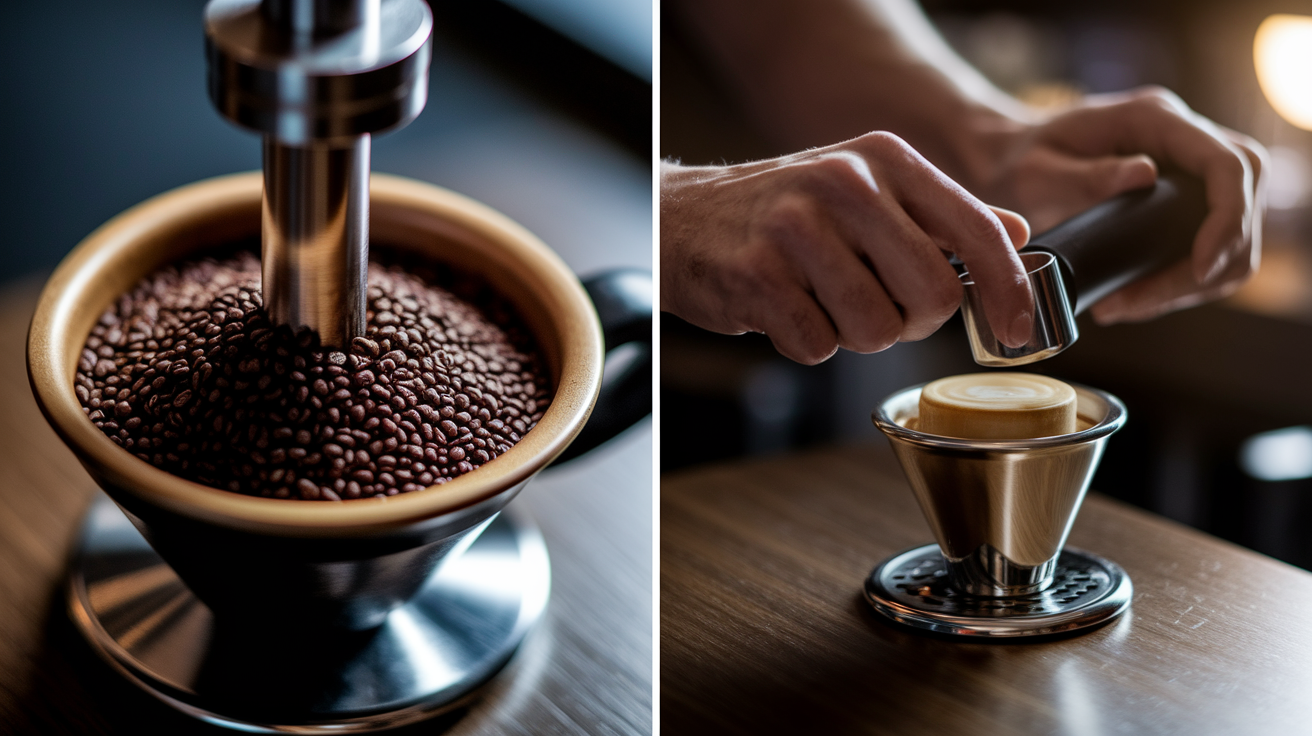
- Dose – Weigh beans, grind directly into the basket or dose cup, target ±0.1 to 0.2 g consistency.
- WDT (if clumpy) – 10 to 30 seconds using needles to stir from bottom to top, side to side. Breaks static clumps and redistributes fines.
- Distribution tool – 2 to 5 seconds with a rotor style distributor or leveling device. Smooths the surface and centers the dose.
- Settle and check – Tap the portafilter gently once or twice, inspect the bed for high or low spots.
- Tamp – Apply 20 to 30 pounds (9 to 14 kg) downward pressure, straight and level, holding for one second. No twist.
- Clean rim and brew – Wipe the basket edge, lock in, purge 1 to 2 g if needed, start the shot.
Advanced Mechanics of Distribution Tools

Distribution tools work at the particle level to reorganize density before compression. When coffee drops from the grinder, it doesn’t fall uniformly. Static causes clumping, and heavier particles settle differently than fines. A distribution tool’s job is to interrupt that natural sorting and spread density evenly across the puck’s full depth and width. WDT needles physically lift and relocate particles, creating micro scale uniformity that rotary distributors can’t reach. Rotor style tools smooth the top surface and push high spots into low spots, but they don’t move particles vertically through the column.
Needle spacing and rotational speed both affect how well a distribution tool removes voids. Needles spaced too wide miss inter particle bridges, leaving clumps intact. Too tight and they can over compact the bed before tamping. Rotary distributors rely on blade depth and spin rate. Too shallow and they skim the surface, too deep and they dig trenches along the basket edge. The goal is to rearrange particles into a uniform bed without introducing new density gradients.
| Distribution Type | Mechanical Action | Depth of Effect | Speed (seconds) |
|---|---|---|---|
| WDT (needles) | Vertical and lateral particle relocation | Full puck depth | 10–30 |
| Tapping | Gravity-based settling and minor clump collapse | Surface and mid-column | 1–2 |
| NSEW/Stockfleth | Finger sweeps push surface material into voids | Top 2–4 mm | 3–5 |
| Rotor distributor | Rotational leveling and lateral spreading | Adjustable 2–8 mm | 2–5 |
Advanced Tamping Physics and Puck Compression Behavior

Tamping collapses the void space between particles, increasing packing density and reducing permeability. When you press down, coffee particles slide into micro voids, forming a network of contact points that distributes resistance more evenly. That’s why tamping force consistency matters more than hitting an exact number. Repeatable pressure creates repeatable packing density, which keeps flow rate predictable shot to shot.
Void collapse isn’t linear. The first few pounds of pressure close the largest gaps. After about 15 to 20 pounds, additional force mostly compresses particles that are already touching, with diminishing returns on density change. That’s why 30 pound tamps and 40 pound tamps often pull nearly identical shots. You’ve already closed the voids that control flow. What changes shot quality at higher pressures is usually uneven force distribution, not the total pressure itself.
Permeability depends on pore size and connectivity. Tamping shrinks pore diameter and reduces the number of connected channels, forcing water to spread laterally before it can accelerate downward. A level tamp keeps pore size uniform across the puck. An angled tamp creates a permeability gradient. One side flows faster, the other slower, and water carves channels along the boundary. Headspace also affects compression behavior. If the puck contacts the grouphead screen, back pressure during pre infusion can crack the surface and reopen voids along the fracture line.
Common tamping mistakes and practical fixes:
- Angled tamp – Creates a sloped density gradient. Water rushes through the thin side. Fix: tamp straight down, check your wrist angle, use a level indicating tamper base.
- Twisting after compression – Introduces radial shear forces that loosen edge contact. Fix: press, hold one second, lift straight up without rotating.
- Inconsistent pressure shot to shot – Leads to variable flow rates and unpredictable timing. Fix: use a calibrated tamper (20 to 30 lb spring loaded) or practice matching pressure against a bathroom scale.
- Insufficient headspace – Puck contacts the screen and cracks during pre infusion. Fix: reduce dose slightly or adjust distributor depth to leave 2 to 4 mm clearance.
- Tamping on an unlevel surface – Basket sits crooked in the portafilter, creating an off center seal. Fix: tamp with the portafilter resting flat on the counter or in a stable tamp stand.
Condensed Comparison of Distribution vs Tamping
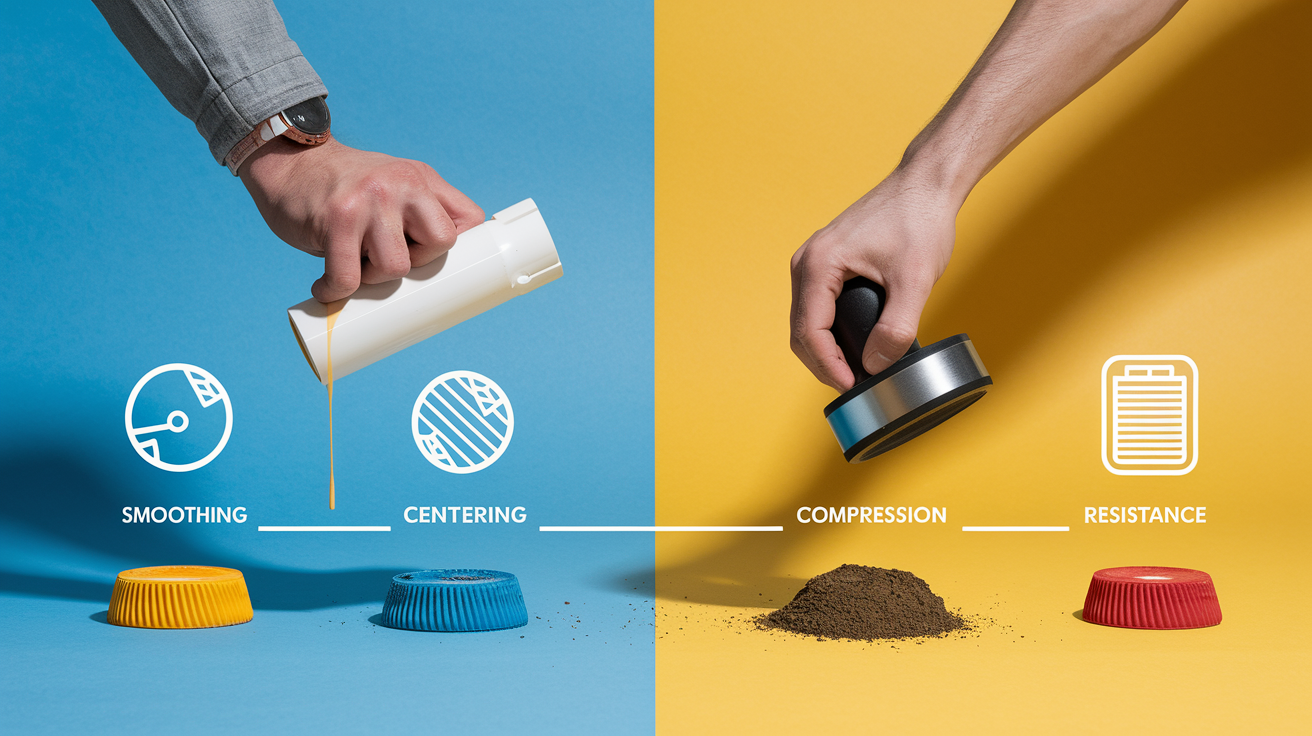
Distribution controls particle arrangement before compression. Tamping controls density and resistance after the bed is level. Both affect extraction, but they work on different variables at different moments. Distribution reduces the range of local density variation. Fewer clumps, fewer voids, more uniform starting conditions. Tamping sets the average density and creates the puck’s resistance profile, which determines flow rate and pressure drop.
Bottomless portafilter tests show the difference visually. Poor distribution produces fast jets and slow drips from the same puck. Channeling you can see in real time. Poor tamping (but good distribution) usually shows even flow with inconsistent timing or weak crema, because the resistance isn’t repeatable. When both are dialed, you get a smooth, centered stream that darkens evenly and holds together until the cup is full.
| Variable | Distribution Influence | Tamping Influence |
|---|---|---|
| Channeling risk | High—fixes clumps and voids that create fast paths | Moderate—levelness prevents edge bypass |
| Flow rate consistency | Moderate—evens starting resistance across puck | High—sets total resistance and repeatable density |
| Crema quality | Low—minor effect unless severe clumping blocks CO₂ | High—compression releases dissolved gas, stabilizes foam |
| Extraction uniformity | High—reduces under/over-extraction in different zones | Moderate—supports even contact time if bed is level |
| Repeatability | Moderate—depends on grinder consistency and static | High—calibrated tampers eliminate pressure variance |
Distribution fixes the problems tamping can’t reach. Tamping makes distribution repeatable. Together, they turn a loose pile of grounds into a stable extraction bed.
Scenarios: When Distribution Tools Matter More Than Tamping

Distribution becomes the dominant variable when the grinder or the coffee creates density problems that tamping alone can’t fix. If your shots channel even when the tamp is level and consistent, the issue is almost always in the particle bed before compression.
Situations where distribution has the strongest impact:
- High dose baskets (18 to 22 g) – Deeper beds amplify clumping and create more vertical variance. WDT or rotor distribution is essential to reach the bottom layer.
- Light roasts and single origin coffees – These beans are denser, harder to grind uniformly, and more prone to channeling. Distribution improves extraction yield and unlocks more flavor complexity.
- Fresh, oily, or static heavy beans – Roasts less than 7 to 10 days off often clump aggressively. WDT breaks those clumps and prevents them from turning into dense plugs.
- Grinders with high retention or popcorning – When old grounds mix with fresh, particle size distribution gets chaotic. Distribution tools help homogenize the mix before tamping locks it in.
- Bottomless portafilter diagnostics – If you see spraying, multiple streams, or uneven darkening, poor distribution is the usual suspect. Improve leveling before adjusting grind or tamp.
- Wide 58 mm baskets – Larger diameters increase the chance of edge gaps and uneven settling. Distribution tools center the dose and smooth the perimeter better than finger leveling.
Scenarios: When Tamping Has the Stronger Influence

Tamping takes the lead when the coffee bed is already reasonably uniform and the goal is to control resistance, flow rate, or shot timing. In these cases, tamp quality determines whether the puck holds together and extracts predictably.
Low dose single shots (7 to 11 g) in smaller baskets don’t have enough depth for clumping to dominate. A quick finger level or light tap is often enough distribution, but tamp pressure and levelness become critical. If the tamp is angled or too light, water finds the thin edge and rushes through. Too heavy or uneven? You get a tight center and a loose perimeter, which also channels.
Ristretto style extractions with very fine grinds rely on precise resistance control. When grind size is already pushing the upper limit of what your machine can handle, an extra half pound of tamp pressure can tip the shot from slow perfection to full choke. Calibrated tampers help keep that fine margin repeatable, especially across multiple baristas or when fatigue sets in during high volume service.
Tamping first scenarios:
- Small single dose baskets (7 to 11 g in 49 to 53 mm baskets) – Shallow beds are easy to level by hand. Tamp consistency is the main variable.
- Fine grinds for ristretto or short ratio shots – Resistance is already high. Tamp pressure fine tunes flow without major distribution sensitivity.
- Consistent, low static grinders with tight particle distribution – When the grinder delivers an even bed naturally, tamping becomes the primary prep variable.
- Crema focused applications – Tamp compression releases dissolved CO₂ and stabilizes foam. Weak or inconsistent crema often traces back to tamp pressure or levelness, not distribution.
Step by Step Workflows: Distribution Only vs Distribution Then Tamp
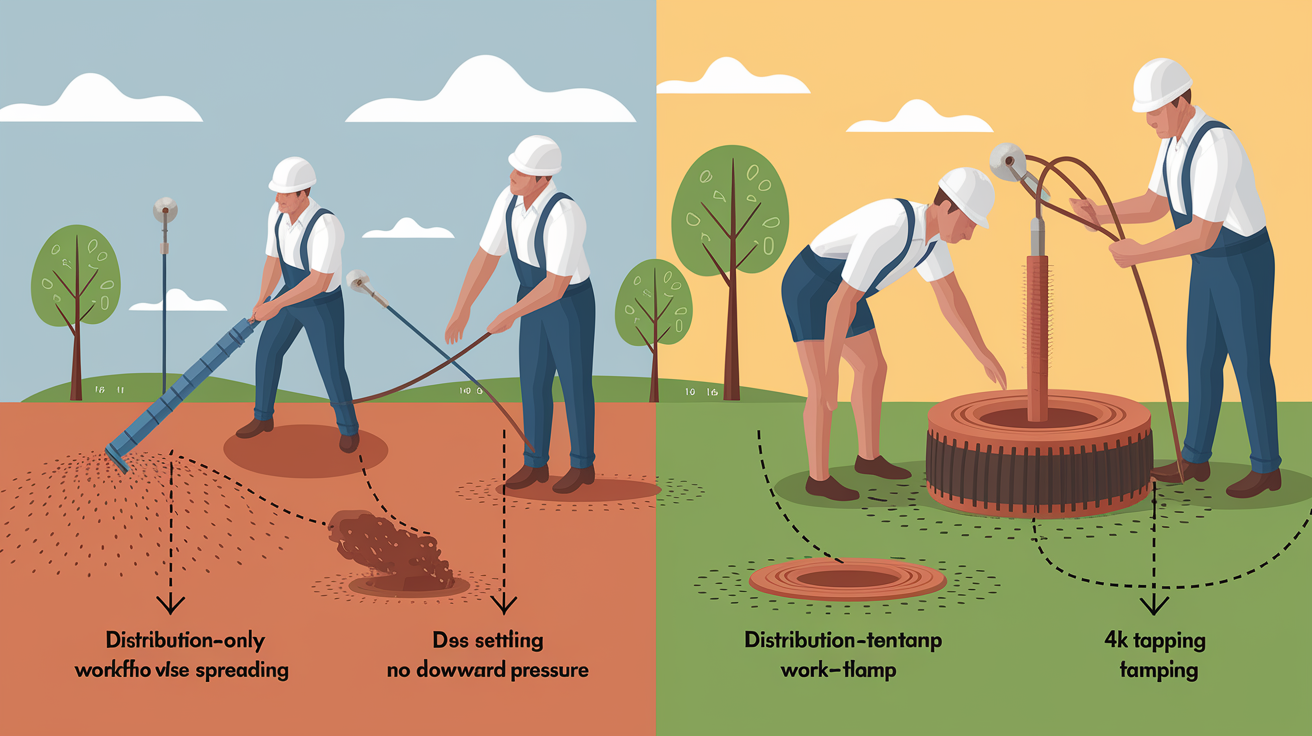
Distribution only workflows are rare, but they exist in ultra low dose or ultra coarse applications where compression isn’t needed to build sufficient resistance. You’ll see this in some single shot home setups, experimental brew ratios, or when someone is testing grind distribution without introducing tamp variables. The idea is to level and dose check without adding compression, then let the grouphead screen and pre infusion pressure do the packing.
Most real world espresso workflows combine both. The distribution then tamp sequence is standard because it separates leveling from compression, making each step easier to repeat and troubleshoot. When both happen in sequence with clear timing and force targets, shot variance drops and flavor becomes more predictable.
Distribution only workflow (5 steps, used for diagnostic or ultra low dose singles):
- Dose 7 to 10 g into a small basket, weigh to ±0.1 g.
- Tap the portafilter gently 2 to 3 times to settle grounds and collapse surface voids.
- Use finger or a flat tool to smooth and center the bed without applying downward pressure.
- Inspect visually. Surface should be flat and dose evenly spread to the basket edge.
- Lock in and brew. Monitor flow and timing to assess grind and dose settings independently of tamp.
Distribution then tamp workflow (6 steps, standard for most home and café doubles):
- Dose 16 to 20 g into the portafilter, weigh and confirm dose consistency.
- WDT for 15 to 20 seconds if grounds are clumpy. Stir vertically and laterally with needles to break all visible clumps.
- Use a rotor distributor for 3 to 4 seconds, set to a depth that just touches the top of the bed. Rotate smoothly to level the surface.
- Tap portafilter once or twice to settle any remaining loose particles and check for an even, centered bed.
- Tamp with 25 lb (around 11 kg) consistent downward pressure, straight and level, holding for one second without twisting.
- Wipe the basket rim, lock the portafilter, purge 1 to 2 g if your machine supports pre infusion, and start the shot.
Tools, Compatibility, and Sizing for Better Puck Prep
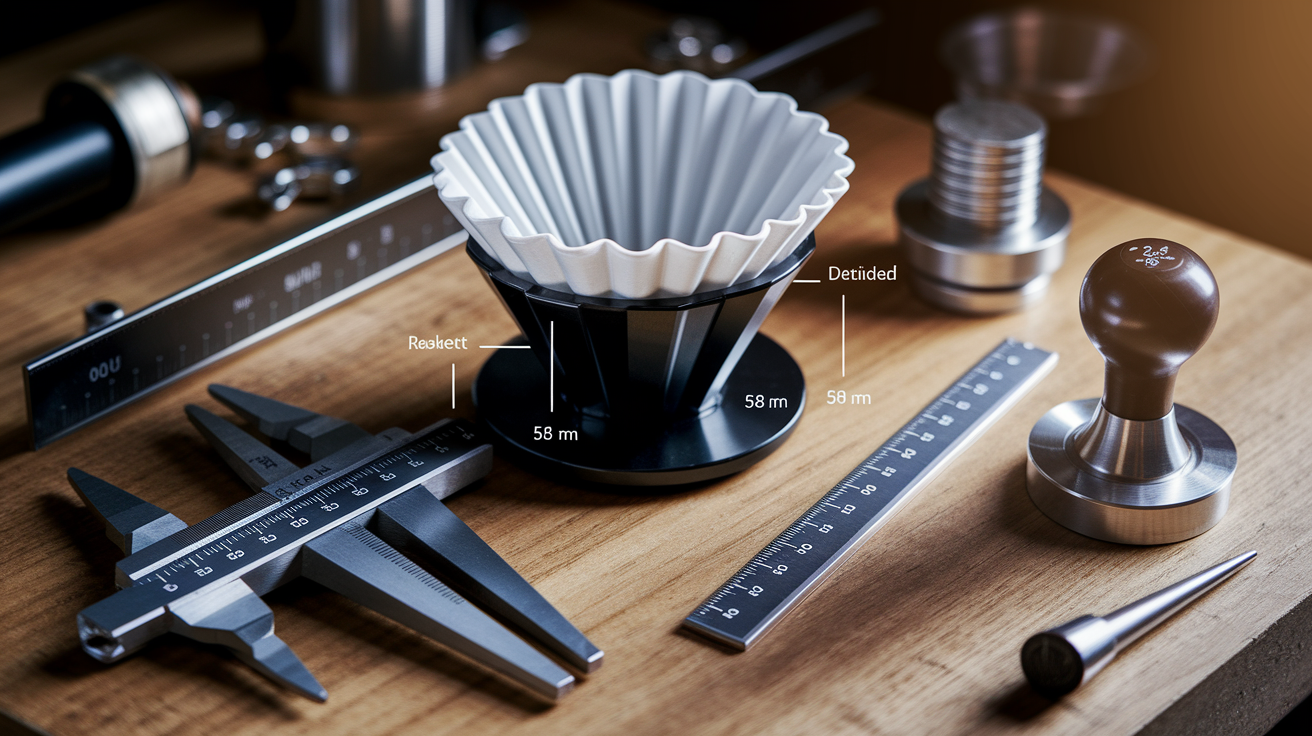
Basket diameter is the first sizing checkpoint. If your distribution tool or tamper doesn’t match the basket, you’ll either leave an untouched ring around the edge or compress the rim and miss the center. Measure your basket’s inner diameter before buying. Most tools list compatibility in millimeters, and a 0.5 mm mismatch is enough to cause problems.
Basket depth affects distribution tool performance more than tamper choice. Shallow baskets (under 20 mm) don’t need aggressive WDT because there’s less vertical space for clumping. Deeper baskets (22 to 28 mm), common in high dose or competition setups, benefit from longer WDT sessions and adjustable depth distributors. Tampers mostly care about diameter and base flatness, not depth, because they only work at the surface.
| Tool Type | Typical Sizes | Price Range | Best Use Case |
|---|---|---|---|
| WDT needle tool | 5–8 needles, 0.3–0.4 mm diameter, 50–70 mm length | Under $20 | Home use, clumpy grinds, light roasts, static heavy beans |
| Rotor/leveling distributor | 49 mm, 53 mm, 54 mm, 58 mm; adjustable depth 2–10 mm | $40–$180 | Café workflow, repeatability, surface leveling after WDT |
| Manual tamper (flat base) | 49 mm, 53 mm, 54 mm, 58 mm; 350–500 g weight | $10–$60 | Budget conscious home setups, basic compression needs |
| Calibrated tamper | Same diameters; spring loaded 20–30 lb click | $80–$300 | High volume cafés, training consistency, reducing shot variance |
Troubleshooting Prep Errors Related to Distribution and Tamping
Channeling shows up as uneven flow from a bottomless portafilter or as sour and bitter notes mixed in the same shot. Water carved a fast path through one zone and left another zone barely touched. That’s a density problem, and it traces back to either an unlevel starting bed or an angled tamp. Sometimes both.
Sour shots with normal timing usually mean water bypassed part of the puck. If your grind is right and your dose is stable, check for edge gaps, clumps that didn’t break during distribution, or a tamp that sealed one side better than the other. Bitter shots that pull too slowly can mean over compression or uneven tamping that created a dense center and loose edges. Water stalls in the middle and over extracts there while racing around the perimeter.
When a shot goes wrong, walk backward through your prep sequence and check each variable one at a time. Most prep failures come from skipping a step or rushing through distribution and tamping without confirming the bed is flat and centered.
Puck prep diagnostic checklist (6 items):
- Dose weight – Confirm you’re within ±0.2 g of your target. Inconsistent dose changes both distribution needs and tamp effectiveness.
- Grind clumping – Look for visible clumps before and after WDT. If clumps remain, increase WDT time or check grinder static/retention.
- Bed levelness – Inspect the coffee surface after distribution and before tamping. Any tilt or high spots will lock in after compression.
- Tamp angle – Check that your wrist stays neutral and the tamper base contacts the entire puck surface evenly. Use a level check if needed.
- Headspace clearance – After tamping, confirm 2 to 4 mm of space between puck surface and grouphead screen to prevent cracking.
- Basket edge cleanliness – Wipe the rim after tamping. Loose grounds on the seal can create micro channels and throw off pressure.
Final Words
Dose, WDT 15–20 seconds, distribute for 2–5 seconds, then tamp at about 20–30 lb. Do that and you’ll fix most puck problems fast.
Distribution smooths clumps and centers the bed; tamping creates uniform resistance and seals the puck. Use distribution first for light roasts, high doses, or clumpy grinds. Use firm, level tamping for small doses and fine grinds.
For a quick rule: distribution tools vs tamping when to use each — start with distribution if you see clumps or uneven flow, tamp to set resistance. You’ll get steadier shots.
FAQ
Q: Do you use a WDT tool before or after tamping?
A: A WDT tool is used before tamping. Typical sequence: dose → WDT 10–30 seconds → distributor 2–5 seconds → tamp at about 20–30 lb for consistent flow and extraction.
Q: What is the difference between a distribution tool and a tamper?
A: A distribution tool levels and breaks clumps to create an even coffee bed; a tamper compresses the grounds to form uniform resistance and seal the puck, which controls flow and extraction.
Q: Do baristas use the WDT tool?
A: Baristas do use the WDT tool, especially with clumpy grinders, light roasts, or high doses; it reduces macro‑channeling and makes shots more consistent during busy service.
Q: Is a WDT tool really necessary?
A: A WDT tool is not always necessary; it helps most with clumpy or static-heavy beans, large baskets, and high doses—run a quick A/B test to confirm better flow and taste.