

Is 30 lbs enough or do you really need 15 kg?
This confusion matters because 15 kg is about 33 pounds and most home baristas do best between 20 and 30 lb (9.1 to 13.6 kg).
Thirty pounds (13.6 kg) is a practical, repeatable target that closes air pockets without turning the puck into concrete.
Aim to stay within about 5 lb of your target and practice on a scale; repeatability will improve your shots more than chasing a higher number.
Exact Recommended Tamping Pressure Guidelines for Home Espresso (lbs and kg)
You’re looking at 20 to 30 pounds (around 9.1 to 13.6 kilograms). That’s the sweet spot for home espresso. It’s enough compression to close up air pockets and give you even water resistance across the coffee bed, but you’re not crushing the puck into concrete.
Most training advice lands on 30 pounds (13.6 kg) as the go-to number. It’s comfortable, repeatable, and most people can hit it without straining. Drop below 15 pounds (6.8 kg) and things start falling apart. You’ll see more channeling, uneven flow, and shots that taste all over the place. Tests comparing 30 lb, 25 lb, 20 lb, and 15 lb showed tasters could pick up differences, but there wasn’t one magic number that worked perfectly for every coffee.
What really matters is staying consistent. If you can keep your tamp within about ±5 pounds (roughly ±2.3 kg) of wherever you land in that 20 to 30 range, you’re doing fine. Someone who reliably tamps at 28 lb will get better shots than someone bouncing between 20 and 35. Once you’ve locked in a repeatable force, you can stop obsessing over tamp and focus on grind and distribution, which actually move the needle more.
| Pressure in lbs | Equivalent in kg |
|---|---|
| 15 lb | ≈6.8 kg |
| 20 lb | ≈9.1 kg |
| 25 lb | ≈11.3 kg |
| 30 lb | ≈13.6 kg |
Why Tamping Pressure Influences Espresso Extraction

Tamping clears out the air pockets and squeezes the coffee bed so water can’t just blast through the easiest path. When you’ve got even resistance across the whole puck, 9 bars of pump pressure hits the coffee uniformly. That gives you controlled extraction. Sugars and acids dissolve first, then you stop before the bitter stuff takes over.
Too soft and you’ll leave voids. Water finds those gaps and sprints through them. You get spurting if you’re using a bottomless portafilter, fast flow overall, and a pale shot that tastes sour or grassy. Too hard and you choke the bed. Flow crawls, contact time stretches way past where it should, and you end up with dark, bitter espresso that sits heavy on the tongue. Uneven pressure, one side firm and the other side weak, gives you a mix of under and over extraction in the same cup. Flavor gets muddy and nothing comes through clearly.
Here’s what goes wrong when tamp pressure isn’t right:
- Spurting or jetting from specific spots on a naked portafilter
- Rapid blonding, where pale color shows up before you hit target yield
- Weak crema with big bubbles that pop right away
- Flow rate jumping around shot to shot even when grind settings don’t change
- One side of the puck flowing faster than the other (check wetness when you knock it out)
- Sour, watery taste paired with a fast extraction time, something under 20 seconds for a standard 1:2 ratio
Practical Techniques for Achieving Consistent Tamping Pressure

Start with where your body is. Stand or sit so your forearm can drop straight down into the portafilter without bending your wrist sideways. Keep your elbow, wrist, and tamper handle lined up. Let gravity and a controlled push from your shoulder do the work. Don’t lean your whole body weight onto the tamp and don’t twist your wrist. Those movements make it nearly impossible to repeat the same pressure every time. When the tamper lands flat and your arm stays aligned, you’ll feel a natural stopping point as the coffee bed pushes back.
Press straight down once the tamper makes full contact with the coffee. No twisting. Twisting when you lift can pull grounds away from the basket wall and crack the seal you just made, leaving gaps for water to sneak through. Full surface contact means the entire base of the tamper touches the entire coffee bed at the same instant. Your tamper diameter needs to match your basket. A 58 mm tamper for a 58 mm basket, a 54 mm tamper for a 54 mm basket. Even a half millimeter gap at the edge lets water slip past coffee that never gets extracted.
Distribution and a level tamp work as a pair. Before you tamp, the coffee bed needs to be flat and clump free. No pile in the center, no empty spots at the rim. A level tamp on an uneven bed will compress the high spots more than the low spots, and you end up with layers of different density. Flow becomes unpredictable and extraction time drifts even when grind size and dose stay locked. Level the grounds first, then apply your force smoothly and lift straight up.
Tools That Help Home Baristas Control Tamping Pressure
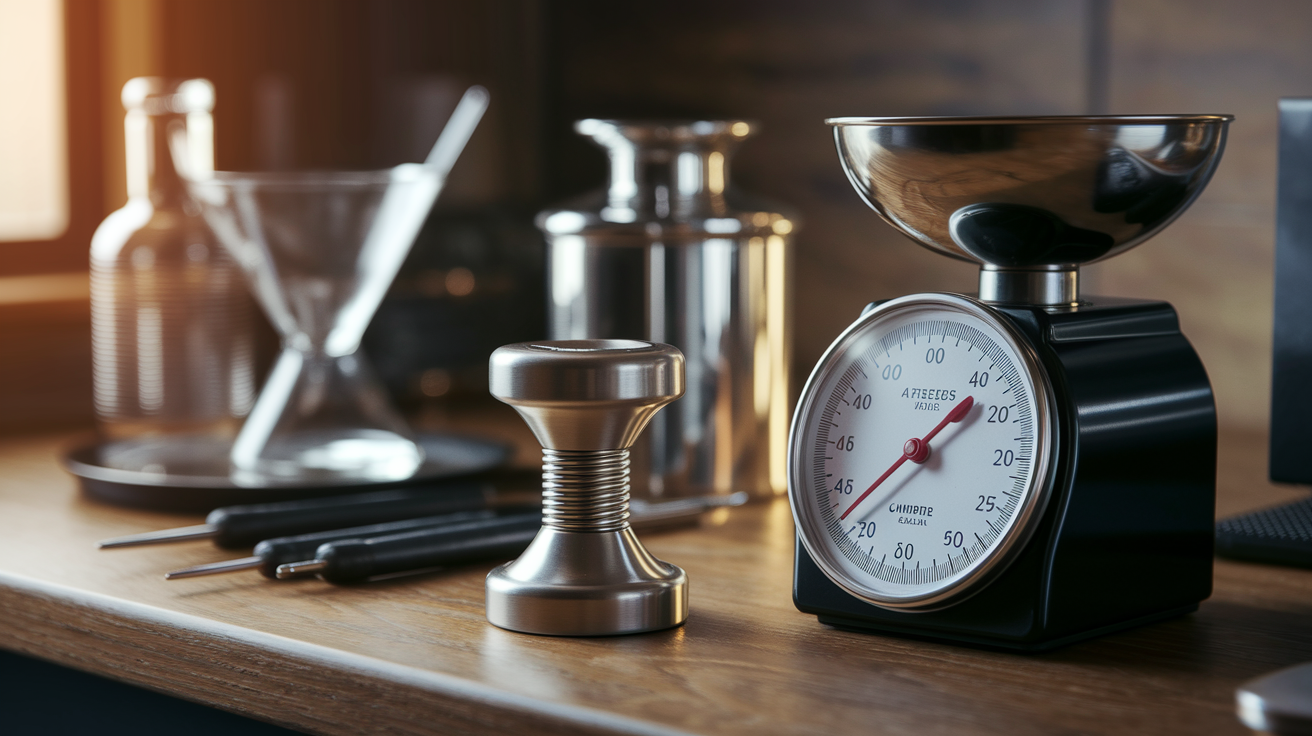
Calibrated tampers click or stop when you hit a preset force, usually adjustable in 5 lb steps. Spring loaded or mechanical click tampers take the guesswork out for anyone still learning what 30 pounds (13.6 kg) feels like. They’re especially useful when you’re training yourself to hold consistent force during a busy weekend or a back to back session.
Tamper material, weight, and base shape all change how easy it is to use and how good the puck looks. A heavier tamper, something around 400 to 500 grams, needs less push because the tool’s own weight does part of the job. Bases made from 316 grade stainless steel resist corrosion and give you a rigid, flat contact surface. A 90 degree edge where the tamper base meets the side wall gives you clean compression all the way to the basket perimeter. Handles that fit your hand comfortably cut down on wrist strain and make it easier to press straight without twisting. Matching the tamper diameter precisely to your basket, within 0.1 mm tolerance for precision baskets, stops edge channeling and tightens up shot consistency.
Tools and tool types worth grabbing:
- Calibrated spring or click tampers set to 30 lb / 13.6 kg
- Bathroom or kitchen scale for freehand practice and force checks
- Tamping mats or stations that hold the portafilter steady and protect your counter
- Weighted tampers at least 400 g with flat, polished stainless steel bases
- Distribution tools like WDT needles or levelers, used before tamping to even out the coffee bed
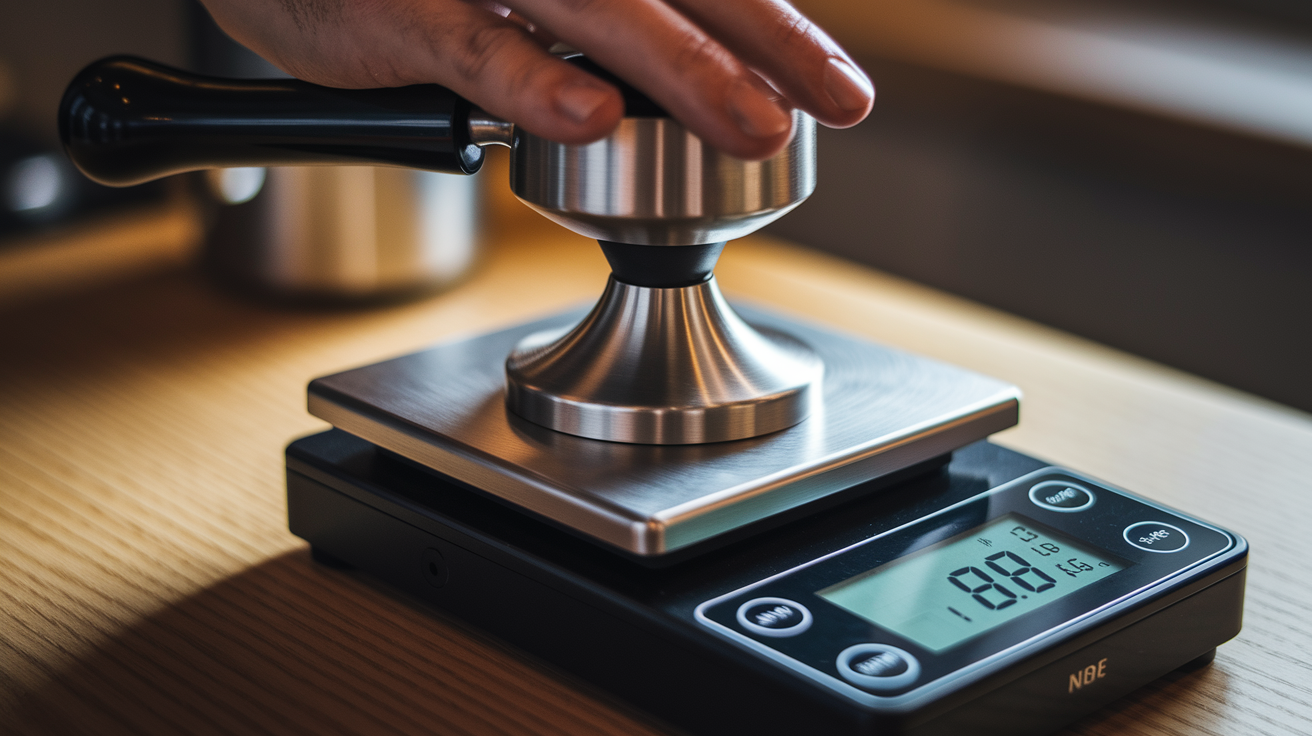
How to Measure and Practice Tamping Pressure at Home (lbs ↔ kg)
The easiest way to learn and check your tamp force is the bathroom scale trick. Put your portafilter basket side down on a digital scale, zero it out, then tamp like you normally would. The scale shows the force in pounds or kilograms. Practice pressing until the scale reads 30 lb (13.6 kg), hold for one second, then lift. Do this ten times in a row and check the reading after each tamp. When you can hit 28 to 32 lb without thinking about it, you’ve built the muscle memory. Use the same move during real shot prep and re-check your force on the scale every week or two to make sure you haven’t drifted.
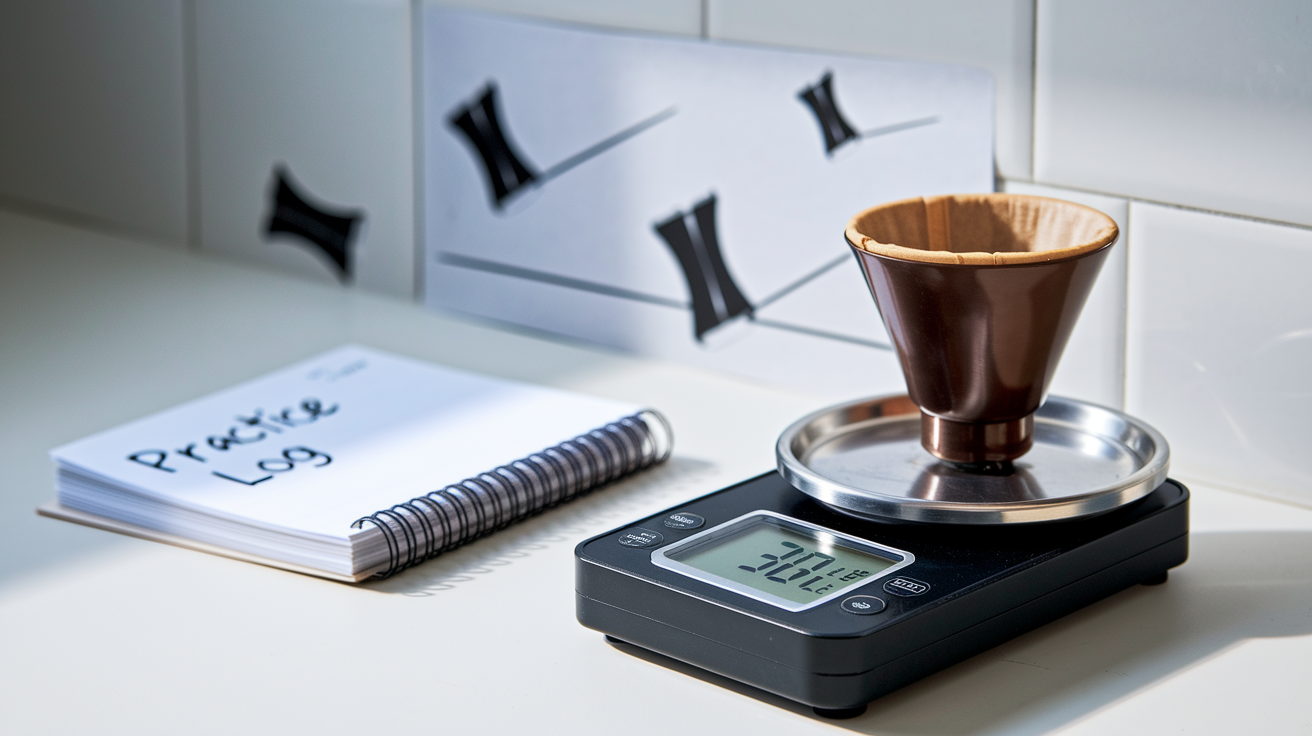
Calibrated tampers with built in pressure readouts or click feedback give you live confirmation without interrupting your rhythm with a separate scale. Set the tamper to your target force, tamp until you feel or hear the click, then stop. This keeps your workflow smooth and quick. Log your tamp force in your espresso notes next to dose, grind setting, yield, and time. Tracking these together shows you whether inconsistent shots come from tamp variation or something else like stale beans or temperature swings.
Four steps for a repeatable practice routine:
- Zero a bathroom scale, place the loaded portafilter on it basket down, and tamp while you watch the reading climb to 30 lb (13.6 kg).
- Record peak force for five straight practice tamps and calculate your average to see how much you vary. Aim for a range under 5 lb.
- Practice tamping without the scale, then check yourself on the scale after every tenth shot to confirm your muscle memory is holding.
- Adjust your wrist position or push style when you notice drift, and re-train with another set of scale monitored tamps until consistency comes back.
Tamping Pressure Variations for Different Beans, Roasts, and Environments

Roast level and humidity change puck resistance, which means tamp pressure might need a slight tweak to keep flow rate and extraction time stable. Lighter roasts are denser and harder, so they resist water more than darker roasts even at the same grind size. High humidity softens coffee structure and makes grounds clump, bumping up resistance. Low humidity makes grounds fluffier and easier to compress. In every case, the move is to dial grind first, then confirm your tamp is still landing in the 20 to 30 lb range and giving you a level puck.
Tests comparing tamp pressures across different coffees found that no single force worked perfectly for every bean. Tasting panels noticed differences when pressure changed, but which pressure they preferred depended on origin, roast profile, and grind setting. Oily dark roasts and decaf beans, which tend to be softer and more fragile, channel more easily with light tamps below 20 lb. Dense light roasts can handle, and sometimes do better with, firmer pressure near 30 lb. Consistency still wins. Pick a force inside the recommended range, then adjust grind size and dose to dial in flavor instead of hunting for a new tamp number every time you open a fresh bag.
Practical tips for adjusting tamp pressure when conditions change:
- For light roasts or high altitude beans, confirm you’re tamping at least 25 to 30 lb (11.3 to 13.6 kg) to match the coffee’s natural density.
- In humid environments, check that clumps are broken before tamping. If channeling keeps happening despite good distribution, try bumping tamp force by 3 to 5 lb.
- For dark roasts or decaf, stay closer to 20 to 25 lb (9.1 to 11.3 kg) and watch for slow flow. Drop force a bit if extraction stretches past 35 seconds.
- When you switch bean origins mid session, re-check tamp force with a scale or calibrated tamper instead of assuming your muscle memory adapted on its own.
- If shots get inconsistent after a dose or basket change, double check both distribution evenness and tamp pressure before you touch grind. Tamping problems often look like grind problems.
Tamping Pressure in the Broader Espresso Workflow

Tamping is a second tier variable. Grind size controls surface area available for extraction and decides how fast water moves through the puck. Distribution decides whether that flow hits uniform resistance or chaotic mess. Tamping locks in the distributed bed and closes voids, but it can’t fix bad grind or uneven coffee spread. Tests adjusting both tamp pressure and grind size showed grind changes had bigger, clearer effects on extraction time and flavor than tamp tweaks within the 20 to 30 lb range. If your shots taste sour or bitter, fix grind first. If they’re all over the place, check distribution before you blame the tamp.
Tamp interacts with dose and target yield. A higher dose, 18 g instead of 16 g in the same basket, creates a taller coffee bed with more resistance, so the same tamp pressure might slow flow a little. When you increase dose, you might need to grind coarser or accept a slightly longer extraction time. Drop the dose and resistance drops, so your current tamp and grind may speed the shot up. The goal is keeping flow rate and extraction time stable while you adjust other stuff. Tamp pressure is the easiest one to lock down and forget about while you tune everything else.
The correct order is dose, distribute, tamp, pull. Weigh your coffee dose to the tenth of a gram and drop it into a clean, dry basket. Use a WDT tool or distribution method to break clumps and spread grounds evenly edge to edge. Tamp with your practiced, consistent force (usually 30 lb / 13.6 kg), lift straight up, and lock the portafilter into the group head. This sequence makes sure each variable builds on the one before it, and any problem that pops up, uneven flow, fast blonding, bitter finish, can be traced back to a specific step instead of a confusing pile of changes happening at once.
| Workflow Step | Why It Matters |
|---|---|
| Dose | Controls total coffee mass and extraction capacity. Must be consistent to compare shots and track recipe changes. |
| Distribution | Spreads grounds evenly and breaks clumps, preventing density variations that cause channeling and uneven extraction. |
| Tamp | Removes air pockets and locks in the distributed bed. Stabilizes resistance so grind adjustments produce predictable results. |
Final Words
Aim for a simple target: 20–30 lbs (9–13.6 kg), with 30 lbs (13.6 kg) as a useful practice baseline. Below about 15 lbs (6.8 kg) you’ll likely see weaker extraction.
Prioritize repeatable technique — level the puck, use steady arm weight, and keep your tamp within ±5 lbs (≈2.3 kg). Tools like a calibrated tamper or a bathroom-scale drill help you learn the feel.
Remember the recommended tamping pressure for home espresso (lbs and kg) is a guideline. Be consistent, log results, and your shots will improve.
FAQ
Q: How many lbs of pressure to tamp espresso? What is the perfect tamp pressure? How heavy should you tamp?
A: The recommended tamping pressure for espresso is 20–30 lbs (9–13.6 kg), with 30 lbs (13.6 kg) a common baseline. Below ~15 lbs (6.8 kg) extraction drops; stay consistent within ±5 lbs (~2.3 kg).
Q: What is the 2 1 rule for espresso?
A: The 2:1 rule for espresso means aiming for a brew ratio where final yield is about twice the dose — for example 18 g in → 36 g out — a practical starting point to dial strength and extraction.