

Think a spoon, coin, or bottle cap will give you the same espresso as a real tamper?
They won’t.
Improvised tampers make uneven compression, tiny cracks, and rim gaps that let water rush where it shouldn’t.
That causes channeling—parts of the puck under-extract, others over-extract—so your shot can taste sour, bitter, and thin with weak crema.
This post shows exactly how those hacks wreck extraction, how to spot the signs at the grouphead, and one simple at-home test to fix your technique.
Key Reasons DIY Tamper Hacks Harm Espresso Extraction
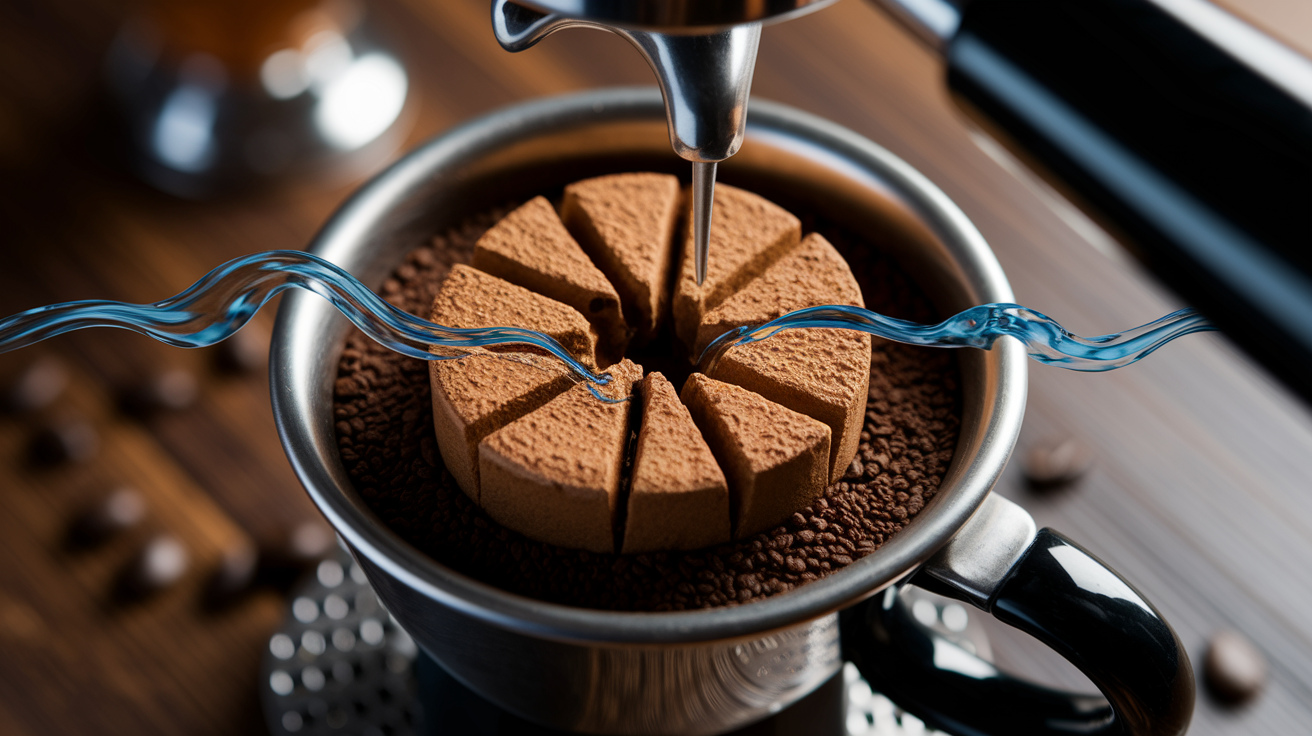
Most improvised tamping tools can’t produce a flat, evenly compressed puck across the full basket. When you press a spoon back, bottle cap, or coin into a portafilter, you’re creating localized zones of high density right next to loose, barely compressed coffee. Water under 9 bar pressure finds the easy path, rushing through the looser sections and completely bypassing denser pockets. That’s channeling, a flow problem that mixes under-extraction and over-extraction in the same shot.
Even small deviations matter. Just 1 to 2 mm of tilt or a partial rim gap is enough to wreck extraction. Proper tamping needs a flat base that covers the entire basket diameter (53, 54, or 58 mm typically) and applies consistent downward force of about 20 to 30 pounds evenly across the surface. When DIY tools don’t match the basket diameter or deliver force through a curved or tiny contact area, the puck develops fissures and radial cracks. These weak zones become high-velocity water channels during extraction. You get rapid flow spikes, early blonding, thin crema.
The taste consequences show up immediately. Channeling produces sourness from under-extracted zones where water rushed through too quickly. Bitterness or astringency from over-extracted pockets where water stalled. Thin body because dissolved solids are unevenly distributed. A properly tamped puck should yield a steady, even stream starting about 6 to 8 seconds after the pump engages, reaching a total extraction time of 25 to 30 seconds for a typical double dose of 18 to 20 grams producing 36 to 40 grams of liquid. DIY tamping often pushes extraction outside this window, either far too fast (under 20 seconds) or unstable with sputtering and split streams.
Common extraction defects caused by improvised tampers:
- Channeling and multiple streams – Uneven density produces visible flow splits and halo patterns around the basket edge
- Sour, acidic taste – Under-extracted zones caused by water rushing through loose sections
- Bitter, astringent finish – Over-extracted pockets where water pools in over-compressed areas
- Weak, thin body – Uneven soluble extraction leaves beverages watery or unbalanced
- Poor crema stability – Flow instability prevents emulsion formation, producing pale, collapsing foam
Common Improvised Tamping Tools and Their Hidden Risks
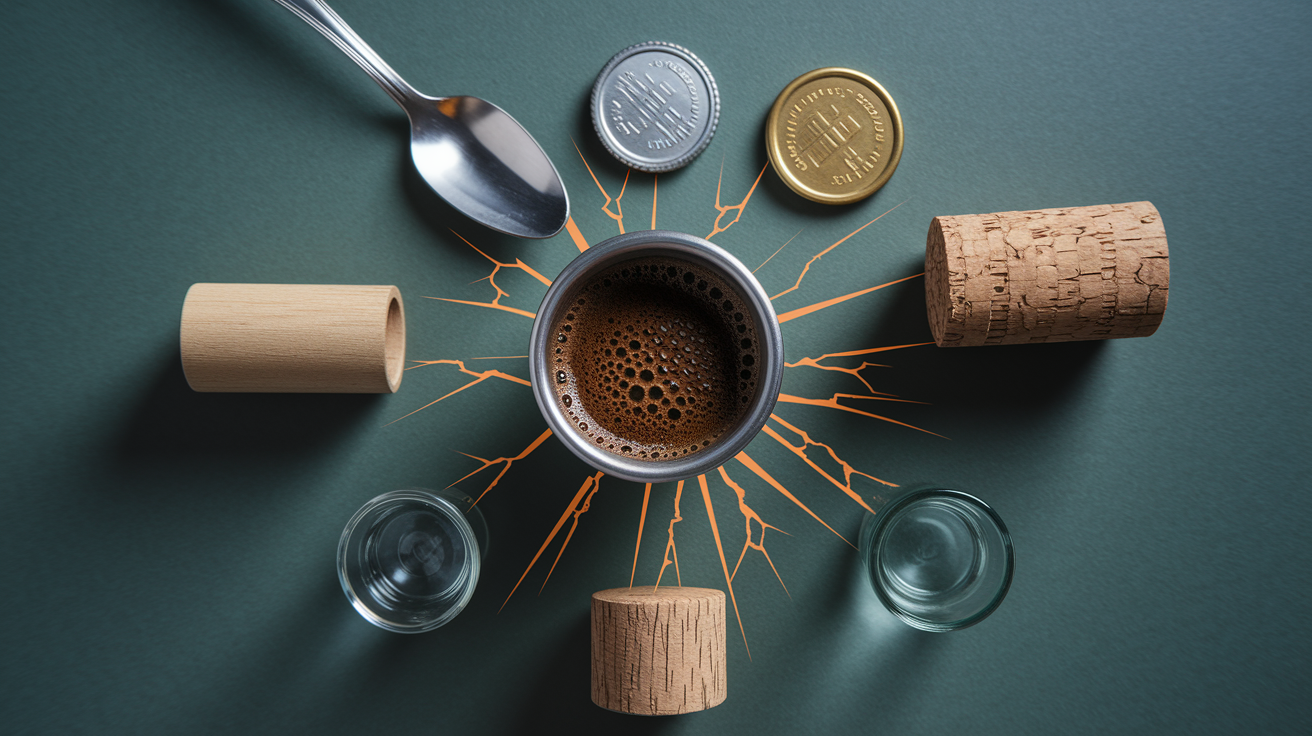
People reach for improvised tampers because they lack a correctly sized tamper, need a quick fix before the first morning shot, or believe any flat object will work. The motivation makes sense. Espresso gear feels expensive, and kitchen drawers are full of flat, round surfaces. But convenience rarely translates to function. Most household objects fail at least one critical tamping requirement: correct diameter, flat contact surface, material safety, or consistent application geometry.
When you use a tool that doesn’t match your basket diameter or shape, you introduce specific mechanical failures that proper tampers are engineered to avoid. Some improvised methods concentrate force into dangerously small contact areas. Others contaminate the puck with debris or leave gaps that guarantee channeling. Each hack carries a unique hazard beyond the general problem of uneven compression.
Common DIY tamping hacks and their specific risks:
- Spoon backs – Curved surface creates concave puck centers and ring-shaped compression, fails to seal rim
- Bottle caps or jar lids – Tiny contact area multiplies pressure, often causing fissures, sharp crimped edges cut into coffee bed
- Coins or metal rings – Hard, narrow edges score the puck and create radial cracks, contamination risk from dirty currency or oxidized metal
- Shot glasses or small glass bases – Risk of shattering under force, uneven curved rims, glass shards are dangerous contaminants
- Fingers, thumbs, or palms – Deliver inconsistent force (typically under 10 to 15 pounds), create fingerprint ridges and uneven density
- Wooden dowels or rolling pins – Rarely match diameter, wood can splinter or shed particles into coffee, rolling motion disrupts distribution
- 3D-printed tampers – Layer adhesion can fail under repeated force, plastic may shed microparticles or deform over time, dimensional tolerance errors common
- Corks or rubber stoppers – Compress unevenly under load, porous surfaces trap old coffee oils and moisture, fostering contamination
Advanced Pressure, Density, and Flow Mechanics Behind DIY Tamper Failures
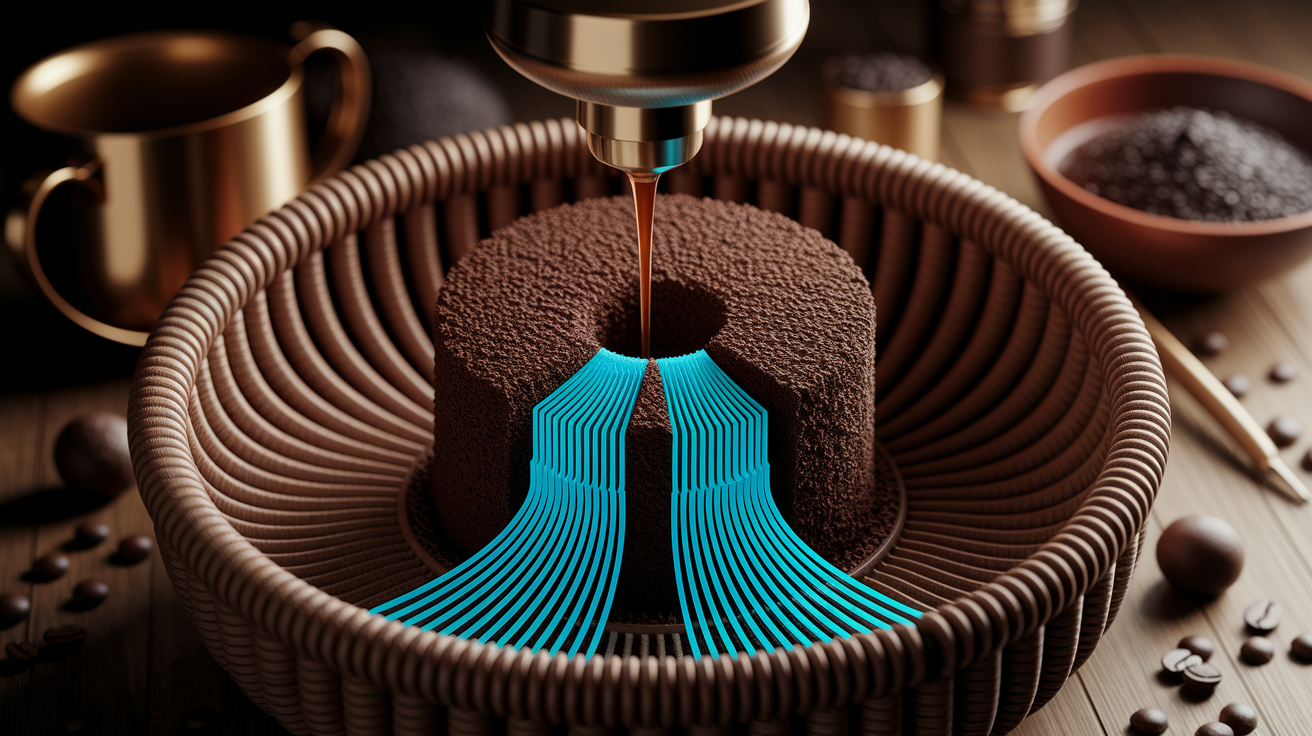
The relationship between contact area and pressure is basic physics. When you apply 30 pounds of force through a proper 58 mm tamper, that force spreads across roughly 26.4 square centimeters (2,642 square millimeters), producing a pressure of about 0.133 megapascals. Apply the same 30 pounds through a bottle cap with a contact area of just 500 square millimeters (about one-fifth the area) and you multiply the pressure by roughly five times, reaching approximately 0.67 megapascals in the contact zone. This localized over-compaction crushes coffee particles, creating a dense plug surrounded by loose, under-tamped grounds. The dense zone chokes flow. Water diverts around it, forming high-velocity channels through the adjacent low-resistance zones.
Puck density gradients are invisible until water reveals them under pressure. During extraction, the grouphead delivers water at about 9 bar (0.9 megapascals). Water follows Darcy’s law in porous media: flow rate is inversely proportional to resistance. A puck with uneven density presents a mosaic of flow resistances. High-density zones created by a small tamper head resist flow. Water accelerates through neighboring low-density regions, extracting them rapidly and incompletely. Meanwhile, the over-compressed center extracts slowly, pulling harsh, bitter compounds. The result? A single shot that tastes simultaneously sour and bitter, an extraction profile that can’t be fixed by adjusting grind size or temperature because the defect originates in puck preparation.
Fines migration compounds the problem. Fine coffee particles suspended in water migrate toward zones of lower resistance during the first few seconds of extraction. In a properly tamped puck, fines distribute evenly and form a thin filter layer at the basket bottom. In a poorly tamped puck with channels, fines accumulate along channel walls and in dead zones, creating localized clogs that further distort flow. This feedback loop worsens as the shot progresses. Early channels widen, flow accelerates in those paths, and the shot blonds prematurely while other sections remain under-extracted.
| Factor | Proper Tamper | DIY Tool |
|---|---|---|
| Surface Flatness | Machined flat; deviation <0.1 mm | Curved, angled, or irregular; deviation >1 mm common |
| Pressure Distribution | Even across full basket; ~0.13 MPa typical | Concentrated in contact zone; up to 5× higher localized pressure |
| Contact Area | Matches basket diameter (±0.5 mm); ~26 cm² for 58 mm | Partial or mismatched; often <5 cm²; leaves rim gaps |
| Likelihood of Channeling | Low when technique is correct | High; multiple flow paths and edge bypass common |
Visual and Taste Diagnostics of Tamp-Related Extraction Problems
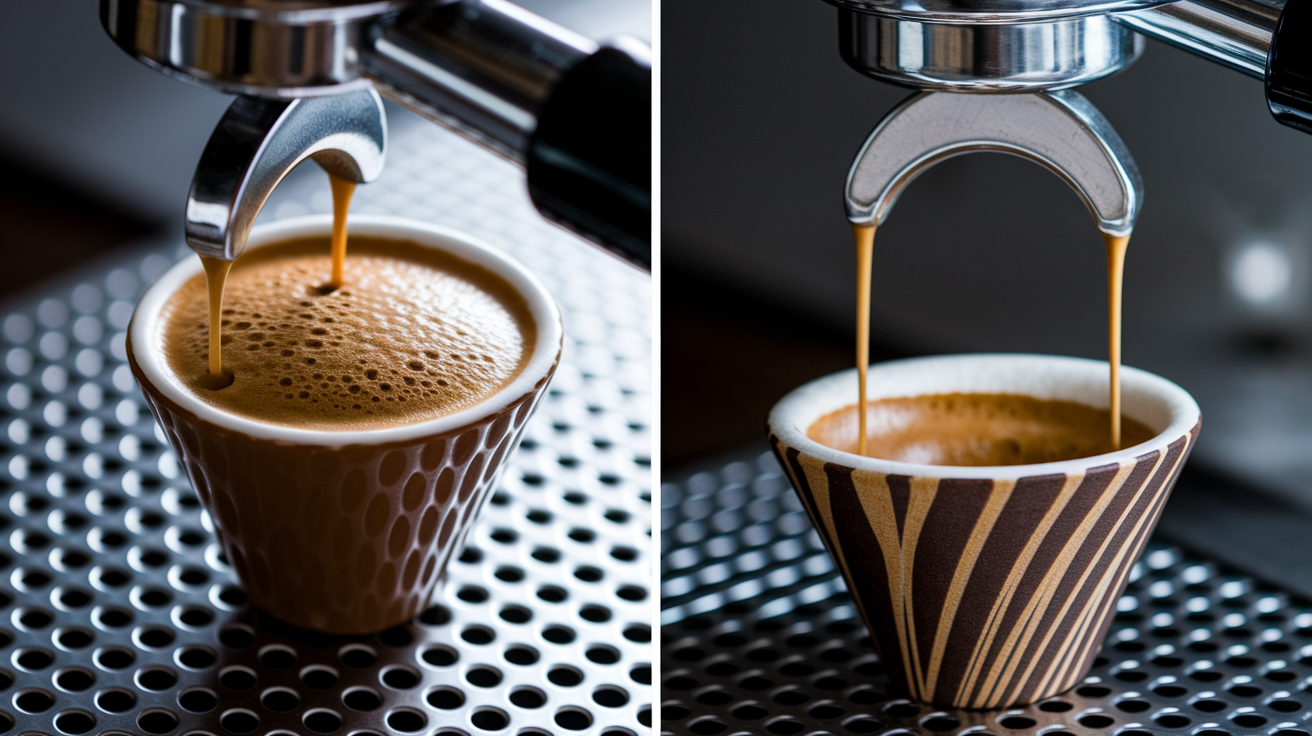
A properly tamped puck looks uniformly flat when you inspect it from above. Smooth contact all the way to the basket rim, no visible cracks or ridges. The surface should be level to within about 1 millimeter across the diameter, and the coffee bed should feel firm but not rock-hard when you press lightly with a fingertip after removing the portafilter. When you run the shot with a bottomless portafilter, you should see a single, steady stream begin to form at the center about 6 to 8 seconds after the pump starts, gradually widening into an even cone of dark espresso that turns to a golden honey color toward the end of the 25 to 30 second window.
A badly tamped puck reveals itself immediately. You might see radial cracks running from the center toward the edges, a concave or domed surface, loose crumbs around the rim, or sections that appear lighter or darker in color. During extraction, the shot will sputter, split into multiple thin streams, or gush suddenly as water finds a channel and breaks through. Blonding often starts early (sometimes before 15 seconds), and the stream may alternate between slow drips and rapid spurts. Crema will be thin, pale, and full of large bubbles that collapse within seconds, leaving a flat, lifeless surface on the finished espresso.
Shot flow signs that indicate tamping problems:
- Multiple streams or “spider legs” appearing immediately after the pump starts, showing side-channeling from rim gaps
- Sputtering or spray as high-velocity water exits through small fissures instead of a smooth stream
- Early blonding (pale, watery flow before 20 seconds) from under-extracted channels
- Intermittent flow that alternates between fast gushes and slow drips, revealing unstable puck resistance
- Uneven or patchy crema with visible darker and lighter zones indicating mixed extraction
Simple At-Home Tests to Evaluate Your Tamping Consistency
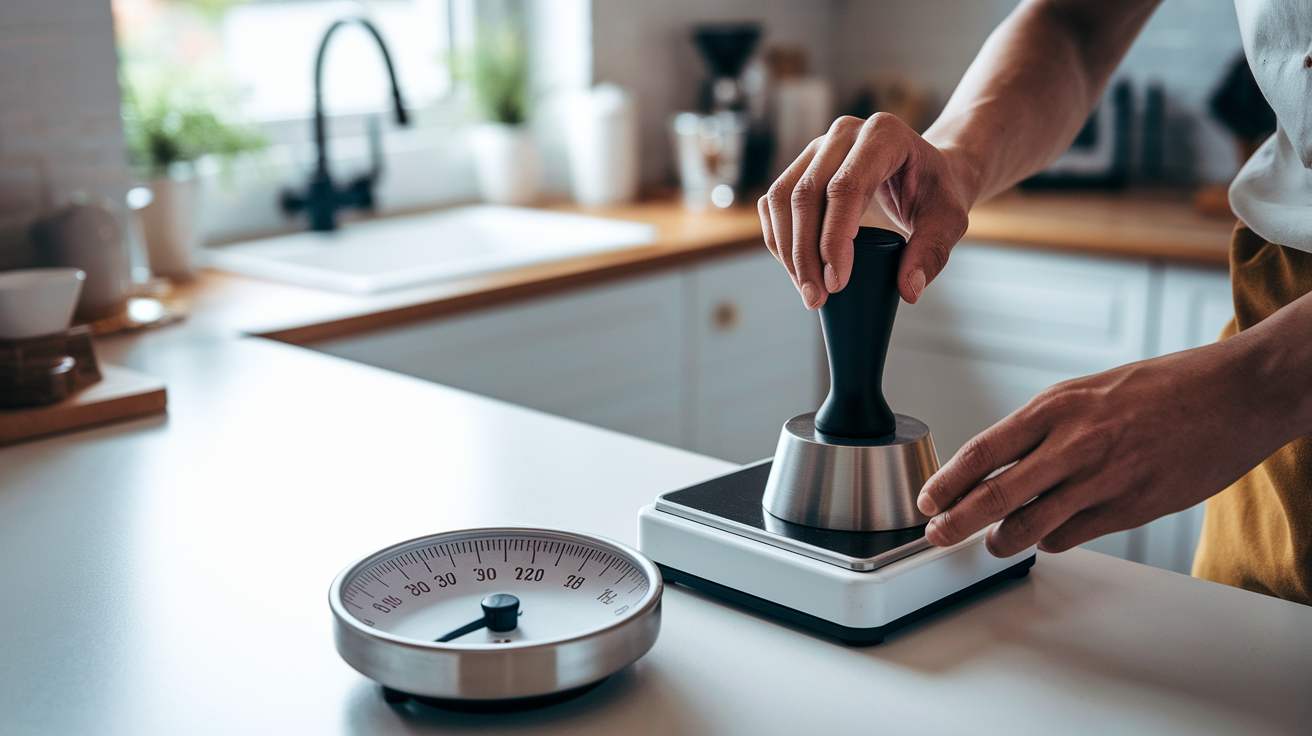
The easiest way to learn correct tamping pressure is to practice on a bathroom scale. Place your portafilter (or just your tamper) on the scale and press down until the display reads 20 to 30 pounds (about 9 to 14 kilograms). Hold that pressure for a moment and memorize the feeling in your wrist, shoulder, and arm. Repeat this drill a few times before each session until you can reproduce the target force without looking at the scale. Consistent force matters more than hitting exactly 30 pounds. Repeatability is what eliminates one major variable from your workflow.
Once you’re confident in your tamping pressure, run a controlled extraction test. Dose precisely. Use a scale to measure 18.0 grams of coffee for a double basket. Then distribute, tamp, and pull a shot while timing from pump start to the moment you stop the pull. Aim for 36 to 40 grams of liquid output in 25 to 30 seconds. If your shot runs much faster (under 20 seconds) or much slower (over 35 seconds) and your grind setting hasn’t changed, the problem is likely in distribution or tamping. Channeling from poor tamping often shows up as wild swings in extraction time even when dose and grind remain constant.
Five-step tamping consistency test:
- Dose 18.0 grams into a clean, dry double basket using a scale with 0.1-gram resolution.
- Distribute grounds evenly using WDT (thin needles, 0.4 to 0.6 mm diameter) or a distribution tool. Tap the portafilter gently to settle the bed.
- Tamp vertically with practiced 20 to 30 pound force. Check that the puck surface is flat and flush with the basket rim.
- Run the shot with a timer, stopping at 25 to 30 seconds. Weigh the output and record the yield.
- Repeat the same dose, grind, and tamp technique for three consecutive shots. If yield and time vary by more than ±2 grams or ±3 seconds, inconsistent tamping or distribution is the likely cause.
Why Properly Sized, Affordable Tampers Outperform DIY Options
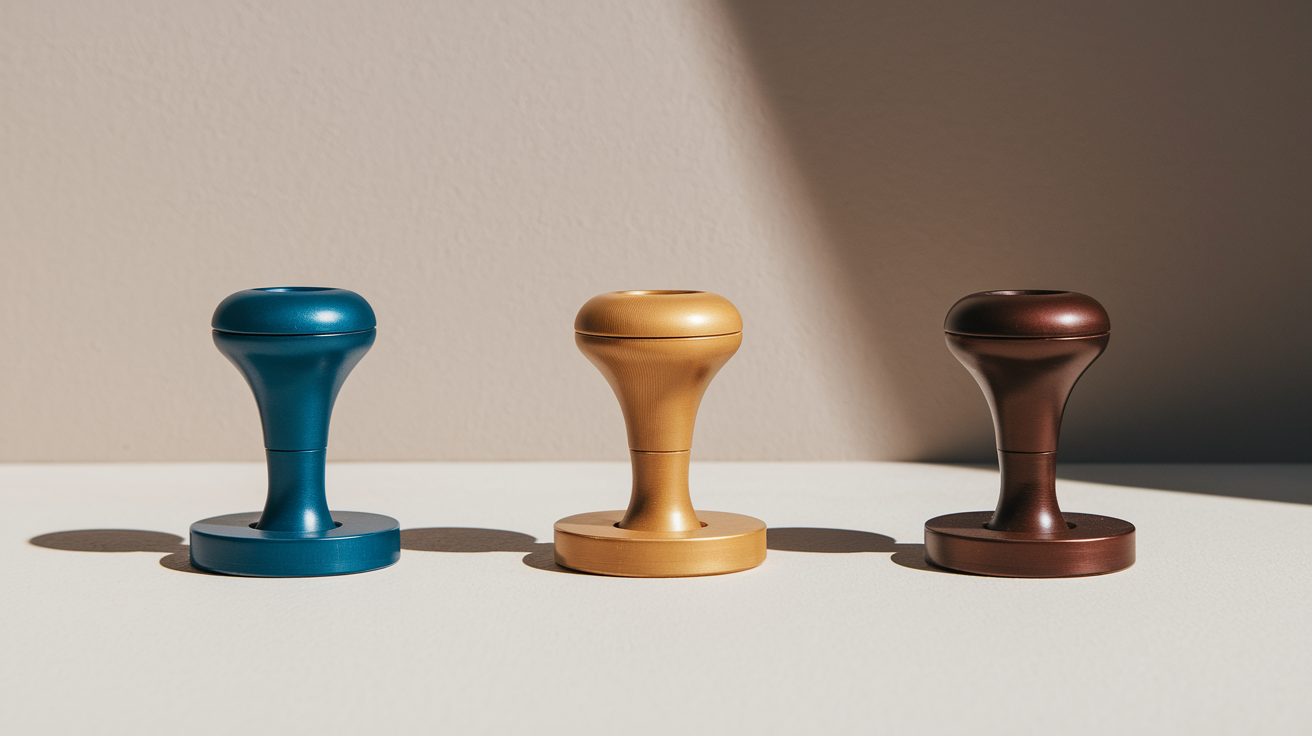
The single most important specification for any tamper is diameter. Espresso machine baskets are machined to precise inner diameters, most commonly 53, 54, or 58 millimeters, and a tamper must match to within about 0.5 millimeters to create a proper seal at the rim. A 57 millimeter tamper in a 58 millimeter basket leaves a visible gap around the edge. Water rushes through that gap during extraction, creating the halo effect and side-channeling. Measuring your basket with calipers before buying a tamper eliminates this guesswork. Most home machines use 54 millimeter or 58 millimeter baskets. Commercial-style machines almost always use 58 millimeter.
Beyond diameter, a proper tamper provides weight, material stability, and a flat machined base. Budget tampers in the $10 to $25 range are typically made of lightweight aluminum or plastic and may lack perfect flatness, but they still vastly outperform spoons and bottle caps because they match the basket diameter and deliver force through a broad, even surface. Mid-range tampers ($25 to $70) are usually machined stainless steel or weighted aluminum with ergonomic handles and tighter tolerances. Premium calibrated tampers ($70 to $200 and up) include internal springs that click or stop at a preset force, usually around 30 pounds, removing human variability and ensuring every tamp applies identical pressure.
Calibrated tampers are especially helpful if you share the machine with other users or if you struggle with wrist fatigue. The spring mechanism absorbs excess force, so you can’t over-tamp or under-tamp. You press until you feel or hear the click, then stop. This single feature eliminates one of the most common sources of shot-to-shot inconsistency. For most home baristas, a solid flat tamper in the $15 to $50 range delivers the majority of the benefit. Upgrading to a calibrated model makes sense when you’re chasing the last few percentage points of repeatability or training new users.
Key advantages of upgrading from DIY to a proper tamper:
- Matches basket diameter precisely, eliminating rim gaps and side-channeling
- Delivers even pressure distribution across the full puck surface, preventing localized over or under-compression
- Provides repeatable force application through ergonomic handle design and optional calibration springs
- Uses food-safe, non-contaminating materials (stainless steel, anodized aluminum) with no risk of shedding particles or breaking under load
Correct Tamping Technique for Reliable, Even Extraction
The goal of tamping isn’t to compress coffee as hard as possible. It’s to create a uniform, level puck with consistent density from edge to edge and top to bottom. Extraction quality depends far more on evenness than on absolute force. A puck tamped at 20 pounds with perfect distribution will outperform a 40-pound tamp applied to clumpy, uneven grounds. This is why the proper workflow always begins with distribution, not tamping.
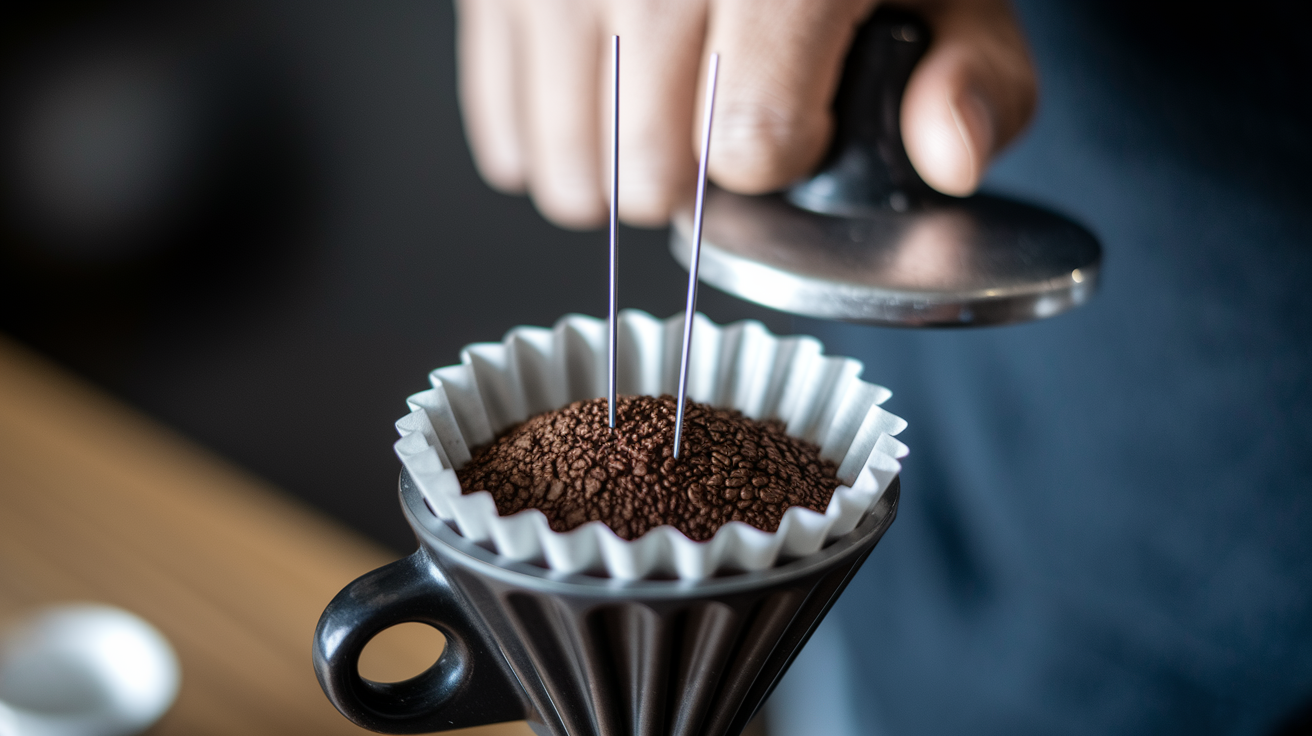
Distribution First: WDT & Leveling Essentials
Before the tamper ever touches the coffee, you need to break up clumps and spread grounds evenly across the basket. The Weiss Distribution Technique (WDT) uses thin needles, about 0.4 to 0.6 millimeters in diameter, inserted vertically into the coffee bed and stirred gently in a circular or radial pattern. This de-clumps the grounds, redistributes fines, and creates a homogeneous bed. If you don’t have WDT tools, a simple finger sweep or light tapping can help, but neither approach is as effective. After WDT, some baristas use a leveling tool (a rotating disc with fins) to flatten the top surface. Leveling tools don’t replace tamping. They prepare the bed so the tamp can do its job correctly.
Applying Even, Vertical Pressure at 20–30 lbs
Hold the portafilter handle firmly with your non-dominant hand, resting it on a stable surface or against your body. Grip the tamper handle with your dominant hand, keeping your wrist straight and your elbow directly above the tamper base. Press straight down, not at an angle, until you reach your practiced 20 to 30 pound target force. Hold the pressure for a brief moment, then release. Some baristas add a small “polish” by rotating the tamper a quarter turn while maintaining light downward pressure, but avoid torquing or twisting hard, as this can lift the puck edges and create gaps.
Checking Puck Level and Rim Seal
After tamping, inspect the puck surface from directly above. It should appear flat and level, with no visible tilt or doming. Run your finger lightly around the basket rim to confirm the coffee is flush with the edge all the way around. If you see gaps, cracks, or an uneven surface, redistribute and tamp again. A properly prepared puck will hold its shape when you invert the portafilter briefly. If grounds fall out or the surface crumbles, distribution or tamp pressure was insufficient. Lock the portafilter into the grouphead promptly after inspection to avoid moisture condensation on the puck surface.
Preventing Long-Term Damage from Improvised Tamping Methods

Improvised tamping tools can damage more than just one shot. They can harm the machine itself. Sharp-edged DIY tampers, especially metal coins, bottle caps, or rigid rings, can score the inner wall of the portafilter basket, creating permanent grooves that disrupt future puck sealing. Baskets are precision-stamped or laser-cut. Even a small dent or warp changes how water flows through the holes. Once a basket is deformed, it may never seal properly again, even with a correct tamper. Replacement baskets typically cost $15 to $40, a seemingly small expense that adds up if you repeatedly damage them.
Excessive or off-center tamping force stresses the grouphead gasket and the portafilter lugs. Grouphead gaskets are rubber or silicone seals that create a watertight connection between the portafilter and the brew group. Over-tamping (applying force well beyond 30 pounds) can compress the gasket unevenly or push the portafilter out of alignment during lock-in, accelerating wear. DIY tools that concentrate force into a small area can also push down hard enough to damage the basket’s center dimple or the basket retention spring clip. These are small parts, but failures lead to leaks, pressure loss, and poor extractions.
Components most frequently harmed by improvised tamping:
- Portafilter baskets – Scored walls, dents, or warped rims from sharp or oversized DIY tools
- Grouphead gaskets – Premature compression, uneven wear, or alignment shifts from excessive or angled force
- Shower screens and dispersion plates – Clogging or scratching caused by debris shed from DIY tampers (paint chips, plastic shards, wood splinters)
- Basket retention springs – Bent or weakened clips from downward over-pressure or impact tamping with hard tools
Final Words
If your shot gushes, splits, or goes blond too soon, this post showed the culprit: makeshift tamping.
We walked through why DIY tampers distort the puck, listed common improvised tools and their hidden risks, explained pressure and flow mechanics, and gave visual tests plus a simple technique and upgrade advice.
Next step: practice 20–30 lb on a scale, try a quick WDT, and swap to a correctly sized, flat tamper. Remember common DIY tamper hacks and why they can harm extraction. Replacing them cuts waste and makes shots more consistent and tastier.
FAQ
Q: What happens if you over tamp coffee?
A: Over tamping coffee compresses the puck too much, slowing flow and causing bitter, over-extracted, thin shots; it can also stress baskets and seals. Next step: aim for an even 20–30 lb tamp.
Q: How much pressure to tamp?
A: The pressure to tamp is about 20–30 lb (≈9–13 kg) applied evenly with a flat, correctly sized tamper; this produces repeatable flow and reduces channeling.
Q: How do I know if I’m tamping too hard?
A: You’re tamping too hard if shots choke, run very slowly, taste bitter/over-extracted, or the puck feels rock-hard; confirm on a bathroom scale, and aim below 30 lb.
Q: What happens if you don’t tamp espresso?
A: If you don’t tamp espresso, grounds stay loose and uneven, producing fast, sour, under-extracted shots with channeling, thin body, and spritzing; distribute and tamp 20–30 lb to fix it.