

Think scrubbing harder will save your espresso gasket?
It often makes the problem worse.
This quick guide shows the safest cleaning steps so you don’t tear rubber, scratch metal, or invite leaks.
You’ll learn what to use, what to skip, and one repeatable routine for daily or weekly care.
Follow these simple checks and tools, like a lint-free cloth, a soft nylon brush, and warm soapy water, and your gasket will stay soft, seal better, and last longer.
Start by powering off and letting the group head cool for five minutes.
Safe Cleaning Method for an Espresso Machine Gasket

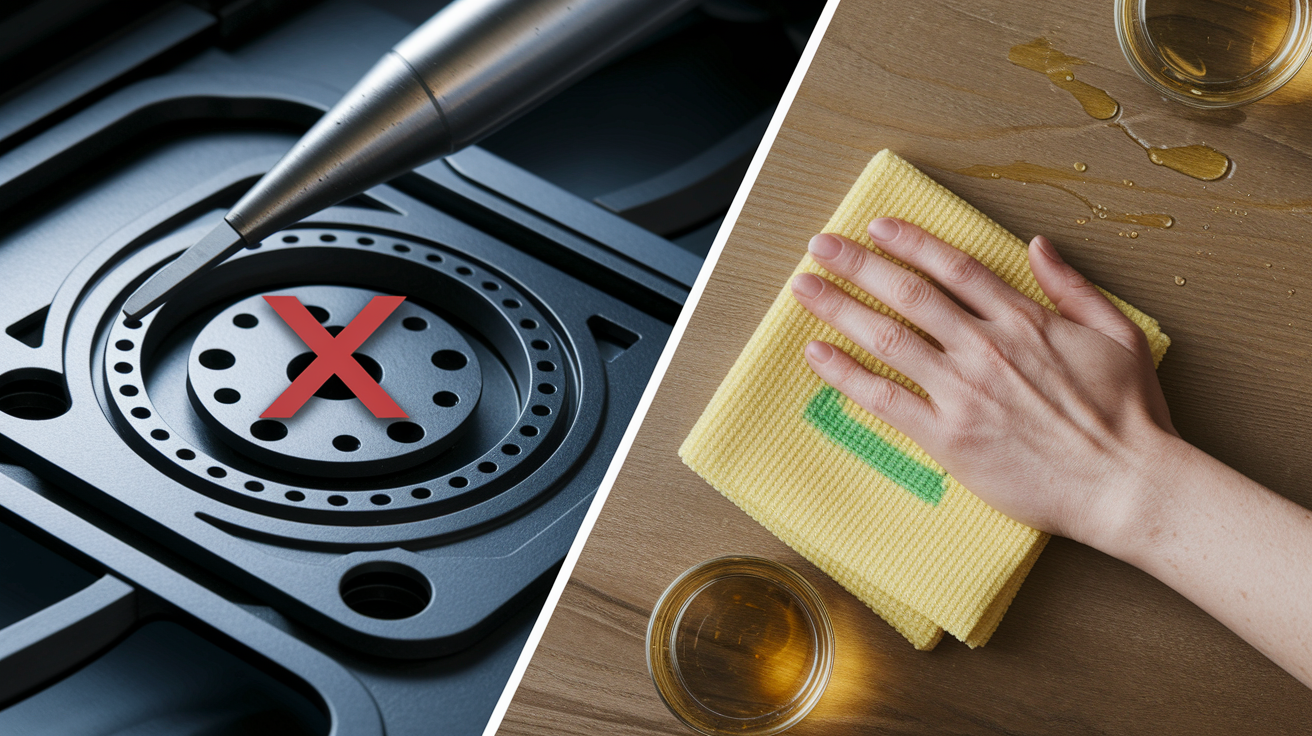
Turn the machine off and unplug it. Don’t mess around near the group head while the boiler’s still pressurized or the cord’s plugged in. Let things cool for at least five minutes. You’re working with soft materials here because you don’t want to tear rubber or scratch metal.
Grab a lint-free cloth and a nylon-bristle brush. Mix a few drops of mild dish soap into warm water. You’re lifting coffee oils and fine grounds that settle on the gasket, not sterilizing surgical instruments. Skip the bleach, citrus degreasers, solvents, or anything petroleum-based. Those destroy rubber faster than daily use ever will. Rinse with clean warm water after every wipe, then dry the gasket and group head completely before you put anything back together.
Daily and weekly care keeps the gasket soft and stops oils from hardening into sticky film. This routine doesn’t require removal. You’re just working around the gasket while it stays seated.
- Power off and unplug. Let it cool at least five minutes.
- Remove the portafilter and set it aside. Pull out the filter baskets.
- Dampen a soft cloth with warm, soapy water (not soaking wet). Wipe the visible gasket surface in a circular motion.
- Use a soft nylon brush around the gasket lip where coffee grounds collect. Brush gently. You’re lifting debris, not scraping rubber.
- Rinse the cloth under warm running water and wipe the gasket again to get rid of all soap residue.
- Dry the gasket and group-head interior with a clean, dry cloth. Make sure no moisture sits in the seal area before you lock the portafilter back in.
If you see brown oil streaks on your cloth after wiping, that’s normal. If those streaks keep showing up every single day even after cleaning, you’ve got oil buildup deeper in the group head.
Essential Tools and Cleaning Products for Espresso Gaskets

You need a small set of basic household tools and a couple machine-specific items. Every tool has a clear job: lift debris without tearing the gasket, rinse without leaving residue, and lubricate (only when your machine explicitly requires it) without contaminating coffee.
Start with a soft, lint-free cloth for daily wiping. Add a soft-bristled nylon brush or a dedicated espresso-machine group-head brush. Pick up a small plastic pick or o-ring removal tool for working around stubborn buildup or for gasket removal when needed. Keep a container of warm water ready for rinsing, and stock a bottle of mild dish soap (unscented is better). If you backflush regularly, have a blind filter basket or a rubber backflush disk on hand. Optionally, keep a small tube of food-grade silicone grease for reinstalling a new gasket, but apply it sparingly and only if your machine manual says so.
Soft, lint-free cloths – for wiping the gasket and group-head surfaces
Soft nylon brush – reaches gasket lip and groove edges without scratching
Mild dish soap – a few drops in warm water; no citrus, bleach, or solvents
Warm water – dissolves oils and rinses away soap
Plastic pick or o-ring tool – pries gently without cutting rubber or scoring metal
Blind filter or rubber backflush disk – supports backflushing that cleans the group head and indirectly helps the gasket
Food-grade silicone grease (optional) – use only on replacement gaskets if your machine requires it; never on old gaskets
Avoid metal scrapers, abrasive sponges, steel-bristle brushes, citrus-based cleaners, oven cleaner, and any lubricant not rated food-safe. Even a small nick from a metal tool can become a leak path.
Advanced Gasket Removal and Deep Cleaning (For Stuck or Heavily Soiled Seals)
Most gaskets can stay in place for routine cleaning. Remove the gasket only if you see heavy carbonized buildup under the lip, persistent leaks despite cleaning, or if you’re replacing it.
- Turn off and unplug. Let the group head cool completely.
- Remove the shower screen by unscrewing the center screw. Some screens are held only by the gasket, so lift carefully.
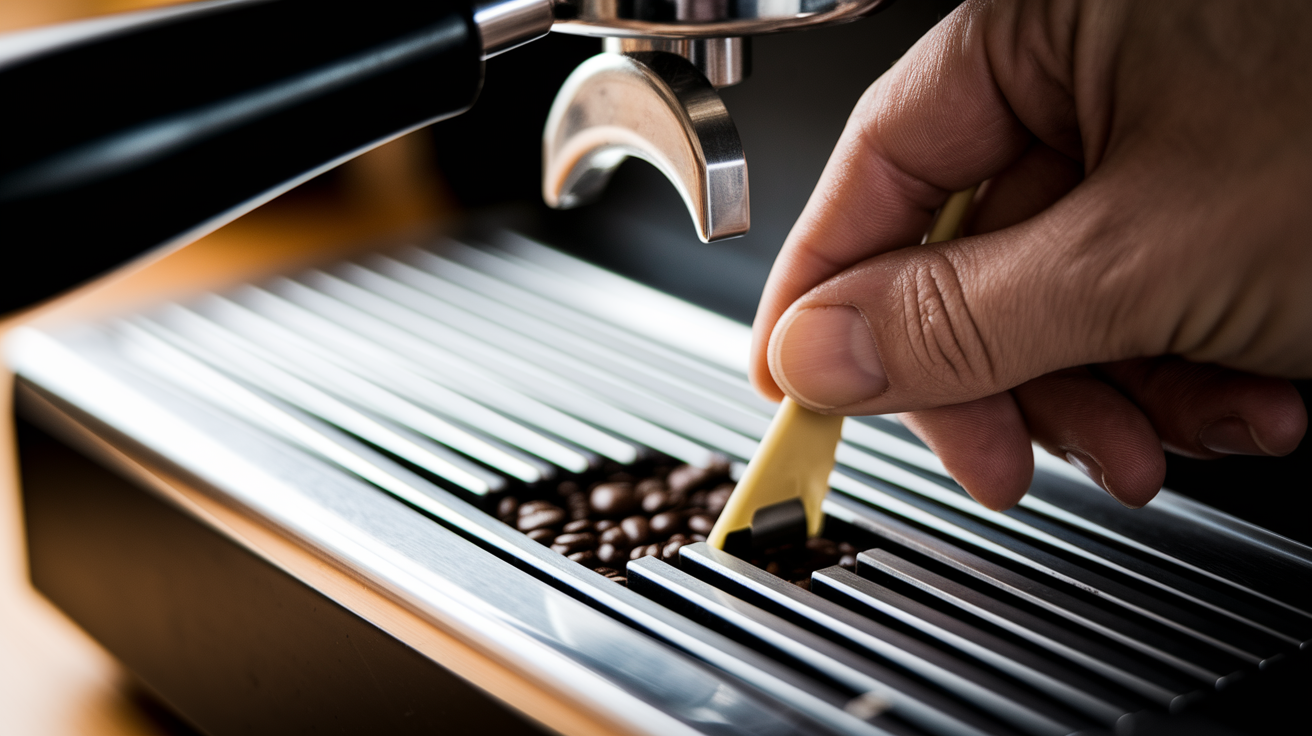
- Insert a plastic pick or o-ring tool at the 3 o’clock or 9 o’clock position around the gasket. Pull the handle toward you and pry the gasket gently downward out of the groove. Work slowly around the circumference.
- If the gasket’s old and hardened, it may come out in chunks. Use the pick to remove every fragment. Leftover pieces prevent a proper seal when you reinstall.
- Clean the exposed groove with a soft nylon brush and warm, soapy water. Scrub the group diffuser (the metal plate behind the screen) if you can reach it.
- Rinse the groove thoroughly with clean warm water. Wipe dry with a lint-free cloth.
- Press the replacement gasket into the groove evenly, beveled side up (the wider, angled edge faces into the group). Use your thumbs and work in a circular motion to seat it uniformly.
- Reinstall the shower screen and screw. Lock the portafilter in place to seat the new gasket. Pull a test shot to check for leaks.
Hardened gaskets sometimes crumble like old tire rubber. If pieces break off during removal, switch to a blunt plastic chisel or wooden toothpick to pick out every bit. Check the groove under good light. Even a small fragment creates an uneven seal. Soak stubborn residue with a warm, damp cloth for five to ten minutes before trying again.
Cleaning Inside the Gasket Groove
Once the gasket’s out, you’ll see a narrow channel that holds the seal. Coffee oils, grounds, and mineral deposits pack into that groove over time and turn into hard film. Use a half-moon group-head brush or a folded piece of lint-free cloth wrapped around a plastic pick to scrub the groove walls. Work the brush in small circular passes. Rinse frequently and check your progress. The groove should feel smooth to the touch, not gritty or sticky. Dry completely before pressing in the new gasket.
How Backflushing Supports Gasket Cleanliness

Backflushing forces water backward through the group head using a blind filter or rubber disk. That reverse flow clears coffee oils from the solenoid valve, dispersion screen, and the upper surface of the group seal. It doesn’t replace gasket wiping, but it stops oil from migrating down onto the gasket lip.
Run a backflush daily if you operate a commercial machine or pull more than twenty shots a day at home. For lighter home use, backflush at least once a week using an espresso-machine cleaning powder (one teaspoon) or one cleaning tablet dissolved in the reverse-flow cycle. The detergent breaks down oils that plain water leaves behind. After the chemical backflush, run five clean-water cycles to rinse all residue.
Heavy oil buildup – you’re pulling dark roasts or high-oil beans daily
Persistent coffee taste in plain water – rancid oils coating the group components
Visible brown film on the shower screen – oils are collecting and will drip onto the gasket
Irregular extraction or channeling – buildup’s disrupting water distribution, which stresses the gasket seal
Backflushing keeps the entire group-head system cleaner, which reduces the cleaning load on the gasket itself. Treat it as routine maintenance, not emergency repair.
Material-Specific Care for Rubber vs Silicone Espresso Gaskets
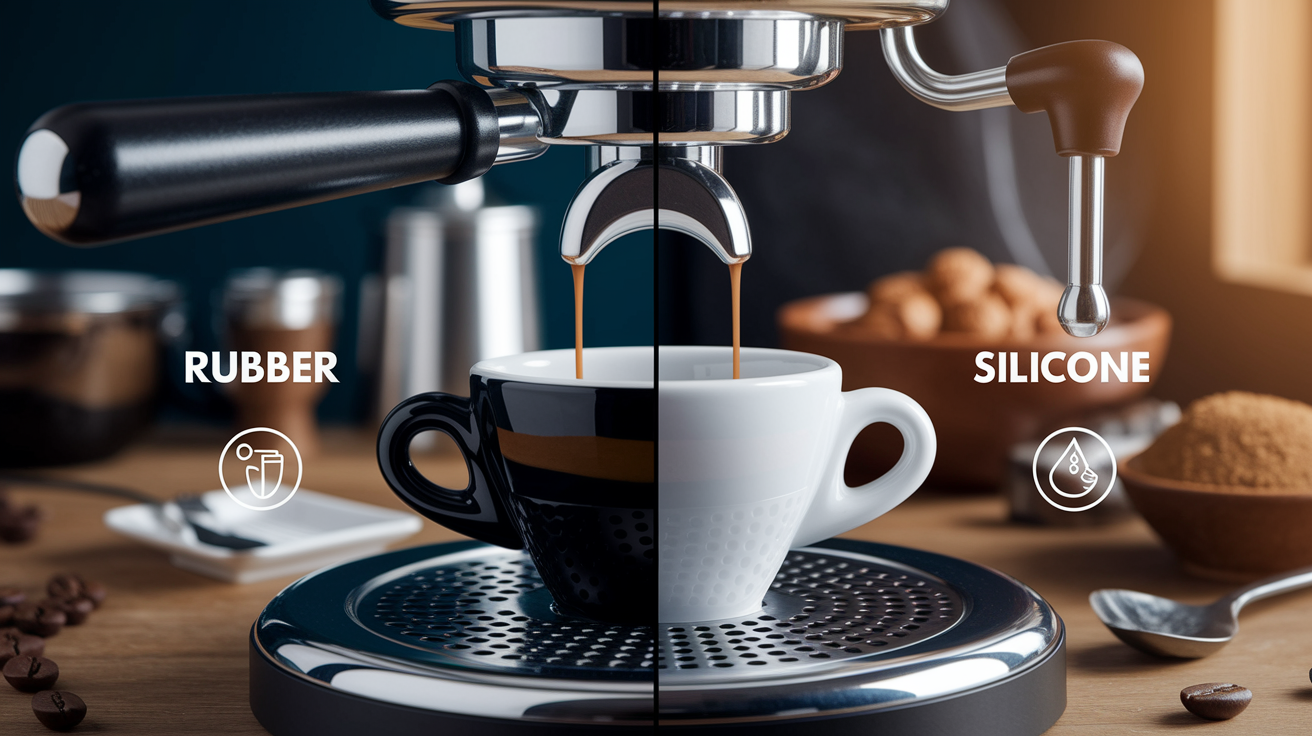
Most stock gaskets are nitrile rubber (NBR). Silicone gaskets are sold as upgrades and cost a bit more. The cleaning agents and techniques that work safely for one material can shorten the life of the other.
Rubber gaskets dry out, crack, and harden faster when exposed to heat, ozone, and certain chemicals. Citrus-based degreasers and petroleum lubricants attack NBR and cause surface cracking within a few months. Stick to mild dish soap and warm water. Small amounts of white vinegar or isopropyl alcohol won’t immediately destroy a rubber gasket, but repeated exposure speeds up aging. If you descale with citric acid, rinse the gasket area thoroughly and wipe it dry immediately after the descale cycle finishes.
Silicone gaskets tolerate higher temperatures and resist most household cleaners better than rubber. You can use the same mild soap routine, and occasional exposure to diluted vinegar or alcohol won’t cause rapid degradation. Silicone’s less prone to compression set (permanent flattening), so it holds a seal longer under the same workload. Even so, avoid bleach, oven cleaner, and strong solvents on any gasket material. Those chemicals break molecular bonds and turn flexible seals brittle. When in doubt, test a tiny hidden area first or just use warm soapy water and skip experiments.
Inspecting the Espresso Gasket for Wear or Damage
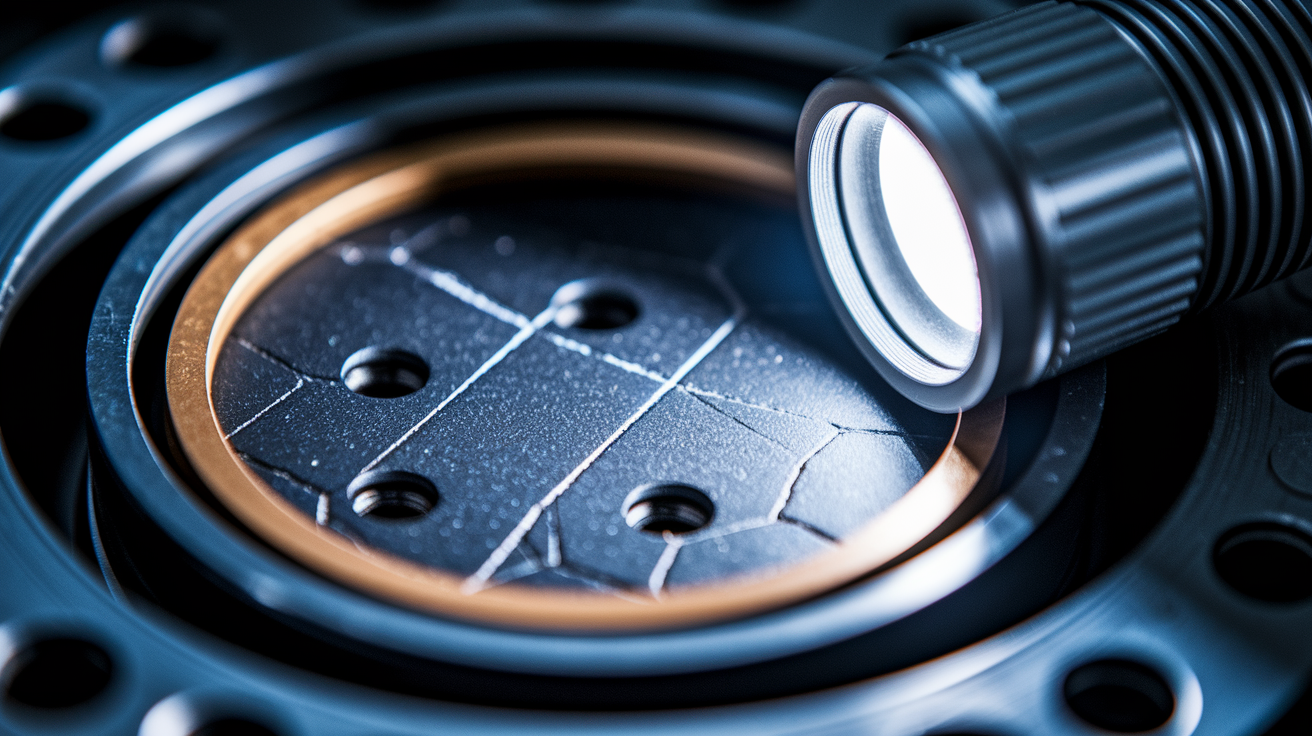
Check the gasket every month if you pull shots daily, or every two months for lighter use. Pull out the portafilter and shine a flashlight into the group head. Look at the gasket’s inner lip where it contacts the portafilter rim.
A healthy gasket feels firm but flexible when you press it with your thumb. It should spring back. The surface is smooth, even in color (black or brown depending on material), and free of cuts or splits. Any hard, shiny patches signal carbonization from overheating or oil baking.
Visible cracks or cuts – the gasket will leak under pressure and cause uneven extraction
Permanent flattening – press your thumb into the gasket; if it doesn’t spring back, compression set has occurred
Brittleness – the gasket feels hard and may crumble when touched
Leaks around the portafilter – drips or spray during extraction even after cleaning
Inconsistent shot times – faster or slower extraction despite identical grind and dose
Sticky or tacky texture – oils have polymerized into the rubber and won’t rinse off
Any one of these signs means replacement’s due. Cleaning won’t restore a gasket that’s already hardened or cracked.
When and How to Replace an Espresso Machine Gasket
Plan to replace the gasket every twelve to twenty-four months for home machines pulling one or two shots daily. Commercial setups running fifty-plus shots a day should inspect quarterly and replace every six to twelve months. Age, heat cycles, and cleaning-chemical exposure all degrade the seal.
- Turn off the machine, unplug it, and let the group head cool for at least ten minutes.
- Remove the shower screen by unscrewing the center retaining screw. Set the screw and screen aside.
- Insert a plastic pick at 3 o’clock or 9 o’clock. Pry the old gasket out slowly, working around the groove. If it’s carbonized, it may break into pieces; remove every fragment.
- Scrub the gasket groove with a soft nylon brush and warm soapy water until the channel’s smooth and clean. Rinse and dry completely.
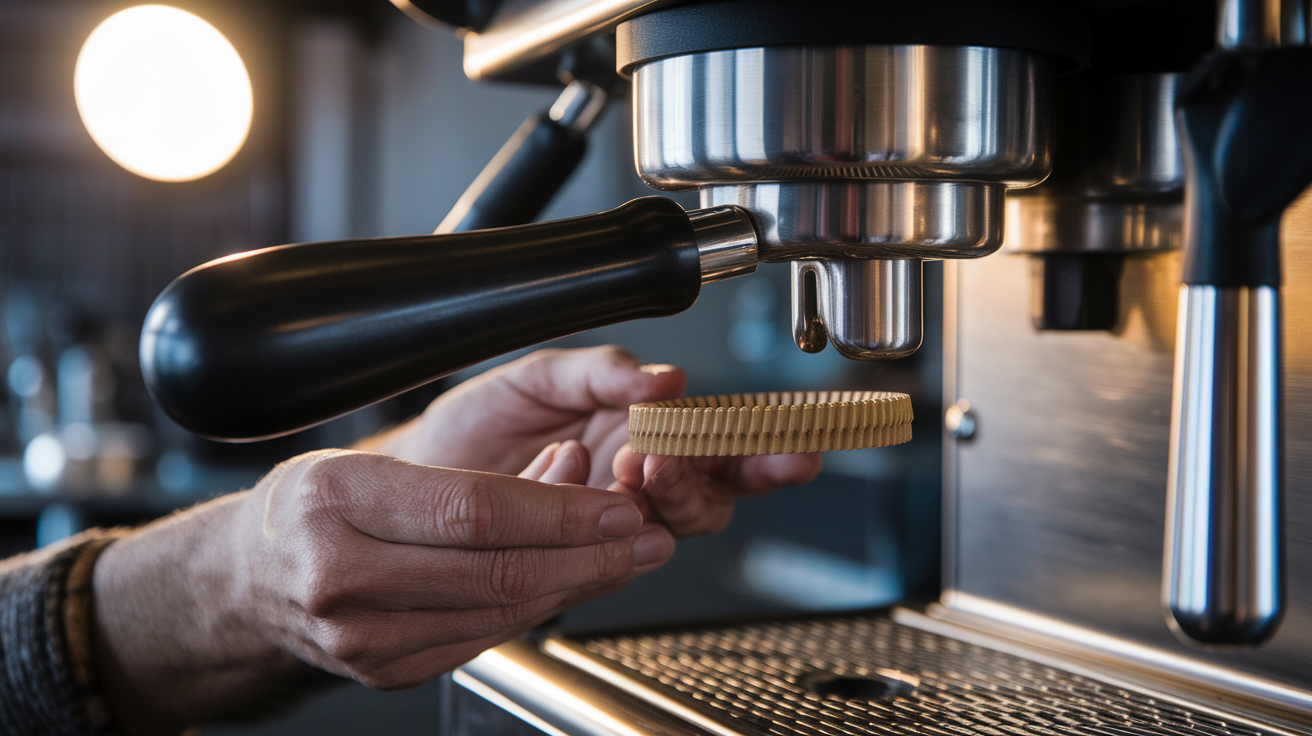
- Identify the orientation of the new gasket. Most have one flat side and one beveled (angled) side. Install the beveled side facing up into the group head.
- Press the gasket into the groove with your thumbs, working in a circular motion. Seat it evenly all the way around.
- Reinstall the shower screen and screw. Hand-tighten; don’t force it.
- Lock the portafilter into the group head. The handle should rest at approximately 6 o’clock when properly aligned. If it sits too far right, add a thin shim under the gasket. If too far left, try a thinner gasket or check for debris in the groove.
Ensuring a Proper Seal After Installation
With the portafilter locked in place, turn the machine on and run a short flush of plain water through the group (no coffee). Watch for leaks around the portafilter rim. If you see drips or spray, unlock the portafilter, check the gasket seating, and confirm the groove’s debris-free. Pull a test shot with coffee. The extraction should be even, the crema consistent, and the shot time within your normal range. If pressure feels low or the shot runs fast, the gasket may not be fully seated. Remove the portafilter, press the gasket again, and retry.
Common Mistakes That Damage Espresso Gaskets
Most gasket failures happen faster than normal wear would predict. The cause is usually cleaning technique, not the gasket itself.
Using harsh chemicals is the biggest shortcut to a cracked seal. Bleach, citrus degreasers, and oven cleaner dissolve rubber bonds within weeks. Petroleum jelly and non-food-grade lubricants contaminate coffee and degrade NBR gaskets. Even if a gasket looks fine after one exposure, repeated contact speeds up aging.
Metal tools create the second most common failure. A flathead screwdriver or a knife tip can nick the gasket or scratch the group-head groove, creating a permanent leak path. Once a gasket’s cut, cleaning won’t fix it.
Skipping the rinse step – soap residue dries into the gasket and attracts more oil
Leaving the gasket wet – promotes mold growth and softens rubber over time
Over-tightening the portafilter – compresses the gasket unevenly and speeds up permanent flattening
Using abrasive brushes or scouring pads – tears the gasket surface and scratches the group head
Applying lubricant to an old gasket – masks wear temporarily but doesn’t restore the seal, and most lubricants aren’t food-safe
If you’re not sure whether a cleaner’s safe, test it on a spare gasket first or stick with warm water and a drop of dish soap.
Maintenance Schedule to Keep the Espresso Gasket Healthy
A simple routine prevents most gasket problems and extends seal life well past the minimum replacement interval.
| Task | Frequency | Notes |
|---|---|---|
| Wipe gasket with soft cloth and warm soapy water | After every 3–5 uses (daily for commercial) | Removes surface oils and grounds before they harden |
| Backflush with cleaning agent | Daily (commercial) / Weekly (home) | Use blind filter and 1 tsp cleaning powder or 1 tablet; rinse with 5 clean-water cycles |
| Inspect gasket for cracks, hardness, leaks | Monthly (heavy use) / Every 2 months (light use) | Look for brittleness, permanent flattening, or visible damage |
| Replace gasket | Every 12–24 months (home) / Every 6–12 months (commercial) | Replace sooner if you see cracks, leaks, or loss of compression |
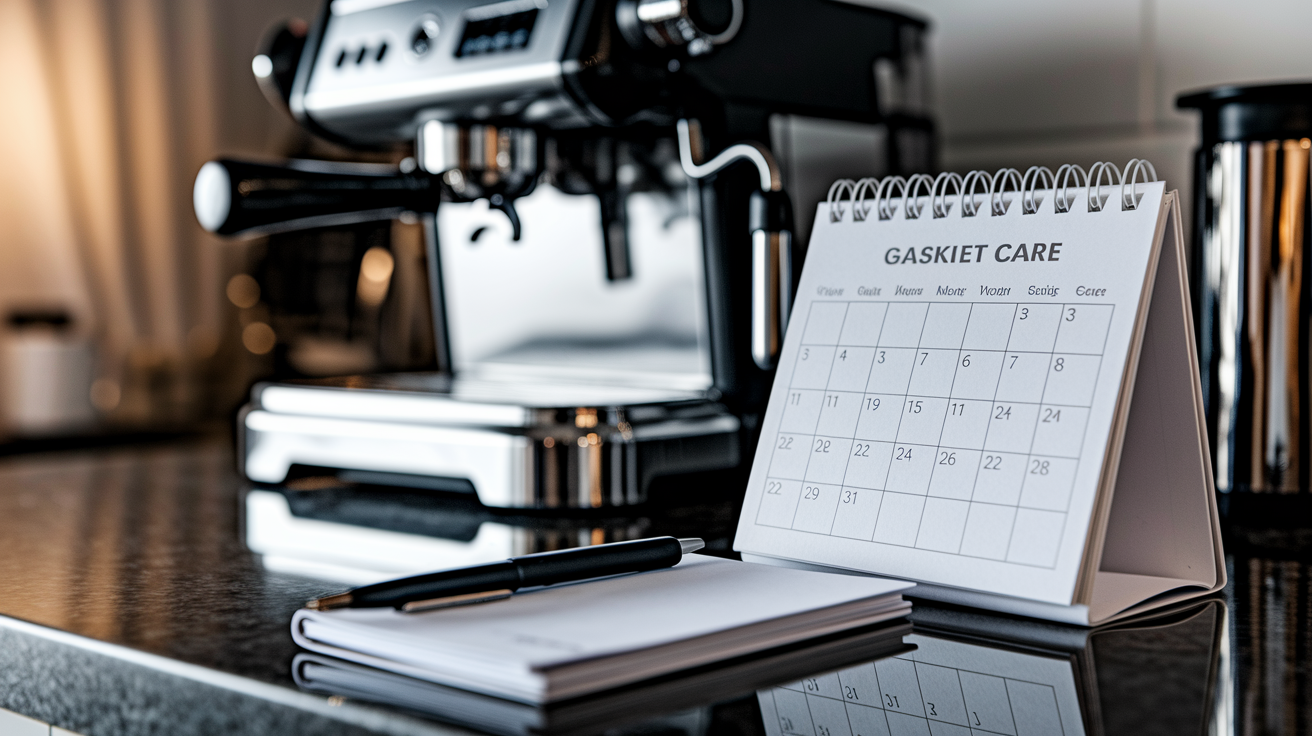
Track your cleaning and replacement dates in a notebook or on your phone. If you notice shot times drifting or extraction becoming uneven, check the gasket first before adjusting grind or dose. A worn seal often mimics grinder or technique problems, and replacing it can reset your entire workflow.
How a Clean Gasket Improves Espresso Quality

The gasket’s job is to hold full brew pressure (typically nine bars) and force all the water through the coffee puck evenly. When oils and grounds build up on the gasket surface or in the groove, the seal becomes uneven. Water finds the path of least resistance and channels around the puck instead of through it. That produces a thin, sour shot with weak crema and inconsistent flavor.
A dirty gasket also harbors rancid coffee oils. Those oils oxidize over days and weeks, turning bitter and acrid. Every shot you pull picks up a small amount of that rancidity, even if the beans in your hopper are fresh. You’ll taste it as a stale, cardboard note that no grind adjustment will fix. Regular gasket cleaning removes those oils before they spoil and keeps each shot tasting only like the coffee you chose.
Pressure retention matters just as much as cleanliness. A gasket that’s cracked, flattened, or coated in hardened residue can’t hold a tight seal. Pressure drops during extraction, the flow rate increases, and you end up with under-extracted, weak espresso. Cleaning and timely replacement keep the seal tight, the pressure stable, and the extraction window predictable. When the gasket does its job correctly, you taste the difference in every cup.
Final Words
Power off the machine, grab a soft cloth and nylon brush, and wipe the gasket area. This is the safe routine.
Use warm water and a few drops of mild dish soap. Avoid bleach, solvents, citrus degreasers, metal tools, and petroleum lubricants. Rinse well and dry to prevent mold.
Brush daily, do a weekly clean/backflush, inspect every six months, and plan replacement at 12–24 months. Clean gaskets keep pressure steady and shots more consistent.
For clear guidance on how to clean espresso machine gasket without damage: mild soap, soft tools, rinse, dry, inspect.
FAQ
Q: How to clean an espresso gasket?
A: Cleaning an espresso gasket starts by powering off and unplugging the machine. Wipe the gasket with warm water and a few drops of mild dish soap using a soft cloth or nylon brush, rinse, and dry fully.
Q: How often should I replace my espresso gasket?
A: Replacing an espresso gasket typically happens every 12–24 months for home use; commercial setups need it more often. Inspect every 6 months and swap sooner if you see cracks, brittleness, leaks, or crumbling.
Q: How to remove black stains from a rubber gasket?
A: Removing black stains from a rubber gasket means gently scrubbing with warm water and a few drops of mild dish soap using a soft nylon brush or lint-free cloth. Rinse well and dry completely; avoid solvents or bleach.
Q: Is it bad to run vinegar through your espresso machine to clean?
A: Running vinegar through your espresso machine to clean is generally not recommended. Vinegar can damage rubber gaskets and leave tastes; wipe externally with dilute vinegar only, otherwise use manufacturer-approved cleaners and flush thoroughly.