

Think a spinner will magically stop your bottomless portafilter from spraying espresso?
It won’t.
The real win comes from folding a distribution tool into a strict, timed sequence: dose, WDT (needle stirring), finish with a leveler or spinner, tamp, lock, and pull.
Do those steps in the right order and within the timing windows and you cut channeling, stabilize shot times, and get even droplets in the first 2 to 5 seconds.
This post gives the one-change-at-a-time workflow, tool choices, and simple checks to prove it works.
Essential Workflow Steps for Integrating a Distribution Tool with a Bottomless Portafilter

The most reliable way to cut down channeling and improve extraction is following the same sequence every single time you prep a puck. Consistency in order and timing beats complexity. A basic workflow that works distribution tools into a bottomless portafilter routine looks like this: weigh your dose, break up clumps with a distribution tool, settle the bed, tamp with level pressure, pull the shot right away. Each step has a narrow timing window. Skip one or swap the order and you’ll usually see uneven flow within the first few seconds of extraction.
Timing matters because fines and larger particles will re-segregate if you wait too long between distribution and tamping. After you finish distributing, tamp within 2 to 10 seconds and lock the portafilter into the group within another 5 to 10 seconds. Wait longer than 30 to 60 seconds between distribution and tamping and the lightest fines drift and settle unevenly, recreating the density problems you just fixed. When distribution works, shot times stabilize within plus or minus 2 to 4 seconds across multiple pulls. You’ll see even droplets forming across the entire basket surface within the first 2 to 5 seconds of extraction.
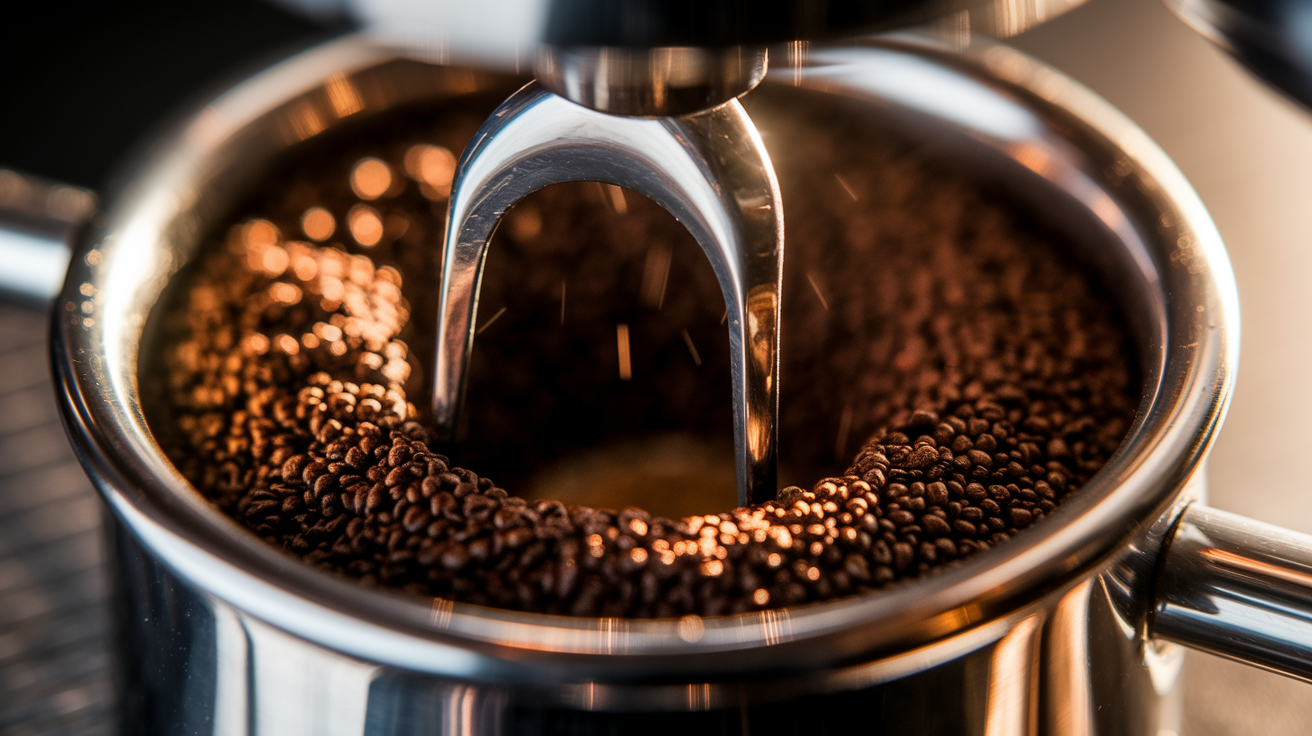
Visual cues through a bottomless portafilter give you immediate feedback on whether your workflow is working. Proper distribution shows up as uniform droplet formation across all basket holes, merging into smooth, symmetrical streams without sudden jets or sprays. If you see thin, high-velocity streams shooting from one side, or dry patches that bloom late, your distribution or tamp was uneven. Adjust technique or timing on the next shot.
Complete workflow sequence:
- Dose coffee into the basket to within plus or minus 0.1 g of your target (typically 16 to 22 g for a double basket).
- Perform WDT with 12 to 30 needles inserted 3 to 6 mm below the surface, using radial and cross-hatch strokes for 10 to 25 seconds total (10 to 30 strokes depending on dose and grind clumping).
- If using a mechanical distributor or spinner, set contact depth to 0 to 2 mm of light compression and spin for 2 to 5 seconds to level and polish the surface.
- Tap the portafilter gently once or twice on a flat surface to settle any loose fines and eliminate air pockets.
- Tamp with consistent pressure (around 30 lb / 13.6 kg is a common benchmark) and make sure the tamper is perfectly level across the puck.
- Wipe the basket rim and lock the portafilter into the group immediately. Start extraction within 5 to 10 seconds of tamping.
- Observe the first 10 seconds of extraction through the bottomless portafilter for even droplet formation and symmetrical stream development. Adjust distribution depth, stirring pattern, or tamp levelness on the next shot if you see jets or asymmetry.
Choosing the Right Distribution Tool for Bottomless Portafilter Techniques

Distribution tools fall into two main categories: needle-based WDT tools that stir the coffee bed internally, and mechanical levelers or spinners that groom and compress the top layer. Needle tools use 12 to 30 thin wires (often around 0.4 to 1.0 mm diameter) arranged in a cluster or comb to break up clumps and redistribute fines throughout the entire depth of the puck. Mechanical levelers (often called OCD-style distributors) feature an adjustable base that sits on top of the grounds and rotates to push coffee outward and downward, leveling the surface and creating light, even compression. Hybrid tools combine both approaches, offering needles for initial stirring and a flat or curved base for finishing.
The best choice depends on what problem you’re trying to solve and how you want to use the bottomless portafilter for feedback. Needle tools excel at breaking internal clumps and density gradients that cause deep channeling pathways, which show up as early jets or donut extractions through a naked portafilter. Mechanical levelers work well for final surface finishing and making sure you get even tamp contact, but they only affect the top 1 to 3 mm of the bed and can’t fix deeper clumping. For most workflows, using a needle tool first to address internal density and then a leveler to polish the surface produces the most uniform extractions.
Tool comparison summary:
- WDT needle tools: break clumps throughout the full puck depth. Require manual technique and consistent pattern. Best for eliminating internal channeling and fines migration.
- Adjustable-depth spinners: level and lightly compress the top layer. Fast and repeatable. Best used after WDT to finish and polish the surface.
- Hybrid tools: combine stirring and leveling in one device. Reduce workflow steps but may require more careful depth calibration.
- Single-needle or improvised tools: effective when moved methodically. Slower than multi-needle clusters but accessible and low-cost.
- Dosing funnels with integrated levelers: help with dose control and initial grooming. Still benefit from follow-up WDT or spinner for internal density.
| Tool Type | Primary Function | Best Use Case |
|---|---|---|
| WDT needle tool | Break internal clumps, redistribute fines | Fixing deep channeling, uneven density visible as jets or donut flow |
| Mechanical leveler/spinner | Groom and compress top layer | Surface finishing after WDT, ensuring level tamp contact |
| Hybrid needle + leveler | Stir internally and level surface | Streamlined workflow when depth is calibrated correctly |
Proper WDT Technique for Even Extraction in a Naked Portafilter
The Weiss Distribution Technique works by inserting thin needles into the coffee bed and stirring in overlapping patterns to break clumps and mix fines evenly with coarser particles. The key variables are needle depth, stroke pattern, stroke count, and total stirring time. Insert the needles to a depth of 3 to 6 mm below the surface. Deep enough to reach clumps in the upper half of the bed but shallow enough to avoid compacting fines against the basket bottom or scraping the metal. Use a radial pattern (center to edge sweeps, like spokes on a wheel) combined with cross-hatch or concentric circular strokes to cover the entire basket surface systematically.
Stroke count and timing depend on dose size and how clumpy your grind is, but a general starting point is 10 to 30 total strokes performed over 10 to 25 seconds. For a multi-needle tool, move at about 1 to 2 full sweeps per second with slow, deliberate motion. If you’re using a single needle or improvised tool like a paperclip, work slower (around 20 to 30 seconds total) to make sure you’ve covered the entire puck multiple times. The goal is to see visible clumps disappear and the surface become smooth and even, without creating air pockets or over-fluffing the bed. Over-stirring (excessive strokes or aggressive vertical motion) can aerate the puck or push fines into dense pockets that resist water flow.
Proper WDT technique prevents the most common channeling patterns visible through a bottomless portafilter: fast spurting jets from low-density zones, one-sided flow from uneven distribution, and donut extractions where the center stays dry while the edges extract first. When WDT is done correctly, you should see droplets form evenly across the entire basket within the first 2 to 5 seconds, with no early thin streams or explosive side sprays. The flow will merge smoothly into a single, stable cone of espresso with uniform crema color and volume.
WDT numeric guidelines:
- Needle depth: 3 to 6 mm below the surface. Adjust based on dose (deeper for 20+ g doses, shallower for 14 to 16 g).
- Needle count: 12 to 30 needles for multi-needle tools. Single-needle tools require more passes.
- Stroke pattern: radial sweeps (12 to 18 passes) + cross-hatch or concentric (6 to 12 passes).
- Total strokes: 10 to 30, spread evenly across the basket surface.
- Stirring speed: slow and controlled, approximately 1 to 2 sweeps per second.
- Total time: 10 to 25 seconds for multi-needle, 20 to 30 seconds for single-needle.
Integrating Mechanical Distributors with a Bottomless Portafilter Workflow

Mechanical distributors (spinners, levelers, or OCD-style tools) work by sitting on top of the coffee bed and rotating to push grounds outward and slightly downward, leveling the surface and creating light, even compression. These tools are most effective when used after WDT, not instead of it, because they primarily affect the top 1 to 3 mm of the puck. Set the distributor’s contact depth so the base just touches the coffee surface with minimal downward pressure (typically 0 to 2 mm of compression). If you set it too deep, you’ll pack the bed unevenly and push fines toward the edges, which shows up as peripheral channeling or thin edge streams through a bottomless portafilter.
Spin time for mechanical distributors is short: 2 to 5 seconds is usually enough for a single, smooth rotation at moderate speed. Longer spins (5 to 10 seconds) can sometimes help with very uneven doses or stubborn surface clumps, but they increase the risk of fines migration and can generate slight heat from friction. The best practice is to use the distributor as a finishing step after WDT has already broken internal clumps and equalized density. This way, the spinner’s main job is to dress the top layer and make sure you get a flat, level surface for the tamper to contact evenly.
Five-step integration guidelines for mechanical distributors:
- Perform WDT first to address internal clumps and density gradients throughout the full puck depth.
- Set your distributor’s depth adjustment so the base lightly contacts the top of the bed without compressing more than 0 to 2 mm.
- Place the distributor on the portafilter and spin for 2 to 5 seconds at steady, moderate speed. Avoid aggressive or prolonged spinning.
- Remove the distributor and visually check the surface for evenness. It should be smooth and level with no raised edges or sunken center.
- Tamp immediately (within 2 to 10 seconds) to lock in the leveled bed, then pull the shot and observe flow symmetry through the bottomless portafilter during the first 5 to 10 seconds of extraction.
Key Visual Indicators from a Bottomless Portafilter After Distribution

A bottomless portafilter exposes the underside of the basket, turning invisible extraction problems into visible patterns you can diagnose shot by shot. When distribution is done well, you’ll see even, tiny droplets forming across the entire basket surface within the first 2 to 5 seconds of extraction. These droplets merge into small, stable streams that come together into a single, syrupy cone with rich, dark crema and “tiger striping” (reddish-brown and caramel streaks that indicate balanced extraction). The flow should remain smooth and symmetrical throughout the 25 to 35 second pull, with no sudden changes in speed or direction.
Channeling shows up as thin, high-velocity jets or sprays shooting from isolated areas of the basket, often appearing within the first few seconds. One-sided extraction (where most of the flow comes from one half of the basket) indicates uneven tamping or lateral density imbalances from poor distribution. Donut extractions, where the edges extract first and the center stays dry or extracts late, point to over-dense centers caused by aggressive tamping or inadequate stirring. Bald spots (dry, un-extracted patches on the basket) happen when fines are packed so tightly in those zones that water can’t penetrate, routing around them instead.
The feedback loop between distribution technique and visual cues is simple: if you see jets, sprays, or asymmetry, adjust your WDT depth, stroke pattern, or mechanical distributor setting on the next shot. If you see donut flow, reduce tamp pressure or increase WDT coverage in the center. If you see bald spots, check for clumps or uneven settling after distribution. Proper distribution reduces all these faults and produces consistent, even flow that looks almost identical shot after shot.
| Visual Cue | Likely Cause |
|---|---|
| Thin, fast jets or sprays within first 5 seconds | Channeling from clumps or low-density zones. Incomplete WDT or over-deep mechanical distributor |
| One-sided flow, asymmetric streams | Uneven tamp or lateral density imbalance. Check tamp levelness and WDT coverage |
| Donut extraction (edges flow first, center dry) | Over-dense center from excessive tamp pressure or inadequate stirring in the middle of the puck |
| Bald spots or dry patches on basket | Compacted fines or clumps that resist water. Increase WDT strokes or reduce settling time |
| Uneven crema color or volume across streams | Localized under- or over-extraction from density gradients. Refine distribution pattern or depth |
Timing, Tamping, and Workflow Synchronization with Distribution Tools
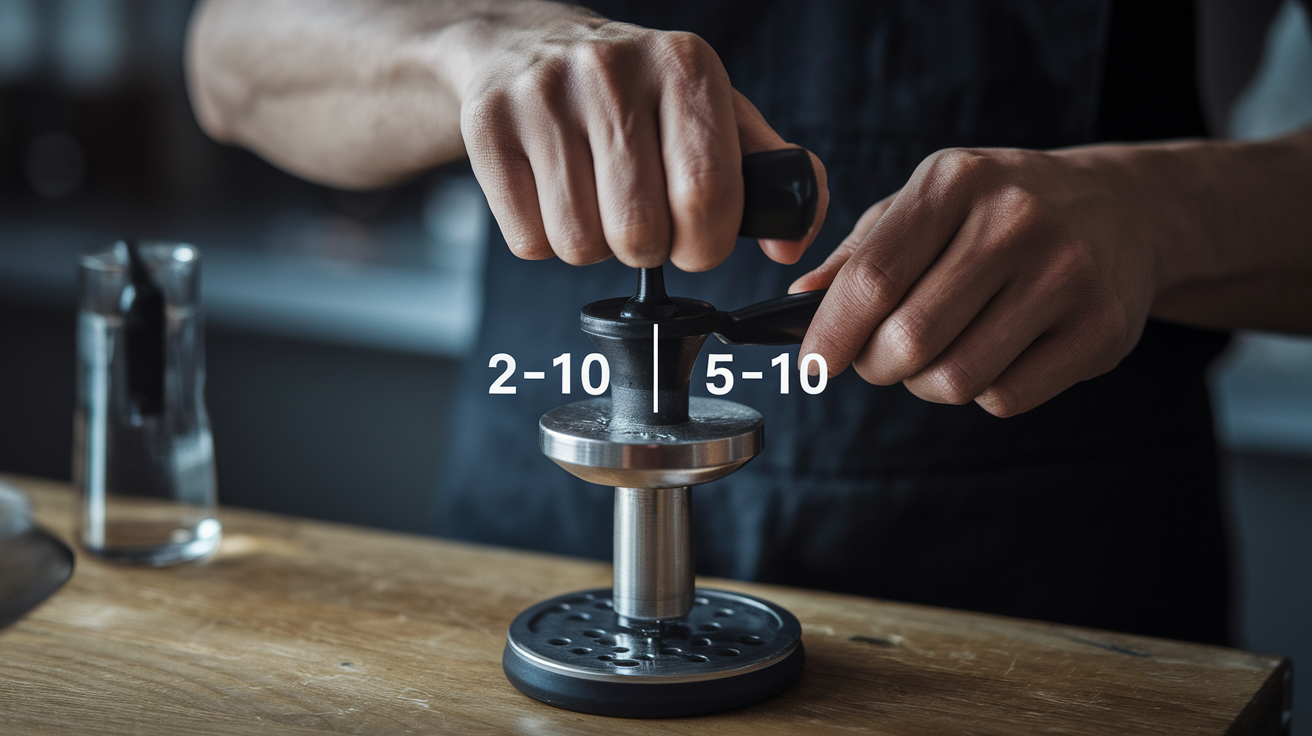
Timing between distribution and tamping controls whether the bed you just prepared stays uniform or re-segregates before extraction. After you finish WDT or spinning, tamp within 2 to 10 seconds to lock the bed in place. Waiting longer than 30 to 60 seconds gives fines time to drift and settle, especially if there’s any static cling or airflow in the room. This re-settling creates new density gradients that undo your distribution work and reintroduce channeling. The tighter you keep this timing window shot after shot, the more repeatable your extractions will be.
Tamp pressure matters less than consistency and levelness. The old “30 pounds” benchmark is useful as a repeatable reference (around 30 lb or 13.6 kg of force), but what really counts is applying the same pressure every time and making sure the tamper surface is perfectly parallel to the basket rim. An off-center or tilted tamp compresses one side more than the other, creating a density wedge that shows up as lopsided flow through a bottomless portafilter. Use your body mechanics to tamp vertically: keep your wrist straight, elbow over the portafilter, and press straight down. If you struggle with consistency, a calibrated or self-leveling tamper can help.
When distribution and tamping are dialed in, extraction times stabilize within a narrow range (typically plus or minus 2 to 4 seconds for the same dose, grind, and ratio). If your shot times are jumping around by 5+ seconds between pulls, the most common culprits are inconsistent distribution, variable tamp pressure, or delays between prep steps that allow the puck to settle unevenly. Tighten your workflow timing and check visual flow through the bottomless portafilter on every shot to identify which step is drifting.
Timing and tamp rules:
- Tamp within 2 to 10 seconds after completing distribution to prevent re-settling.
- Avoid waiting more than 30 to 60 seconds between distribution and tamp. Fines will migrate and create new density problems.
- Lock the portafilter into the group within 5 to 10 seconds of tamping to minimize further settling or shifting.
- Use consistent tamp force (around 30 lb / 13.6 kg is a common benchmark) and verify level contact. Consistency matters more than hitting an exact number.
Before/After Comparisons When Adding a Distribution Tool to a Bottomless Workflow
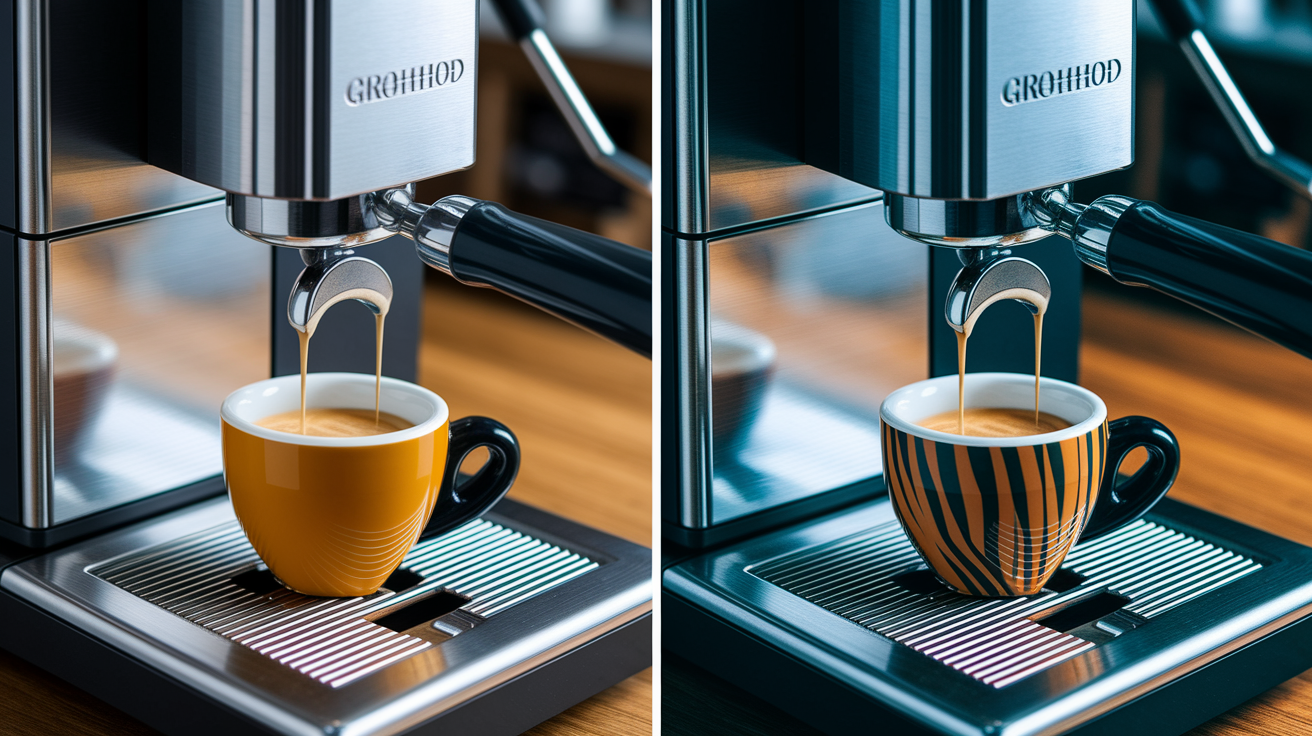
Adding a distribution tool to your workflow changes extraction in ways you can see, measure, and taste. A typical before scenario looks like this: 18 g dose ground and tamped without distribution, yielding 36 g of espresso in 22 seconds with visible side sprays and uneven crema. The shot tastes harsh and unbalanced (sharp sourness from under-extracted zones mixed with bitter astringency from over-extracted channels). Shot times vary by 5 to 8 seconds between pulls, making it nearly impossible to dial in a stable recipe.
After integrating WDT and a mechanical distributor into the same workflow, the same 18 g dose now yields 36 g in 26 seconds with smooth, symmetrical flow and no visible jets. The crema is thicker, more uniform in color, and shows tiger striping. Flavor balance improves: less sour bite, less harsh bitterness, more sweetness and body. Most importantly, shot times stabilize. Variance drops to plus or minus 2 to 3 seconds, so small grind adjustments produce predictable changes instead of random chaos.
The improvements are cumulative. Better distribution reduces channeling, which increases extraction evenness and lets you push higher extractions without bitterness. More even flow means more predictable yield for a given dose and grind setting, which tightens your workflow and reduces waste. Crema quality and visual flow become reliable indicators of puck prep quality, so you can diagnose problems faster and iterate more efficiently.
Typical gains from adding distribution tools:
- Reduction in visible channeling events (spurting jets, asymmetric streams) from most shots to occasional or rare.
- Tighter shot-time variance (from plus or minus 5 to 8 seconds down to plus or minus 2 to 4 seconds for identical dose/grind).
- More balanced, fuller flavor with reduced sour or bitter spikes from localized under- or over-extraction.
- Improved crema volume, color uniformity, and tiger-striping appearance as extraction becomes more even.
| Metric | Before (No Distribution) | After (WDT + Spinner) |
|---|---|---|
| Shot time (18 g → 36 g) | 22 s, ±6 s variance | 26 s, ±2 s variance |
| Visual flow through bottomless PF | Side sprays, asymmetric streams, thin jets | Even droplets merging into single stable cone |
| Flavor balance | Harsh, sour/bitter mix, thin body | Balanced sweetness, fuller body, smoother finish |
Troubleshooting Distribution Problems Revealed by a Naked Portafilter

The most common distribution mistakes all show up as specific visual faults when you pull a shot through a bottomless portafilter. Over-stirring with WDT (using too many strokes or stirring too aggressively) aerates the puck and creates air pockets or pushes fines into dense clusters. This shows up as erratic flow: sudden bursts, random sprays, or streams that start and stop. If you see this, reduce stroke count by 5 to 10 and slow down your stirring motion to keep it deliberate and controlled.
Inserting WDT needles too deep (below the bottom third of the puck or scraping the basket floor) compacts fines at the bottom and can scratch the basket, creating permanent flow distortions. This causes persistent channeling along the basket perimeter or from specific holes, even when everything else looks correct. Keep needle depth to 3 to 6 mm and avoid plunging straight down. Use shallow, sweeping motions instead. Excessive mechanical distributor pressure (setting the tool too deep or spinning too hard) pushes grounds toward the edges and creates a dense rim with a light center, producing donut extractions. Set your distributor to barely touch the surface with 0 to 2 mm of light compression.
Side-tapping the portafilter after tamping is one of the fastest ways to ruin a perfectly prepared puck. Tapping dislodges the tamp seal and shifts grounds toward one side, creating immediate lateral density imbalances that show up as one-sided flow or fast jets. Only tap before tamping, never after. Long delays between distribution and tamping (waiting more than 30 to 60 seconds) allow fines to resettle and undo your prep work, causing the same channeling you were trying to fix. Keep the workflow tight: distribute, tamp, brew.
Common mistakes and solutions:
- Over-stirring (too many WDT strokes): creates air pockets and erratic flow. Reduce stroke count and slow down motion.
- Too-deep WDT needles: compacts fines at basket bottom, causes perimeter channeling. Limit depth to 3 to 6 mm.
- Excessive mechanical distributor pressure: creates donut extractions with dense edges. Set tool to 0 to 2 mm compression.
- Side-tapping after tamp: shifts puck and breaks seal, causes one-sided jets. Only tap before tamp, never after.
- Long delays between prep steps (more than 30 to 60 s): allows fines to resettle, reintroduces density gradients. Tamp within 2 to 10 seconds of distribution.
- Uneven or tilted tamp: creates lateral density wedge, shows as asymmetric flow. Check tamp levelness and body mechanics every shot.
Maintenance and Calibration of Distribution Tools for Consistent Bottomless Extractions

Distribution tools need regular cleaning and occasional recalibration to maintain consistent performance. Coffee oils, fines, and static buildup on WDT needles and distributor surfaces change how the tool interacts with the puck, gradually shifting your distribution pattern even when your technique stays the same. Clean WDT needles weekly if you’re pulling daily shots, or after every 100 to 200 doses. Wipe them down with a dry cloth to remove loose fines, then wash with warm soapy water and dry completely to prevent rust or corrosion on steel needles.
Inspect needles for bending, chipping, or tip damage every few weeks. Bent needles create uneven stirring paths and can gouge the basket or compact fines in unpredictable ways. Replace damaged needles immediately. Most multi-needle tools allow individual needle replacement. For mechanical distributors, check that the depth adjustment mechanism still locks securely and that the base surface is clean and flat. If the distributor starts leaving ridges or uneven compression, verify that the depth setting hasn’t drifted and recalibrate to your original 0 to 2 mm target.
Maintenance checklist:
- Clean WDT needles weekly or every 100 to 200 shots. Wipe dry, wash with soapy water, dry completely.
- Inspect needles for bends, chips, or damage every 2 to 4 weeks. Replace any damaged needles before the next session.
- Verify mechanical distributor depth settings monthly. Confirm base compression stays within 0 to 2 mm and recalibrate if drift is detected.
- Check distributor base for flatness and cleanliness. Remove coffee oil buildup and make sure you get even contact across the entire basket surface.
Final Words
Dose precisely, WDT 10–25 seconds (12–30 needles, 3–6 mm), optional spinner 2–5 seconds, tamp within 2–10 seconds, then pull the shot.
If you follow timing, depth, and simple maintenance checks, you’ll cut channeling and tighten shot-time variance.
Integrating a distribution tool into a bottomless portafilter workflow is a small change with big, repeatable gains. Small tests, big improvements. Try one change at a time — and enjoy steadier, more consistent shots.
FAQ
Q: What are the disadvantages of bottomless portafilter?
A: The disadvantages of bottomless portafilter are increased splatter and mess, exposed channeling that wastes shots, greater demand on consistent dose/distribution/tamp, and slightly lower heat stability—so it needs better prep and skill.
Q: How do you distribute coffee in a Portafilter?
A: You distribute coffee in a portafilter by dosing accurately, using WDT (10–25 seconds, 12–30 needles at 3–6 mm) to break clumps, optionally spinning 2–5 seconds, then tamping and pulling the shot promptly.
Q: Do you get more crema with bottomless portafilter?
A: A bottomless portafilter doesn’t automatically produce more crema; it reveals extraction quality. Proper dosing, WDT and tamping improve crema consistency, which the naked portafilter makes easy to diagnose and refine.
Q: Do you really need a bottomless portafilter?
A: You don’t really need a bottomless portafilter; it’s optional. Use it for visual feedback to diagnose channeling and refine distribution. Start with a spouted portafilter, upgrade when you want troubleshooting help.