

Think your grinder alone stops channeling? It doesn’t.
Clumps below the surface still make shots sour in one spot and bitter in another.
This post walks you through a fast, repeatable espresso distribution tool workflow you can do at home, using needles, a funnel, taps, leveling, and a tamp.
No gadget shopping first.
You’ll learn one change at a time, what to watch (flow, puck look, shot time), and a simple WDT routine that takes about five seconds once you’ve practiced.
Read on to make your pucks behave and your shots more consistent.
Step-by-Step Espresso Distribution Workflow for Home Baristas

The Weiss Distribution Technique showed up in 2005, and it’s still the best method for breaking up clumps and evening out your puck before you tamp. WDT sits between dosing and tamping. Without it, clumps and uneven density create channels where water rushes through too fast, leaving some of your puck sour and other parts bitter.
Distribution takes maybe five seconds once you’ve got the motion down. The sequence: grind into the basket, run a fine needle through to redistribute grounds, level the top if it’s uneven, tamp with steady pressure, brew. Skip distribution or half-do it and you’ll get density problems that show up as weird flow and inconsistent times.
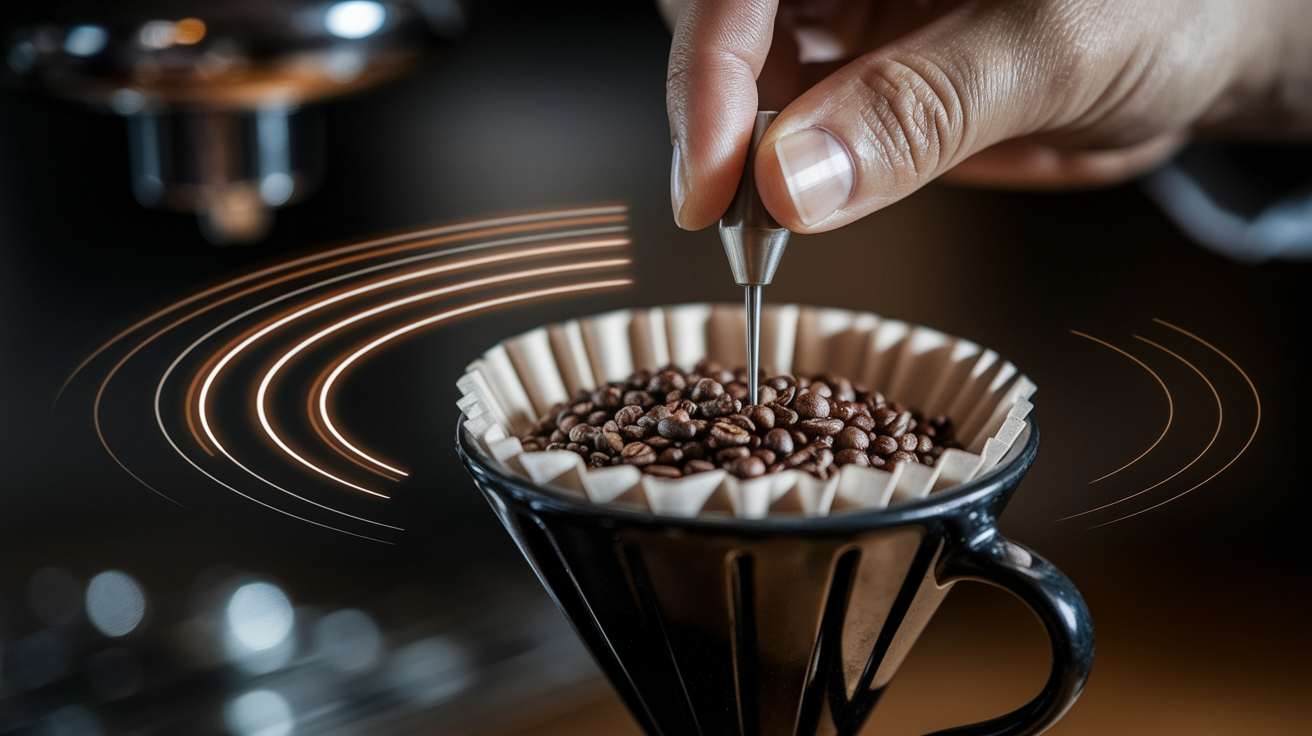
You need a needle around 1.0 mm or thinner. Anything fatter just shoves grounds sideways instead of threading between particles to bust clumps. A dosing funnel contains the mess while you stir, so you can cover the entire basket without losing coffee over the side.
Complete WDT workflow:
-
Grind your dose straight into the portafilter basket, or into a dosing cup if you shake to settle first.
-
Place a dosing funnel on the portafilter so grounds stay put while you work.
-
Insert the WDT needle vertically near the center, then draw gentle circles or sweeping passes across the full radius—edge to center and back.
-
Stir all the way to the basket bottom on at least half your passes. This breaks up clumps deep in the puck, not just on the surface. That’s what separates real WDT from surface raking.
-
Remove the funnel and tap the portafilter once or twice on the counter to settle grounds and close small voids.
-
Level the top with a flat edge or leveling tool if the surface looks wavy after tapping. You’re just smoothing, not compacting.
-
Tamp straight down with steady pressure, lock in, pull the shot.
Understanding Espresso Distribution Tools and Their Role in a Home Workflow

Most commercial distribution tools that look like tampers with fins only level the top. They don’t redistribute coffee lower in the puck, so clumps below the surface stay intact. WDT is the only method that consistently shows real benefits in tests because it breaks clumps through the entire bed depth, not just the top layer.
Modern grinders with declumping features help, but they don’t eliminate the problem. Even high-end grinders produce some clumping depending on bean moisture, roast date, and grind setting. Automated WDT tools exist now—they use randomized needle motion to distribute grounds without you doing it manually—but they’re rare and expensive compared to simple hand tools.
Tool categories and when to use them:
Single-needle WDT: slowest, but you get full control. Best for learning technique and dialing in new coffees where you want maximum feel for puck behavior.
Multi-needle WDT (3 to 12 needles): faster, easier to cover the basket in one or two passes. Good for daily workflow once you’ve got the motion figured out.
Surface-leveling tools (grooved distributors, fins): useful only after WDT to smooth the top before tamping. Don’t rely on them alone because they leave clumps intact below the surface.
Dosing cups with shaking: helps with partial homogenization before transferring into the basket. Better than nothing, but doesn’t replace in-basket redistribution for espresso-fine grinds.
Automated distribution devices: for high-volume or data-focused setups. They reduce operator variation but add cost and counter space.
Comparing WDT to Other Espresso Distribution Methods

The specialty community has zeroed in on WDT because flow and pressure data show that deep stirring produces higher sustained puck pressure and cuts down on microchanneling compared to tapping, leveling, or surface methods. Tests comparing deep WDT to puck-raking (stirring only the top layer) found that deep WDT increased shot-to-shot consistency and overall puck resistance. Water moved more evenly through the bed instead of finding fast paths.
Other methods like NSEW (pushing grounds north, south, east, west with a finger), Stockfleth (rotating the basket and your hand in opposite directions), and side-tapping offer partial homogenization. They’re better than nothing, but they don’t break clumps as thoroughly as needle-based redistribution. Surface tapping settles loose grounds and can reduce big voids, but it doesn’t address density variation within the compressed puck.
Leveling tools smooth the top and can improve tamp contact. But if clumps remain below the surface, channeling still happens during extraction. WDT addresses the root cause—uneven particle distribution throughout the basket. The other methods just address symptoms like an uneven top or visible gaps.
| Method | Effect on Extraction |
|---|---|
| Deep WDT (needle stirring to basket bottom) | Highest puck resistance, reduced microchanneling, improved shot-to-shot consistency |
| Puck-raking (surface stirring only) | Moderate improvement over no distribution; faster but leaves deeper clumps intact |
| NSEW / Stockfleth / side-tapping | Partial homogenization; reduces large voids but doesn’t break clumps effectively |
| Leveling-only tools (grooved distributors) | Smooths top surface for even tamp contact; no effect on clumps or density below surface |
Technique Breakdown: How to Use a WDT Tool Correctly at Home
Use a needle between 0.2 mm and 1.0 mm in diameter. Anything thicker will push grounds aside instead of threading between particles. The ideal motion is a gentle circular or sweeping pass that covers the basket from edge to center and back, with the needle angled slightly or held vertical depending on your funnel depth. Recommended needle thickness and counts vary, but 3 to 9 needles is common for multi-needle tools. It balances speed and precision.
Deep WDT means your needle tip reaches near the basket bottom on at least half your passes. This breaks clumps where they matter most—in the compressed lower layer where water first contacts the puck. Puck-raking (stirring only the top 2 to 3 mm) is faster and better than nothing, but it leaves deeper clumps intact. A funnel keeps grounds contained and lets you stir without spilling. Critical for consistent dosing and clean workflow.
Common WDT Mistakes and How to Fix Them
Uneven density happens when you stir too hard in one spot or skip sections of the basket. Over-stirring (more than 8 to 10 passes for most baskets) can concentrate fines at the bottom and create a muddy puck that chokes the shot. Using a thick tool like a toothpick or paperclip (above 1 mm) just moves grounds around instead of breaking clumps. If you don’t level after WDT, you’re left with a wavy or domed surface that causes uneven tamp pressure across the puck.
Fix these with these checks:
Uneven stirring: make sure every pass covers the full basket radius, not just the center or one side. Rotate the portafilter between passes if that helps.
Over-stirring: stop after 6 to 10 gentle passes. If your puck looks disturbed or fluffy instead of settled, you’ve gone too far.
Thick needle: switch to a tool at or below 1 mm diameter. A sewing needle or purpose-built WDT rake with fine tines works better than improvised thick probes.
No leveling after WDT: tap the portafilter gently on the counter once or twice to settle redistributed grounds, then check the surface and level if it looks uneven.
Pressing down while stirring: keep the motion light and let the needle glide between particles. Pressing compacts unevenly and defeats the purpose of redistribution.
Skipping the funnel: without a funnel, grounds spill over the basket edge during stirring. That changes your dose and creates a mess that adds time and kills consistency.
How Distribution Impacts Espresso Extraction Quality and Shot Consistency
Proper distribution reduces shot-to-shot variation in extraction time and flow rate. Your recipe stays stable across multiple pulls even when small variables like tamp pressure or bean moisture shift. Shots prepared with WDT tend to show lower bitterness and astringency because fewer parts of the puck over-extract while others stay sour. Sometimes better distribution lets you use a gram or two less coffee for the same cup strength. Higher overall extraction efficiency means more soluble material ends up in the cup instead of wasted in the puck.
Taste improvements from distribution loosely correlate to extraction yield, but yield isn’t the only predictor of quality. Balance, clarity, and mouthfeel also shift when water moves evenly through the puck. Flow and pressure data confirm that well-distributed pucks maintain higher, more consistent pressure during the shot. That indicates uniform resistance instead of microchannel formation where pressure drops as water finds fast paths.
Track your shots over a week and effective distribution shows up as tighter grouping in your shot times (28 to 30 seconds instead of 24 to 34 seconds) and more predictable flavor. When extraction becomes more consistent, troubleshooting sour or bitter shots gets easier. You can isolate grind size or dose as the variable instead of guessing whether uneven flow caused the problem.
Flavor and troubleshooting impacts from better distribution:
Reduced bitterness and astringency: fewer over-extracted channels mean cleaner finish and less harsh aftertaste, especially in light and medium roasts.
More uniform sweetness and body: even extraction across the puck pulls balanced flavor from all the coffee instead of mixing sour and bitter zones.
Tighter shot-timing windows: consistent puck resistance keeps flow rates predictable, making it easier to repeat a dialed recipe day to day.
Easier diagnosis of off flavors: when distribution is stable, sour shots point to grind too coarse or dose too low, and bitter shots point to grind too fine or dose too high, without the noise of random channeling.
Building a Repeatable Espresso Distribution Workflow at Home
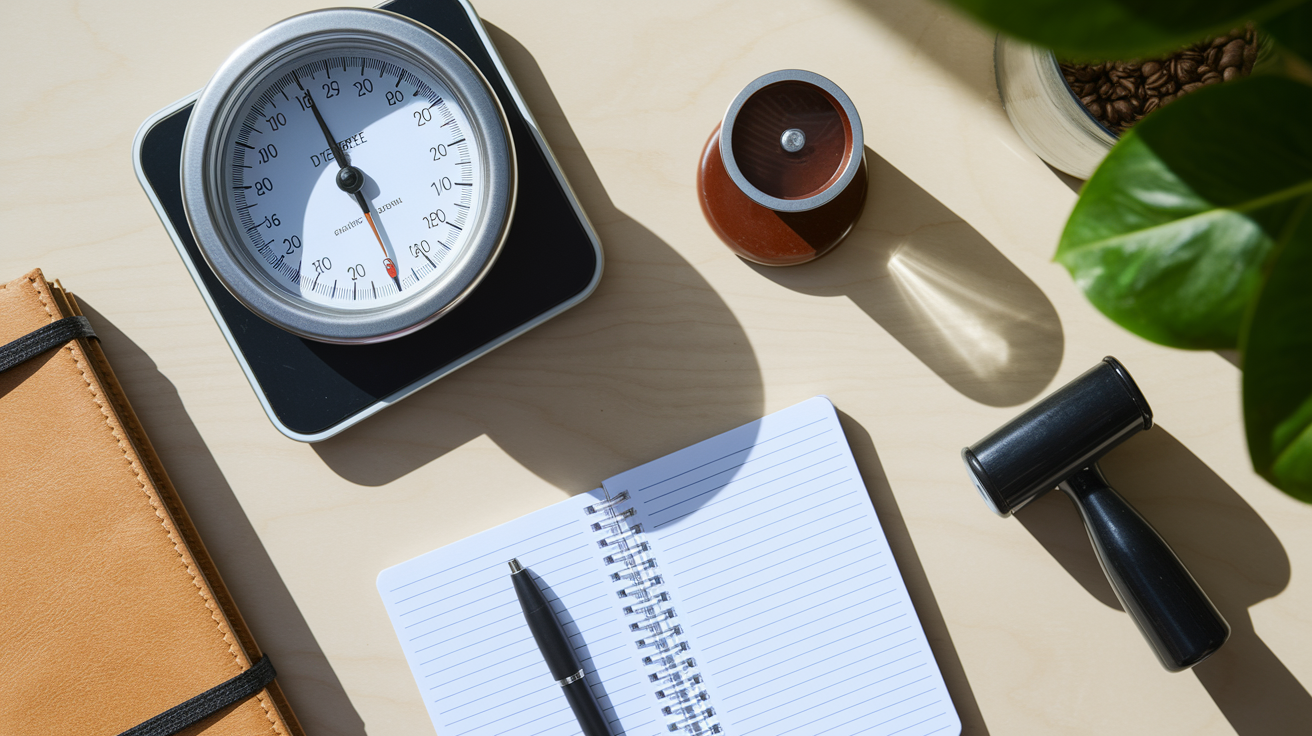
Consistency matters more than perfection in any single shot. WDT adds only a few seconds to your routine, and multi-needle tools cut that time further without sacrificing thoroughness. Research shows that deep WDT lowers shot-to-shot variation in puck resistance and extraction, so the small time investment pays off in fewer wasted shots and more predictable results. Home baristas should track dose in grams, shot time in seconds, and yield in grams out to see whether their distribution technique actually improves repeatability.
Automated tools can improve repeatability if manual execution feels shaky. But most home setups benefit more from practicing manual WDT until the motion becomes automatic. Your goal is to do the same stirring pattern in roughly the same time for every shot. That creates a stable baseline that lets you isolate other variables like grind size or water temperature when dialing in new beans.
Steps to build a repeatable distribution workflow:
-
Dose the same weight every time using a scale. Variation of more than 0.5 grams between shots will obscure the benefits of distribution.
-
Add WDT immediately after dosing so grounds don’t settle unevenly while you prep other steps. Delay creates density layers that are harder to redistribute.
-
Use the same stirring pattern and speed for each shot. Count passes if it helps, or aim for a consistent tempo (two full rotations covering the basket radius, for example).
-
Level and tamp with identical pressure and angle every time. Even the best distribution fails if your tamp rocks or presses unevenly.
-
Log your shots in a notebook or app with dose, time, yield, and a brief taste note. After 10 to 15 logged shots, patterns in timing and flavor will show whether your workflow is stable or drifting.
Keep your WDT tool, funnel, tamper, and scale within arm’s reach on the counter so the workflow moves smoothly without hunting for accessories mid-prep. A compact, organized setup cuts the chance of skipping steps when you’re tired or rushed. It keeps the added time from WDT under 10 seconds per shot once the motion becomes habit.
Final Words
Grab your portafilter and dose—grind → WDT → level → tamp → brew. The post gave a tight, step-by-step puck prep routine, the WDT origin and needle specs, and where distribution sits in the workflow.
We ran quick comparisons to other methods, broke down correct needle technique and fixes, and showed how distribution affects timing, yield, and taste.
Use this espresso distribution tool workflow for home baristas and you’ll pull steadier, cleaner shots with fewer wasted pulls.
FAQ
Q: What is the Weiss Distribution Technique (WDT) and why should I use it?
A: The Weiss Distribution Technique (WDT) is a needle-based method from 2005 that breaks clumps and evens puck density, improving consistency and reducing tiny voids that cause uneven extraction.
Q: Where in my shot prep should I use WDT?
A: You should use WDT after dosing and before tamping — follow grind → WDT → level → tamp → brew — the WDT step only takes a few seconds and fits right after dosing.
Q: What needle size and insertion depth should I use for WDT?
A: You should use needles about 0.2–1.0 mm thick (ideally ≤1 mm) and insert roughly two-thirds into the puck to redistribute grounds without scraping the basket bottom.
Q: How long should WDT take and what motion is correct?
A: WDT should take only a few seconds using gentle circular or sweeping motions; avoid aggressive stirring to stop creating density gradients and finish by leveling before tamping.
Q: Will WDT stop channeling and improve pressure during the shot?
A: WDT reduces microchanneling and tends to produce higher sustained pressure and steadier flow, though proper dose, grind, and tamp are still needed for reliable results.
Q: How does WDT compare with tapping, NSEW, Stockfleth, or leveling-only methods?
A: WDT produces deeper, more consistent redistribution than tapping, NSEW, Stockfleth, or leveling-only tools, which often only partially homogenize and can leave density gradients.
Q: Do I need a distribution tool and which type suits home use?
A: You should use a distribution method but a simple single-needle WDT is enough at home; multi-needle tools speed the step and automated devices boost repeatability if you want faster, consistent results.
Q: What common WDT mistakes should I avoid and how do I fix them?
A: Common WDT mistakes are uneven stirring, over-stirring, using thick needles, and not leveling afterward; fix them by using thinner needles, gentle motions, and a quick level before tamping.
Q: How does distribution impact espresso taste and shot consistency?
A: Distribution improves extraction consistency, often reducing bitterness or sourness, and gives steadier flow and timing; measure yield, time, and pressure to confirm improvements.
Q: How do I build a repeatable distribution workflow at home?
A: You should build a routine: weigh dose, WDT a few seconds, level, tamp, brew, log dose/time/yield, and change one variable at a time to track what actually improves your shots.