

What if tamping is not the thing ruining your shots?
Most home baristas blame the tamp. But uneven dosing and a patchy coffee bed are the real culprits.
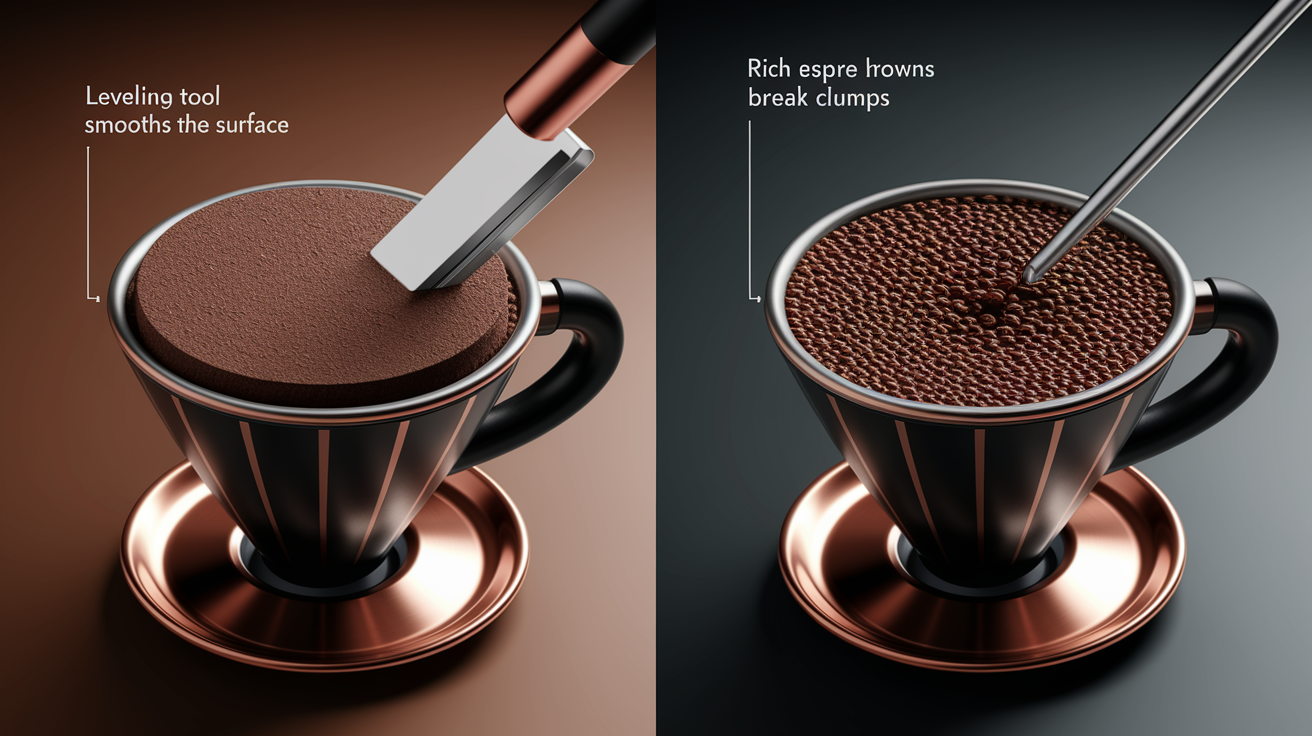
A distribution tool levels grounds before you tamp, removing air pockets and high spots that let water find shortcuts (channeling).
Use a fixed depth, spin 3 to 5 full rotations, then lift straight up and tamp.
Do that, and your shots stop spritzing, taste sweeter, and dial in faster.
Core Method for Using a Distribution Tool
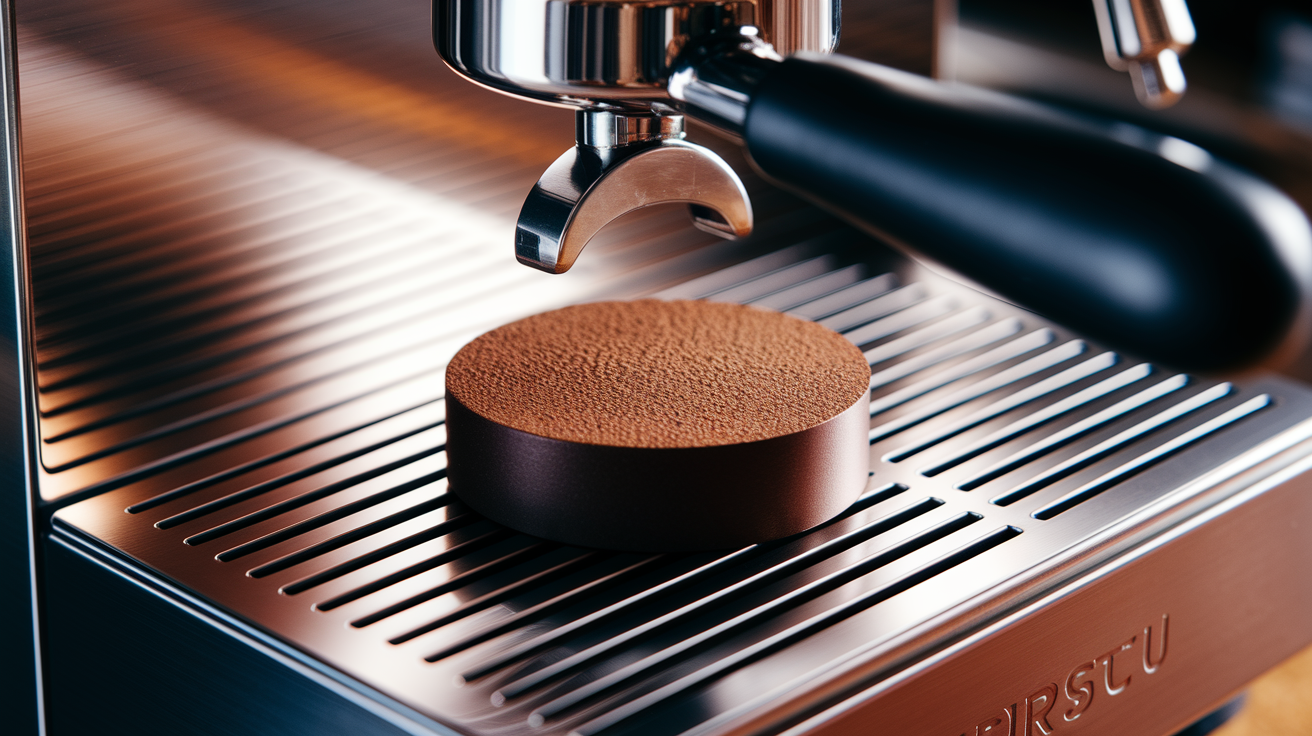
A distribution tool levels out coffee grounds in the portafilter before you tamp. It sits on top of the basket and uses spinning blades or fins to spread the coffee bed into a flat, even layer. This gets rid of air pockets and high spots that let water rush through weak zones during extraction.
- Dose your coffee into the portafilter (usually 18–20 g for a double basket).
- Set the distribution tool depth so the base sits about 1–2 mm above the settled grounds.
- Place the tool flat on the basket rim and spin it 3–5 full rotations in one direction.
- Lift the tool straight up. Don’t tilt.
- Tamp right away with consistent, level pressure (20–30 lbf).
- Lock the portafilter into the group head and pull your shot.
Distribution creates even density across the entire puck. When all regions have the same resistance, water flows uniformly instead of finding easy paths through loose patches. That uniform flow is what stops channeling. Water moves through coffee like it’s looking for shortcuts. Distribution removes those shortcuts by making every route equally difficult.
Skip this step and you’re left with random dense and loose zones that water exploits. Fast, sour shots. Bitter, over-extracted streams alongside under-extracted pockets. The order matters: dose, distribute, tamp. Never tamp before distributing, because tamping locks in whatever unevenness you started with.
Key Techniques for Optimal Distribution

Proper distribution depends on tool depth, rotation count, and consistency. Set the tool so the fins or blades contact the top layer of grounds without pressing the entire bed downward. Most adjustable distribution tools use a threaded collar or set screw to lock depth. Start with the base 1–2 mm above the coffee surface, then spin 3–5 full rotations at a steady, moderate speed.
Too few rotations leave ridges and gaps. Too many can over-compact the top layer, creating a dense crust that resists water.
After rotating, lift the tool straight off. Any tilt on the way up drags grounds to one side and undoes the leveling work. The finished bed should look flat across the entire diameter and feel evenly firm when you tap the basket edge lightly. If you see a dome or crater, the depth setting is wrong or the rotation was uneven.
Best practices:
- Use 3–5 full rotations every shot.
- Keep rotation speed steady, about one rotation per second.
- Set depth so the tool touches grounds but doesn’t compress the bed.
- Lift straight up. Never tilt or drag sideways.
Depth consistency is the single biggest variable. A tool set too shallow only skims the surface. A tool set too deep pre-compresses the puck and can create uneven density if the dose varies by even 0.5 g shot to shot.
Comparing WDT and Leveling Distribution Tools
Leveling distribution tools and WDT tools serve different roles in puck prep. A leveling tool uses spinning fins or a flat base to redistribute and flatten the top surface of the coffee bed. WDT (Weiss Distribution Technique) uses a small rake with fine needles to stir the grounds and break up clumps before any leveling happens.
Both address channeling, but they work at different stages and on different problems.
Leveling tools fix macro-level unevenness: mounds, craters, empty corners. They move grounds horizontally and smooth the top layer so the puck has a flat starting surface for tamping. They’re fast (add about 5 seconds per shot), clean, and highly repeatable. But leveling tools don’t break up clumps or eliminate internal density differences that form during grinding and dosing. If your grinder produces tight clumps of fines or your beans are fresh and sticky with CO₂, a leveling tool alone won’t solve the channeling problem.
WDT targets clumping and internal stratification. Stirring the bed with needles breaks apart fines clusters and redistributes particles vertically, creating a more homogeneous density throughout the entire puck depth. This is especially useful when single-dosing or using a grinder that clumps heavily (common with popcorn-style grinders or high-retention models). WDT takes longer, 15–25 seconds if done carefully, and requires a dosing collar or funnel to contain the grounds.
Many home baristas use both: WDT first to break clumps and mix the bed, then a leveling tool to flatten the surface, then tamp.
When to Use WDT
Use WDT when you see clumping in the basket after dosing or when shots channel despite careful tamping and leveling. Needle stirring is most effective with fresh, lightly roasted beans (which carry more CO₂ and static) and grinders that produce uneven particle distribution or leave “popcorn” piles in the portafilter.
The technique requires a WDT tool with 5–12 needles spaced 3–6 mm apart, typically 18–22 gauge (needle diameter around 0.4–0.8 mm). Stir in a gentle circular or back-and-forth pattern for 10–20 passes, reaching close to the basket bottom without scraping metal. The goal is to homogenize the bed, not aerate it.
WDT increases prep time but delivers the most uniform density distribution of any manual method. If you see a clump the size of a pea in your dry grounds, WDT is the only method that will actually break it apart instead of just rearranging it.
Common Distribution Mistakes and How to Avoid Them
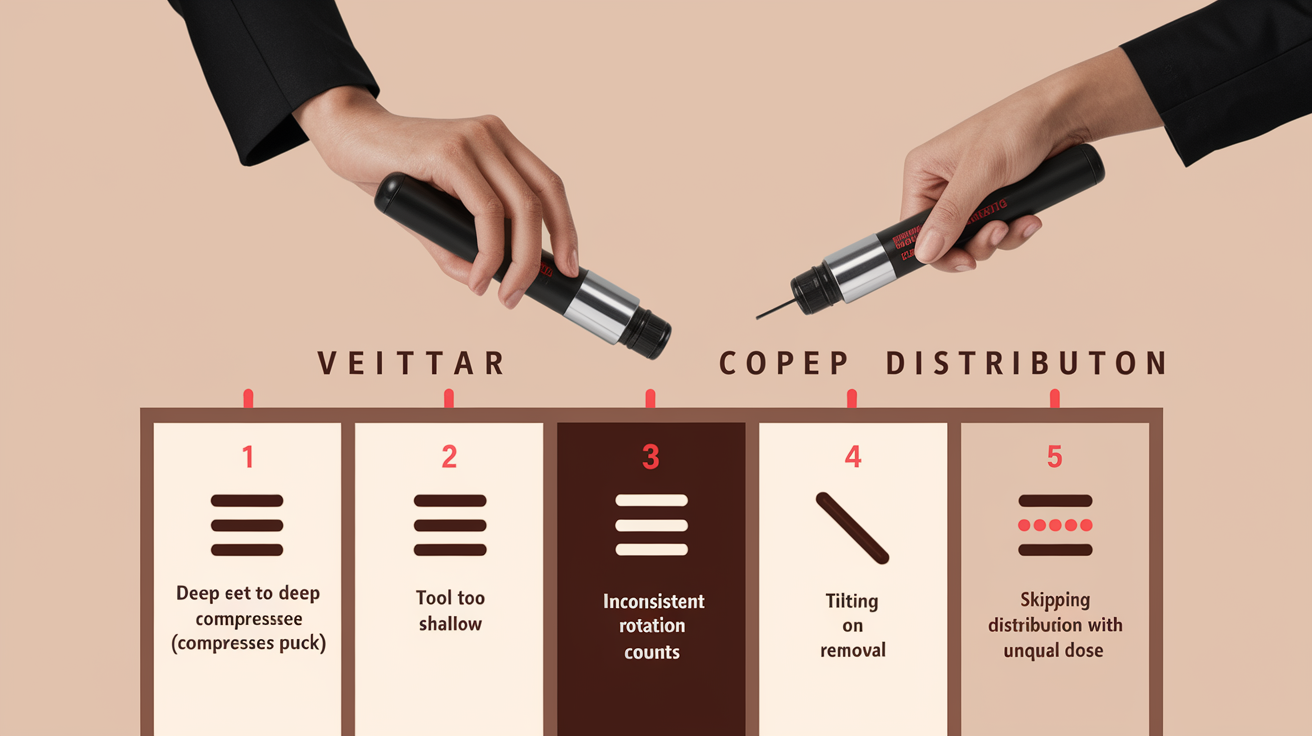
Poor distribution technique reintroduces the channeling problems the tool was meant to solve. The most common errors are setting depth inconsistently, rotating unevenly, skipping distribution entirely, tilting the tool during removal, and using distribution as a substitute for proper dosing. Each mistake leaves density variations that water exploits during extraction.
Setting the tool too deep pre-compresses the puck unevenly and creates a hard top crust that slows flow and traps fines below.
Setting the tool too shallow only redistributes the top 2–3 mm, leaving clumps and voids untouched in the lower bed.
Inconsistent rotation count. Three rotations one shot, seven the next. Creates shot-to-shot variation in puck density and flow rate.
Tilting on removal drags grounds to one side, leaving a slope or ridge that causes uneven saturation.
Skipping distribution when the dose varies. If you dose 17.8 g one shot and 19.2 g the next, distribution can’t fix the resulting depth and resistance differences.
These mistakes produce hollow, sour espresso when water channels through loose zones, or thick, bitter shots when over-compacted regions slow flow and over-extract. Visual signs include uneven crema color, fast drips from one side of a bottomless portafilter, or a finished puck with a crater or lopsided impression.
Fixing distribution errors is simple: use a fixed depth setting, count rotations out loud, and lift straight up every time. Check your work by tapping the basket edge lightly. If grounds shift or a divot appears, distribution was incomplete.
Flavor Impact of Proper Distribution

Even distribution delivers balanced extraction across the entire puck, which translates directly to flavor. When every region of the coffee bed has the same density and resistance, water moves through all grounds at the same rate. That uniform contact time means sugars, acids, and solubles extract at similar levels everywhere in the puck.
The result is fuller body, clearer sweetness, and better separation of flavor notes. A well-distributed shot tastes like all the coffee participated, instead of half of it sitting out.
Uneven distribution creates localized over-extraction and under-extraction in the same shot. Loose zones let water sprint through, pulling bright, sour acids and little else. Dense zones slow water down, extracting bitter tannins and astringent compounds. The combined cup tastes muddled, harsh, or thin because no single extraction level dominates.
Proper distribution eliminates that conflict. Shots become more predictable, dialing in becomes faster, and the espresso has a coherent flavor arc from start to finish instead of shifting between sour and bitter as the cup cools.
Final Words
Dose, distribute, tamp, brew—you learned the core method and a straight workflow for using a distribution tool.
We covered depth, rotation, and when to use WDT versus a leveling tool, plus the common mistakes that cause channeling. You also saw how even distribution lifts body, sweetness, and clarity.
Practice one change at a time and track results. Using what you learned about how to use a distribution tool for even espresso extraction will cut wasted shots and give you more consistent, tastier pulls.
FAQ
Q: How do you use a distribution tool?
A: Using a distribution tool means following Dose → Distribute → Level → Tamp → Brew. Dose into the basket, set tool depth, place on the puck, rotate evenly to flatten, then tamp with steady pressure.
Q: What rotation method, depth, and pressure should I use with a distribution tool?
A: The rotation method, depth, and pressure should use shallow adjustable depth, light steady contact, and 2–4 slow rotations. Let the tool move the grounds, don’t press hard or over-rotate, which creates uneven density.
Q: How does distribution prevent channeling and affect extraction?
A: Distribution prevents channeling by evening density and removing pockets so water flows uniformly. That yields balanced extraction, fewer sour or hollow notes, and more consistent shot-to-shot results.
Q: When should I use WDT versus a leveling distribution tool, and what sequence is best?
A: You should use WDT versus a leveling tool when dealing with clumpy, single-dose grinders; WDT breaks clumps, then follow with a leveling tool to flatten the bed. Sequence: WDT first, distribution second, tamp last.
Q: What are the most common distribution mistakes and how do I avoid them?
A: The most common distribution mistakes are skipping distribution, uneven rotation, setting the tool too deep, over-rotating, and inconsistent dose. Avoid them with one controlled rotation, correct depth, and a visually flat puck before tamping.
Q: How does proper distribution change espresso flavor and consistency?
A: Proper distribution changes espresso flavor by producing sweeter, fuller-bodied shots with clearer clarity. It removes extraction hot and cold spots so shots match more closely between pulls and taste more balanced.