

Waiting until the group head leaks is a fast way to get bad shots and an emergency repair.
Instead, change the gasket on a schedule that matches how you use the machine.
For most home users that means every 12 to 24 months; if you pull shots daily, aim for about 12 months.
Commercial machines should expect 6 to 12 month swaps and quick monthly checks to catch hardening, cracks, or leaks before they ruin a shift.
Read on for simple inspection steps and one change you can test today to keep shots steady.
Replacement Frequency and Timelines for Espresso Group Head Gaskets

Most home users swap their group head gaskets every 12 to 24 months. It depends on how many shots you’re pulling each week. If you’re running multiple shots daily, think about annual replacement to keep that seal tight and avoid a surprise failure mid-brew. Commercial setups need tighter timelines: replace every 6 to 12 months and inspect monthly so you catch wear before it turns into leaks or pressure loss during service.
Inspection frequency? Just as important as when you actually replace the thing. Commercial machines should get a visual gasket check once a month. Look for flattening, cracks, or hardness while you’re doing routine group head cleaning anyway. Home machines can stretch inspections to every three months, but if you’re pulling shots daily, do a quick weekly check for drips around the portafilter while the machine’s locked and running.
A few factors can push you to replace sooner:
- High temperature cycling from constant on-off or steam-heavy drinks
- Heavy daily use with back-to-back extractions
- Poor cleaning habits letting coffee oils and minerals carbonize the rubber
- Hard water or high mineral content building up in the groove
- Long idle periods that compress and harden the gasket while the machine sits
Cleaning habits and water quality shift these timelines noticeably. Machines running on hard water or getting aggressive detergent backflushing without proper rinsing might need replacement closer to the 6-month mark even at home. Filtered water, gentle cleaning, and consistent backflushing can push replacement intervals toward the upper end.
Key Signs of a Worn Espresso Group Head Gasket
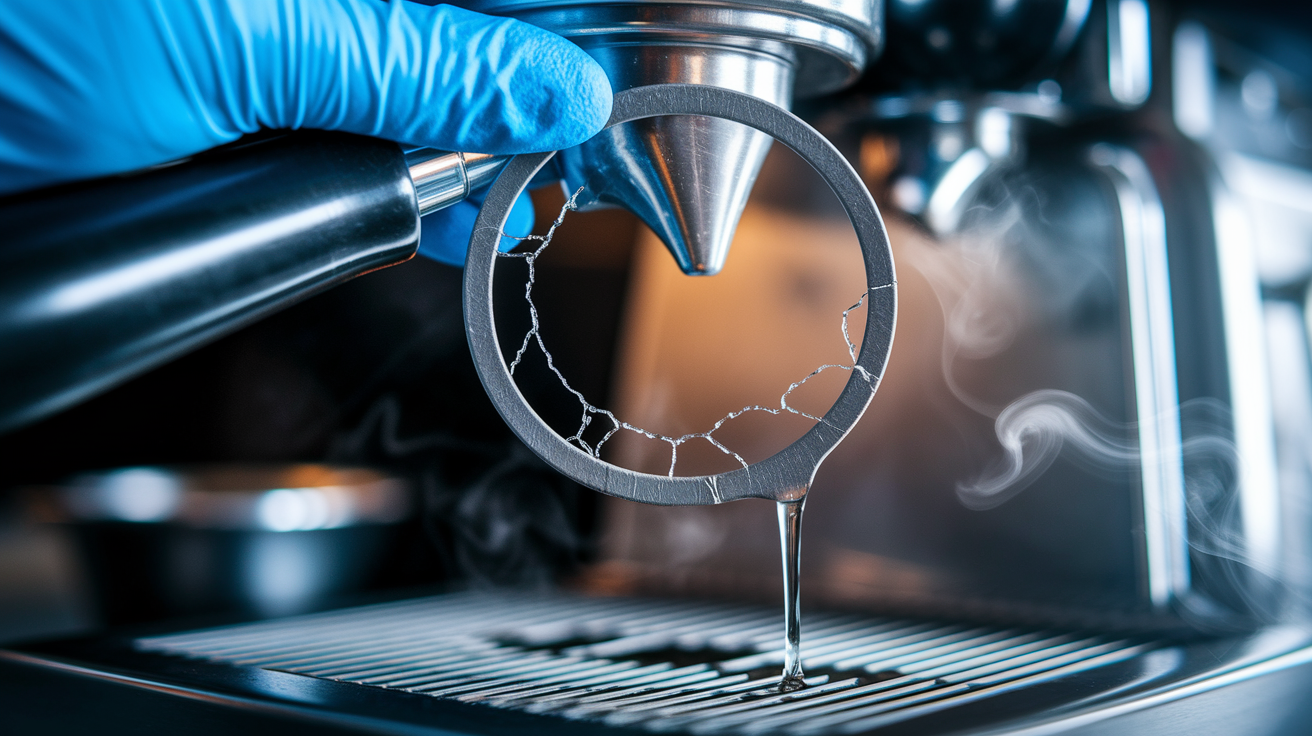
Visual inspection catches wear early. Check the gasket for hardening by pressing it with a fingertip. Fresh rubber compresses slightly. Worn rubber feels stiff or brittle. Look for cracks, splits, or flattening where the gasket sits under constant portafilter pressure. A healthy gasket has even thickness all the way around. Permanent compression or visible indentations? The seal’s no longer elastic enough to do its job.
Functional symptoms show up during daily use. You’ll see dripping or steady leaks from around the portafilter during brewing, even when the handle’s locked tight. The portafilter may spin freely or slip when locked, or it might need excessive force to engage and unlock. Both signs the gasket’s lost its grip. Sudden channeling, inconsistent pressure, or thinner shots can point to seal failure letting water bypass the puck.
- Gasket feels hard, brittle, or stiff when pressed
- Visible cracks, splits, or chunks missing from the rubber
- Persistent dripping or leaking around the portafilter during extraction
- Portafilter won’t lock securely or spins when tightened
- Excessive force needed to lock or unlock the portafilter
- Channeling or uneven extraction that appeared suddenly
- Black rubber fragments or debris visible in the spent puck
Factors That Affect Espresso Gasket Lifespan

Usage volume and temperature cycling hit gasket life hardest. Machines pulling dozens of shots daily compress and heat-cycle the rubber constantly, speeding up breakdown. Each shot heats the gasket, each cool-down contracts it. Over time that expansion and contraction cycle cracks the compound. Long idle periods create a different problem. The gasket stays compressed under group head tension and hardens in place, losing the flexibility it needs to seal when you finally pull a shot.
Water hardness and cleaning chemicals degrade rubber from the inside. Hard water deposits calcium and magnesium in the gasket groove, creating rough surfaces that wear the seal unevenly and trap coffee oils that carbonize into tar-like buildup. Frequent backflushing with strong detergents or high-concentration cleaners breaks down some rubber compounds faster, especially if you don’t rinse thoroughly after each detergent cycle. EPDM gaskets tolerate most espresso cleaners well. Softer silicone formulations can swell or degrade when exposed to certain solvents.
Mechanical fit issues cause uneven wear and premature failure. Aftermarket portafilters that don’t match OEM tolerances can create high-pressure spots on one side of the gasket, thinning it faster. Warped or damaged shower screens press unevenly. Loose group screws allow the screen to shift and grind the gasket during insertions. Misaligned groups or bent portafilter lugs force the gasket to compensate, which speeds cracking and leaking.
Choosing the Right Espresso Group Head Gasket Size and Material
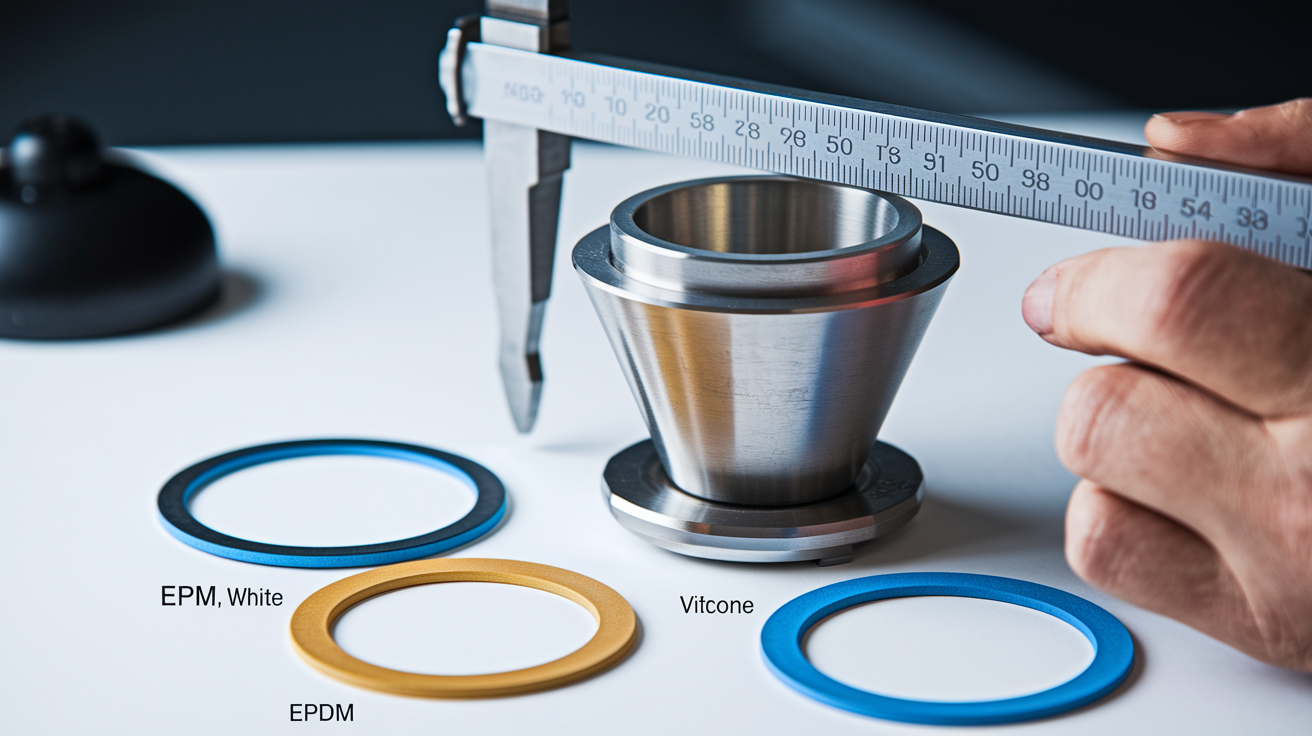
Measure your old gasket’s inner diameter (ID), outer diameter (OD), and cross-section thickness before ordering. Most commercial machines use 58 mm portafilters, so gaskets typically run around 60 to 62 mm OD with an 8 to 9 mm thickness. But you need exact numbers for your model. E61 groups and specific brands like La Marzocco or Slayer often need model-specific gaskets. Consult your machine manual or measure the old part with calipers. If you’re replacing for the first time and the gasket’s already removed, take it to a parts supplier or photograph it next to a ruler for reference.
Material choice affects heat resistance, chemical durability, and how often you’ll replace again. EPDM rubber is the workhorse: good heat tolerance, compatible with standard espresso cleaners, and the most economical option for regular replacement cycles. Silicone gaskets stay flexible longer and resist certain temperature extremes, but some formulations are softer and compress faster under heavy use. Check manufacturer notes on detergent compatibility. Viton (FKM) offers the highest heat and chemical resistance, making it ideal for commercial settings or machines that backflush daily with strong detergents. Expect to pay more, but lifespan often justifies the cost.
| Material | Heat Resistance | Durability | Best Use Case |
|---|---|---|---|
| EPDM | Good (up to ~250°F continuous) | Standard; 6 to 24 months depending on use | Home machines, light commercial, budget-friendly replacement |
| Silicone | Very good (up to ~300°F) | Flexible but may compress faster under heavy load | Low-volume use, infrequent cleaning, temperature-sensitive applications |
| Viton (FKM) | Excellent (up to ~400°F) | Long-lasting; resists aggressive chemicals and heat cycling | High-volume commercial, daily detergent backflushing, hard water environments |
Tools and Preparation Needed for Group Head Gasket Replacement
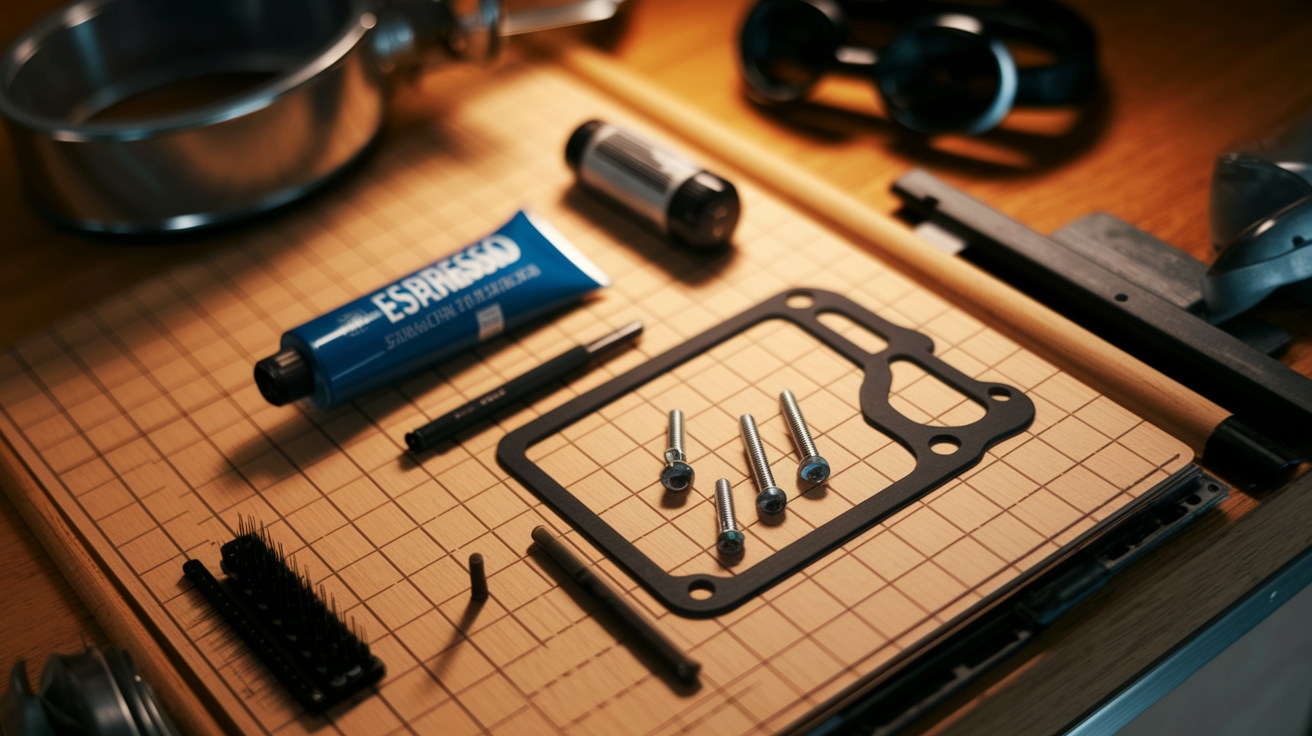
You’ll need a small set of hand tools and cleaning supplies to do the job without damaging the group. A flat-head screwdriver or dedicated gasket pick works for prying out the old gasket. A stubby screwdriver helps press the new one into the groove evenly. You’ll also need a Phillips, Torx, or Allen driver (depending on your shower screen screws), a small stiff brush or toothbrush for scrubbing the gasket groove, and espresso machine cleaner or descaler to remove carbonized coffee and mineral scale. Optional but helpful: food-grade silicone grease for lubricating the new gasket and a replacement shower screen kit if your screen shows warping or heavy pitting.
- Flat-head screwdriver or gasket removal pick
- Stubby screwdriver for seating the new gasket
- Phillips, Torx, or Allen key for shower screen screws
- Small stiff brush or toothbrush
- Espresso cleaner or descaler solution
- Eye protection (old gaskets can shatter into sharp fragments)
Start by turning off the machine or letting it idle until the group head cools slightly. You don’t want to burn your hands, but the metal doesn’t need to be cold. Remove the portafilter and unscrew the shower screen (typically three screws around the diffuser). Prepare a small bowl of hot water mixed with about one teaspoon of espresso cleaner for soaking the screen and screws while you work on the gasket. If the old gasket is brittle or heavily carbonized, put on eye protection before you start prying. Brittle rubber can snap and flick sharp pieces.
Step-by-Step Espresso Group Head Gasket Replacement Guide
This procedure takes 15 to 45 minutes depending on how stuck the old gasket is and how thoroughly you clean the groove. First-timers should budget an hour to work carefully and test the installation with a few flushes.
-
Turn off or idle the machine and let the group cool slightly. Remove the portafilter and set it aside. Flush the group briefly to clear any loose grounds, then wait a minute for residual steam to dissipate.
-
Remove the shower screen. Unscrew the three screws (or however many your machine uses) holding the screen and lift out the screen and diffuser plate. Drop the screws and screen into a bowl of hot water with one teaspoon of espresso cleaner to soak.
-
Pry out the old gasket. Insert a flat-head screwdriver or gasket pick at the 3 o’clock or 9 o’clock position and gently pry downward to lift one edge of the gasket. Work around the groove, pulling and prying until the gasket comes free. If it’s brittle, it may break into chunks. Remove every piece and check the groove carefully for leftover fragments.
-
Clean the gasket groove and group bore thoroughly. Use a stiff brush and the same espresso cleaner solution to scrub coffee oils, mineral deposits, and any old adhesive or rubber residue from the groove. Rinse with hot water and wipe dry. A clean groove is critical. Leftover debris prevents the new gasket from sealing.
-
Inspect and clean the shower screen and diffuser. Scrub both sides of the screen, clear any clogged holes, and check for warping or damage. If the screen is bent or heavily pitted, replace it. Rinse the screws and dry everything before reassembly.
-
Lightly coat the new gasket with food-grade silicone grease (optional). A thin film on the gasket surface makes installation easier and helps with future removal, but don’t overdo it. Excess grease can trap coffee particles.
-
Press the new gasket into the groove. Identify the beveled or tapered side (it typically faces up into the group). Start at one point and work around in a circular motion, pressing the gasket firmly and evenly into the slot with a stubby screwdriver. Make sure it sits flush and flat with no twists or gaps.
-
Reinstall the diffuser and shower screen. Place the diffuser back into position, set the screen on top, and start the screws by hand. Tighten fingertip-tight only, working in a star or cross pattern to avoid warping the screen. Don’t over-torque.
-
Seat the gasket with the portafilter. Insert one ear of the portafilter and push it as far as it’ll go, then repeat with the other ear to compress the gasket evenly. The handle should clock to roughly the 6 o’clock position when locked. If it sits much farther right or left, you may need a shim or a different gasket thickness.
-
Run a few water flushes and pull a test shot. Backflush with water a few times to fully seat the gasket, then pull a shot and check for leaks around the portafilter. The gasket may feel snug at first. This is normal and will loosen slightly after a few cycles.
Troubleshooting Espresso Leaks and Seal Issues After Replacement

Right after installation, you might notice the portafilter feels tighter than usual or the handle sits in a different position. A new gasket needs a short break-in period. Pull three or four shots or run several backflush cycles to compress the rubber and let it conform to the portafilter. If the handle’s difficult to unlock, don’t force it. Work it in and out gently a few times until the gasket relaxes.
- Persistent dripping during extraction: Gasket not fully seated, wrong size, or leftover debris in the groove. Remove the gasket, clean again, and reinstall, checking that the beveled side faces up and the gasket sits flush all the way around.
- Portafilter won’t lock or feels loose: Gasket too thin or not seated correctly. Verify the OD and thickness match your machine spec and press the gasket firmly into the groove before testing again.
- Portafilter too tight or sticks when unlocking: Gasket oversized or not compressed yet. Run a few water cycles and try locking and unlocking several times. If it’s still tight after ten cycles, you may need a slightly thinner gasket or a shim adjustment.
- Dribbling or uneven flow during the shot: Shower screen clogged, diffuser misaligned, or gasket twisted. Remove the screen, clean thoroughly, and check that the gasket sits flat without kinks.
- Leak from the group screw area: Screw loose or screen warped. Re-torque screws fingertip-tight in a star pattern. If leaking continues, inspect the screen for damage and replace if necessary.
- Short gasket life recurs: Check water hardness, reduce detergent concentration, replace the shower screen if warped, and consider switching to Viton for better chemical resistance.
If problems persist after cleaning, reseating, and break-in, verify you have the correct gasket size and material for your machine model. Aftermarket gaskets sometimes list generic fit ranges that don’t match OEM tolerances perfectly.
Cost, Parts, and Where to Buy Espresso Group Head Gaskets

A single replacement gasket typically costs $5 to $20 depending on material and brand. Standard EPDM gaskets sit at the low end of that range. Viton or FKM gaskets cost more, sometimes $15 to $25, but offer longer service life in heavy-use or high-detergent environments. Gasket-and-screen kits that include a new shower screen, screws, and gasket run $10 to $30 and simplify the job by replacing wear-prone parts together. Buying a kit makes sense if your screen shows pitting or if you’re already past the recommended service interval.
OEM parts ensure exact fit and material spec, which matters for machines with tight tolerances or proprietary group designs. Most manufacturers sell gaskets and service kits directly or through authorized dealers. Check your machine’s model number and order by part number when possible. Aftermarket suppliers offer variety and often faster shipping, but verify dimensions carefully (ID, OD, and thickness) before ordering. Keep a spare gasket and screen kit on hand so you’re not waiting on shipping when a gasket fails mid-service or during a weekend of back-to-back drinks.
Maintenance Habits That Extend Group Head Gasket Life

Daily backflushing with plain water after your last shot of the day clears coffee oils and grounds from the group and diffuser, preventing carbonization that hardens gaskets prematurely. Weekly detergent backflushing (or whatever interval your machine manufacturer recommends) removes deeper buildup, but always follow detergent cycles with several water-only backflushes to rinse residual chemicals that can degrade rubber over time. Machines in commercial settings may need daily detergent backflush. Home machines can usually stretch to weekly or biweekly depending on volume.
Water filtration and softening reduce mineral deposits that roughen the gasket groove and trap debris. Hard water speeds up scale buildup on the diffuser and gasket surface, creating friction and uneven wear. Use a quality water filter or softener system, and descale your machine on schedule (typically every two to three months for home use, more often in commercial settings or areas with very hard water). When backflushing with detergent, use the concentration recommended by the cleaner manufacturer. Stronger isn’t better and can shorten gasket life.
Inspect the gasket during routine cleaning. Quarterly for home machines, monthly for commercial. Replace proactively at the first sign of flattening or cracking rather than waiting for leaks. Wipe the diffuser and screen each time you remove them, check the group screws for tightness, and keep a log of replacement dates so you know when the next service window is coming. A $10 gasket replaced on schedule costs far less than the water damage, lost shots, and emergency service call that follow a catastrophic seal failure during morning rush.
Final Words
Replace home gaskets every 12–24 months; heavy home users yearly; commercial machines every 6–12 months, and busy shops should inspect quarterly.
For home setups, check gaskets every three months. For commercial, check monthly. Keep a spare gasket, clean the groove, and use filtered water to slow wear.
If you’re wondering how often to change espresso group head gasket, use the timelines above and tweak for your cleaning and water quality. Do that and your shots will stay steady and less frustrating.
FAQ
Q: How often should I replace my espresso gasket? How long do group head seals last? When to change grouphead gasket?
A: You should replace your espresso group head gasket about every 12–24 months at home, yearly if you use it a lot, and every 6–12 months for commercial machines. Inspect quarterly at home and monthly in commercial use.
Q: What is the 30 second rule for espresso?
A: The 30 second rule for espresso is to wait roughly 30 seconds between shots and briefly purge the group so temperature and pressure recover, giving steadier extraction and more consistent shots.