

Want perfect microfoam? You’re probably holding the pitcher wrong.
Tilt the pitcher 15 to 20 degrees while steaming. That single move makes milk form a steady whirlpool, pulls air in gently, and shears big bubbles into silky microfoam without any fancy gear.
This post shows the one grip and tilt that works, how to set wand depth, what the sounds and surface should tell you, and a quick check to repeat it every time.
Mastering the Correct Pitcher Tilt for Immediate Steaming Success
The single best move you can make is tilting your pitcher 15 to 20 degrees while the steam’s running. This tilt gets the milk flowing in a smooth vortex along the sidewall, which pulls air down and breaks big bubbles into microfoam. If the pitcher stands straight up, milk churns around without much direction or just spins weakly, and you’re left with patchy texture. That 15 to 20 degree tilt shifts the center of rotation toward the wall and creates the rolling motion you see in pro microfoam.
Wand depth works hand in hand with tilt. During stretching, keep the steam tip 1 to 3 millimeters under the surface and hold the pitcher at 15 to 20 degrees. You want a soft, steady “tsss” sound, like tearing paper or a quiet hiss. That tells you air’s coming in gradually, not all at once. After 3 to 8 seconds of stretching, drop the tip to 5 to 10 millimeters and keep the same tilt. The wand should sit just off center, about a quarter of the way from the middle to the edge, angled slightly toward the wall but not touching. This spot creates a strong whirlpool that pulls surface foam down and mixes it through the milk.
Your eyes and ears tell you when the angle’s working. During texturing you should hear a low, steady roll instead of a high-pitched scream or loud clang. The surface should show a smooth, spinning vortex with no visible big bubbles. When you stop steaming and swirl, good milk looks glossy and paint-like, with bubbles smaller than half a millimeter. If you see a frothy layer or hear violent sputtering, tilt or depth is off.
Six steps to repeat the correct tilt every time:
- Fill the pitcher one third full and hold it upright while purging the wand for 1 to 2 seconds.
- Insert the tip 1 to 3 millimeters below the surface and tilt 15 to 20 degrees away from vertical, spout angled slightly upward.
- Open the valve fully and listen for that soft “tsss” while watching for a gentle ripple. That confirms you’re at the right stretching depth and tilt.
- After 3 to 8 seconds or when volume jumps 10 to 25 percent, lower the tip to 5 to 10 millimeters and hold the same tilt.
- Watch the milk spin in a steady circle and nudge the tilt one or two degrees if the whirlpool slows or disappears.
- Stop when the pitcher’s too warm to hold comfortably or hits 140 to 155 degrees, then pull the wand and wipe plus purge right away.
Grip Methods That Improve Milk Pitcher Angle Control

A stable wrist and deliberate handle grip turn that 15 to 20 degree tilt from guesswork into something you can repeat. Most people hold the handle with the thumb on top and the index finger stretched along the upper edge or curled lightly around it. This gives you a pivot point that makes small angle shifts easier to feel and control. Wrapping all four fingers around the handle works, but you lose some sensitivity when your whole hand’s closed tight. Right-handed setups usually put the right hand on the handle while the left steadies the base or holds a thermometer. Lefties just flip it. Either way, keep your wrist neutral or slightly flexed, not sharply bent in or out. A stable wrist stops the pitcher from rocking during steaming, which would kill the vortex and create uneven texture.
Grip consistency translates straight into foam consistency. When your thumb pressure, finger placement, and palm contact stay the same shot after shot, muscle memory locks in the tilt. Small changes, like shifting your thumb forward or back by a centimeter, can alter the effective tilt by several degrees and mess up the whirlpool. Practice gripping the pitcher the same way before every session, and check that your knuckles line up with the spout. That alignment gives you a visual cue to return to the same starting angle without measuring.
Five grip cues that support a stable 15 to 20 degree tilt:
- Thumb pressure: Rest your thumb gently on top of the handle, just enough to stabilize without forcing a different angle.
- Index finger extension: Stretch your index finger along the top or first knuckle for leverage and fine angle control.
- Palm contact: Let your palm touch the side of the handle lightly. Don’t squeeze tight or you’ll stiffen your wrist.
- Handle orientation: Position the handle so the spout points slightly up when tilted 15 to 20 degrees. This orients your wrist naturally.
- Knuckle alignment: Line up your knuckles parallel to the spout before inserting the wand. Creates a visual reference for repeating the same tilt.
Wand Placement and Angle Interaction Inside the Pitcher

Pitcher tilt and wand position team up to decide where air enters and how the vortex forms. When you tilt 15 to 20 degrees and place the steam tip a quarter of the radius from center, the wand sits slightly off axis and pushes steam toward the wall at an angle. This off center spot, combined with the tilt, drives milk in a circular path along the wall and down through the middle, which creates the roll you need. If the pitcher’s perfectly upright and the wand’s centered, milk might spin weakly or not at all. The tilt amplifies the sidewall effect and makes it easier to keep a strong whirlpool without constantly fiddling with the wand.
Depth changes as you go, but the 15 to 20 degree tilt mostly stays put. During stretching, keep the tip 1 to 3 millimeters below the surface so it pulls in small amounts of air. At this shallow depth, the tilt ensures the wand angles toward the wall instead of pointing straight down, which would sink the tip and stop aeration. After you finish adding air, usually 3 to 8 seconds in, drop the tip to 5 to 10 millimeters and hold the same tilt. This deeper spot keeps the wand submerged enough to cut off air while keeping the angled path that drives the vortex. If you reduce the tilt and straighten the pitcher during texturing, the wand may drift toward center and the whirlpool weakens.
The tradeoff between depth and angle gets clearer when you’re troubleshooting. If you see big bubbles, your tip’s too shallow or your tilt’s too steep, letting in excess air. Drop the tilt a few degrees or deepen the tip 1 to 2 millimeters to cut air intake and strengthen the vortex, which shears bubbles into finer foam. If the milk stays flat and you hear nothing at the surface, the tip’s too deep or the pitcher’s too upright. Bump the tilt slightly and lift the tip closer to the surface to bring air back in. Changing both at once makes it harder to figure out what’s wrong, so tweak one thing at a time and watch how sound and vortex speed respond.
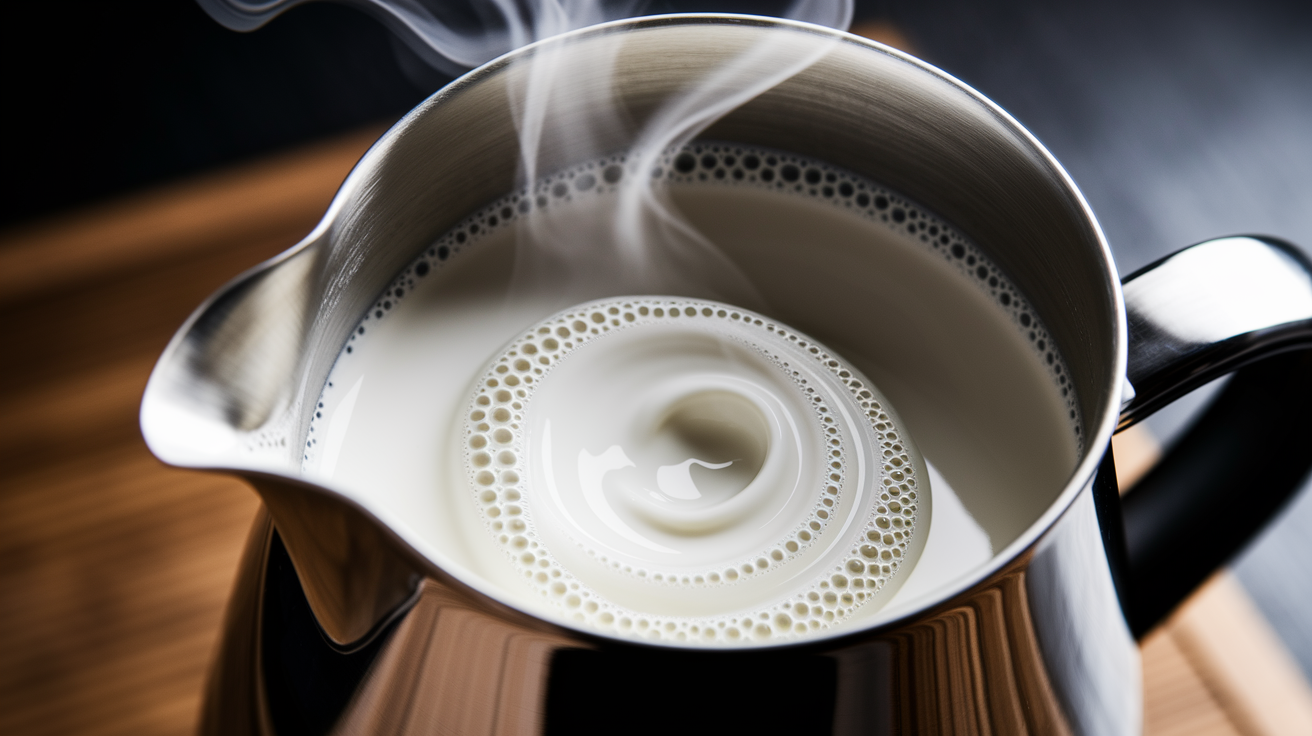
Creating the Whirlpool: The Motion That Confirms the Correct Pitcher Angle
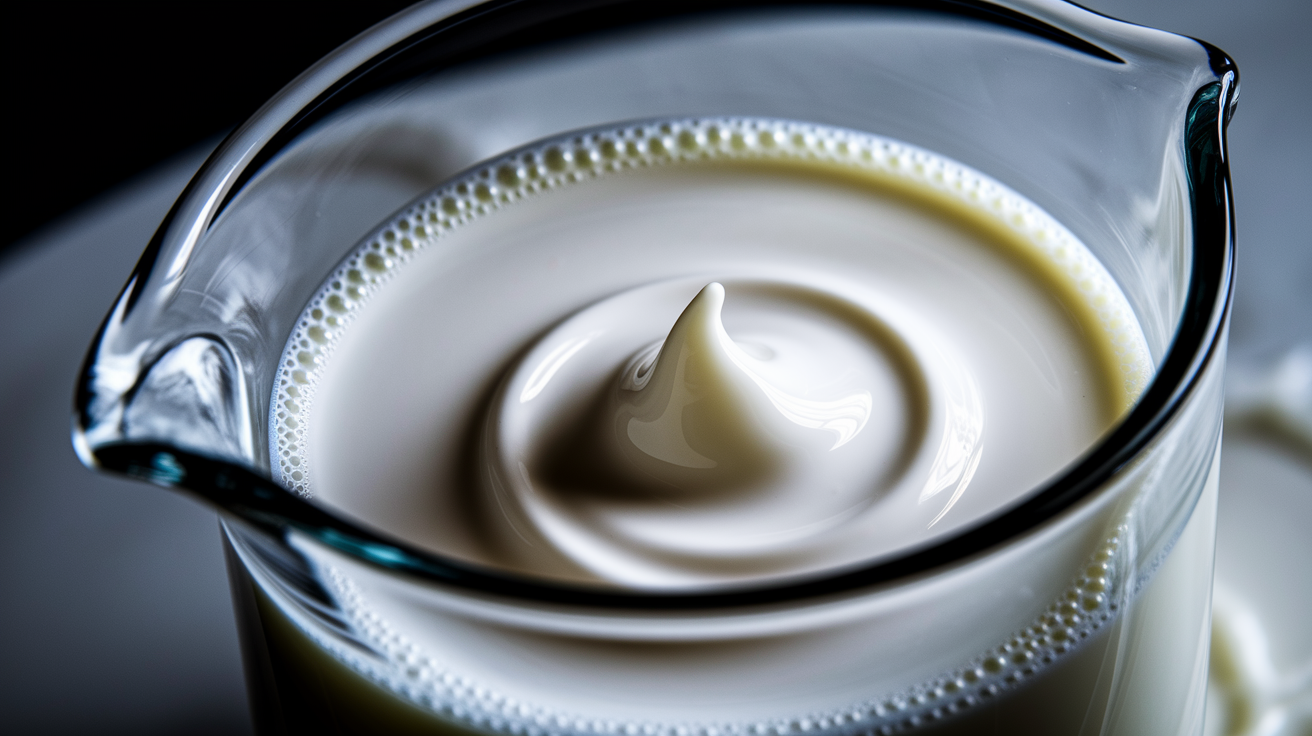
A stable, visible whirlpool is the clearest sign your angle’s right. When milk spins in one consistent vortex, the surface stays smooth and glossy, and any foam on top gets pulled down into the body where it turns into microfoam. The whirlpool happens naturally when the steam wand sits off center and the pitcher’s tilted 15 to 20 degrees. You should see milk rotating in a circle that starts at the surface and goes down deep. If the vortex looks choppy, splits into multiple swirls, or disappears, your tilt or wand spot needs adjustment. Tilt consistency beats perfect initial placement. Don’t rock the pitcher back and forth or change the angle mid steam, because every movement interrupts the vortex and creates uneven texture.
Speed control comes from small tilt tweaks and wand depth changes. A whirlpool spinning too fast can pull in excess air and make big bubbles, while a slow or stalled vortex leaves milk poorly mixed and can give you separated foam. If the whirlpool speeds up and you hear louder surface noise, reduce tilt by 2 to 3 degrees or lower the wand tip slightly to slow air intake. If the vortex slows or stops, increase tilt a few degrees or raise the tip closer to the surface to get flow going again. Watch the milk surface closely during the first few seconds after you deepen the wand. This is when the vortex either locks in or fades. If it fades, tilt the pitcher one or two degrees more and shift the wand a millimeter toward the wall without pressing it.
| Technique | Effect on Whirlpool |
|---|---|
| Tilt pitcher 15 to 20 degrees and hold steady | Creates consistent sidewall flow and smooth single vortex |
| Reduce tilt to 10 to 12 degrees mid steam | Slows vortex speed, may stop air and reduce foam volume |
| Increase tilt to 22 to 25 degrees | Speeds up vortex, risks over aeration and big bubbles if wand’s too shallow |
| Rock pitcher back and forth | Breaks vortex into messy swirls, produces uneven texture and separated foam |
Angle Adjustments for Lattes, Cappuccinos, and Flat Whites

Drink style changes how long you aerate and how much you lean on the vortex, but the core 15 to 20 degree tilt stays the foundation for all three. For a latte, you want fine, silky microfoam with barely any visible bubbles, so you add air for only 3 to 5 seconds and then focus entirely on texturing. Hold the pitcher at a steady 15 to 20 degrees during stretching, then keep that same tilt while the vortex blends the small bit of foam you made. The goal is a glossy, paint-like surface that pours smoothly and works for simple latte art. Don’t push the tilt past 20 degrees during a latte, because extra tilt can pull in more air than you need and create a foamier cap that messes up the pour.
Cappuccinos need more aeration, so you stretch for 5 to 8 seconds and let milk volume jump 20 to 30 percent or more. Some people tilt the pitcher slightly more, up to 22 degrees, during stretching to help pull in air faster, then drop back to 15 to 20 degrees for texturing. This works well if your steam pressure’s moderate and you need help aerating. Watch the volume closely and listen for the “tsss” sound. When the pitcher feels noticeably lighter and the surface shows visible expansion, deepen the wand and ease any extra tilt back to the standard range. The vortex still matters for cappuccino foam. Without it you get stiff, dry bubbles instead of creamy microfoam that holds shape in the cup.
Flat whites sit at the opposite end. Stretch for only 2 to 4 seconds to add a very thin layer of microfoam, then immediately deepen the wand and hold a stable 15 to 20 degree tilt to focus on heating and blending. The flat white needs velvety texture and a thin foam cap, so tilt consistency and a strong whirlpool matter a lot. Any rocking or angle change creates uneven texture that shows up as patches of thick foam or thin spots in the finished drink. If your flat white consistently has too much foam, shorten the stretch by one or two seconds rather than reducing tilt, because less tilt weakens the vortex and can leave the small amount of foam poorly mixed.
Angle nuances per drink:
- Latte: Standard 15 to 20 degree tilt, stretch 3 to 5 seconds, maintain steady angle throughout texturing for fine, glossy microfoam.
- Cappuccino: 15 to 22 degree tilt during stretch (up to 8 seconds), return to 15 to 20 degrees for vortex and heating, expect larger foam volume and slightly airier texture.
- Flat white: Strict 15 to 20 degree tilt, very brief stretch (2 to 4 seconds), lean on a strong, uninterrupted vortex to blend minimal foam into silky body.
- Macchiato or cortado (small volume): 15 to 20 degree tilt in smaller pitcher (12 oz), shorter total steam time, same technique scaled down to 2 to 4 oz milk.
Milk Type Differences That Influence Pitcher Angle and Texture

Whole milk makes the most stable microfoam because higher fat and protein support air bubbles and create silky mouthfeel. Use the standard 15 to 20 degree tilt and stretch for 3 to 5 seconds, then texturize with a steady vortex. Whole milk’s forgiving. It tolerates small angle changes without immediately giving you big bubbles or losing texture. If you’re learning angle control, start with whole milk because it gives clear feedback and consistent results.
Skim milk foams more aggressively and increases volume by 30 to 60 percent compared to whole milk’s 10 to 25 percent. This means you need less stretch time and slightly less tilt to avoid over aeration. A lot of people reduce tilt to 15 to 17 degrees and stretch for only 2 to 4 seconds with skim. The vortex is just as important. Skim milk produces drier, bigger bubbles if you skip texturing, so maintain the tilt and deepen the wand quickly after stretching. Skim also heats faster, so stop steaming earlier to avoid going past 155 degrees, which can make skim taste thin and chalky.
Oat milk and soy milk behave differently from dairy. Both need slightly longer texturing time to blend foam because their protein structures differ. Hold the pitcher at 15 to 20 degrees and stretch for 4 to 6 seconds, then keep the tilt and vortex going an extra 5 to 10 seconds compared to whole milk. Aim for the upper end of the temp range, 150 to 155 degrees, because plant milks often taste fuller and sweeter when slightly warmer. Some oat and soy formulas separate or curdle if overheated, so watch for texture changes and stop right away if the milk looks grainy. Almond milk is fragile and produces thin, unstable foam. Use a gentle stretch (3 to 4 seconds), maintain 15 to 20 degree tilt, and finish at the lower end of the temp range (140 to 145 degrees) to cut the risk of separation. Almond milk rarely gives you the glossy, paint-like finish you get with dairy, so focus on blending whatever foam forms rather than trying to create thick microfoam.
Angle and wand tweaks for each milk:
- Whole milk (3.25% fat): Standard 15 to 20 degree tilt, stretch 3 to 5 seconds, wand depth 1 to 3 mm then 5 to 10 mm, finish at 150 to 155 degrees.
- Skim milk (0% fat): Reduce tilt to 15 to 17 degrees, stretch 2 to 4 seconds only, wand depth slightly shallower (1 to 2 mm) to prevent over aeration, finish at 145 to 150 degrees.
- Oat milk (barista formula): Standard 15 to 20 degree tilt, stretch 4 to 6 seconds, extend vortex phase 5 to 10 seconds longer, finish at 150 to 155 degrees.
- Soy milk (barista formula): 15 to 20 degree tilt, stretch 4 to 6 seconds, deepen wand to 6 to 10 mm for stable vortex, finish at 150 to 155 degrees, watch for curdling.
- Almond milk: Gentle 15 to 18 degree tilt, stretch 3 to 4 seconds max, lower final temp to 140 to 145 degrees, accept thinner texture and focus on blending rather than volume.
Troubleshooting Pitcher Angle Problems During Steaming
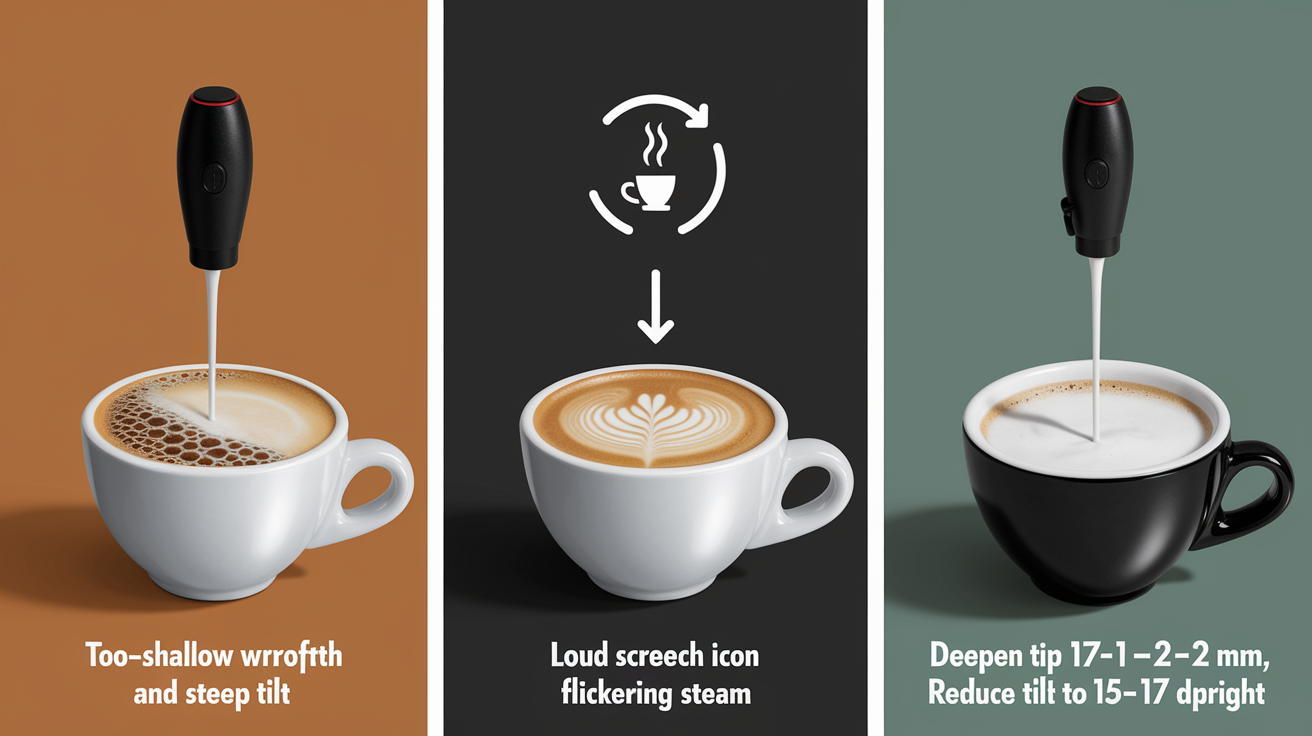
Big bubbles mean your steam tip’s too shallow or your pitcher tilt’s too steep. When the tip sits at or above 1 millimeter depth and the pitcher’s tilted past 20 degrees, you’re pulling in too much air too quickly. The milk surface looks frothy and bubbly instead of smooth. Fix this by dropping the wand tip 1 to 2 millimeters deeper and cutting tilt to 15 to 17 degrees. Hold that spot and let the vortex work for 5 to 10 seconds to shear big bubbles into finer foam. If bubbles stick around, tap the pitcher gently on the counter and swirl after steaming to pop surface foam, then adjust your technique on the next shot by starting with less tilt.
Flat milk with no foam usually means the wand’s too deep from the start or the pitcher’s too upright. If you hear no surface sound and see no vortex, steam’s heating the milk without pulling in air. Raise the tip to 1 to 3 millimeters below the surface and bump tilt to 18 to 20 degrees. You should hear the soft “tsss” sound right away. If your steam pressure’s low, even correct tilt and depth may not aerate enough. Check your machine’s pressure gauge or make sure the boiler’s fully heated before steaming.
A loud screech or high-pitched whistle means the wand tip’s at or above the milk surface. This happens when tilt’s too steep or the wand shifts during steaming. Deepen the tip by 1 to 2 millimeters and hold the pitcher steady at 15 to 20 degrees. The sound should drop to a low, rolling hum. If you hear banging or clanking, the wand’s hitting the pitcher wall. Pull the tip slightly toward center and cut any side to side rocking. Overheating isn’t about angle but happens when you focus too much on tilt and forget to watch temperature. Stop steaming when the pitcher’s too warm to hold comfortably, usually around 140 to 145 degrees. Milk temp will climb another 5 to 10 degrees after you stop, so cutting steam early prevents scalding and keeps sweetness intact.
Quick fixes for common angle errors:
- Big bubbles on surface: Lower wand tip 1 to 2 mm, reduce tilt to 15 to 17 degrees, extend vortex phase to break bubbles into microfoam.
- No vortex forming: Bump tilt to 18 to 20 degrees, confirm wand’s off center (about a quarter radius from middle), check steam pressure’s adequate.
- Loud screech or whistle: Deepen wand tip right away by 1 to 2 mm, reduce tilt slightly, hold pitcher steady without rocking.
- Milk overheats (past 160 degrees): Stop steaming earlier, aim for 140 to 145 degrees on thermometer, account for 5 to 10 degree temp rise after steam stops.
- Flat milk, no foam: Raise wand tip to 1 to 3 mm below surface, increase tilt to 18 to 20 degrees, stretch for full 3 to 5 seconds before deepening.
- Vortex too slow or uneven: Tilt pitcher 1 to 2 degrees more, shift wand tip slightly toward wall without touching, make sure milk fill is one third pitcher volume.
Best Practice Routine for Repeating the Correct Pitcher Angle Every Time
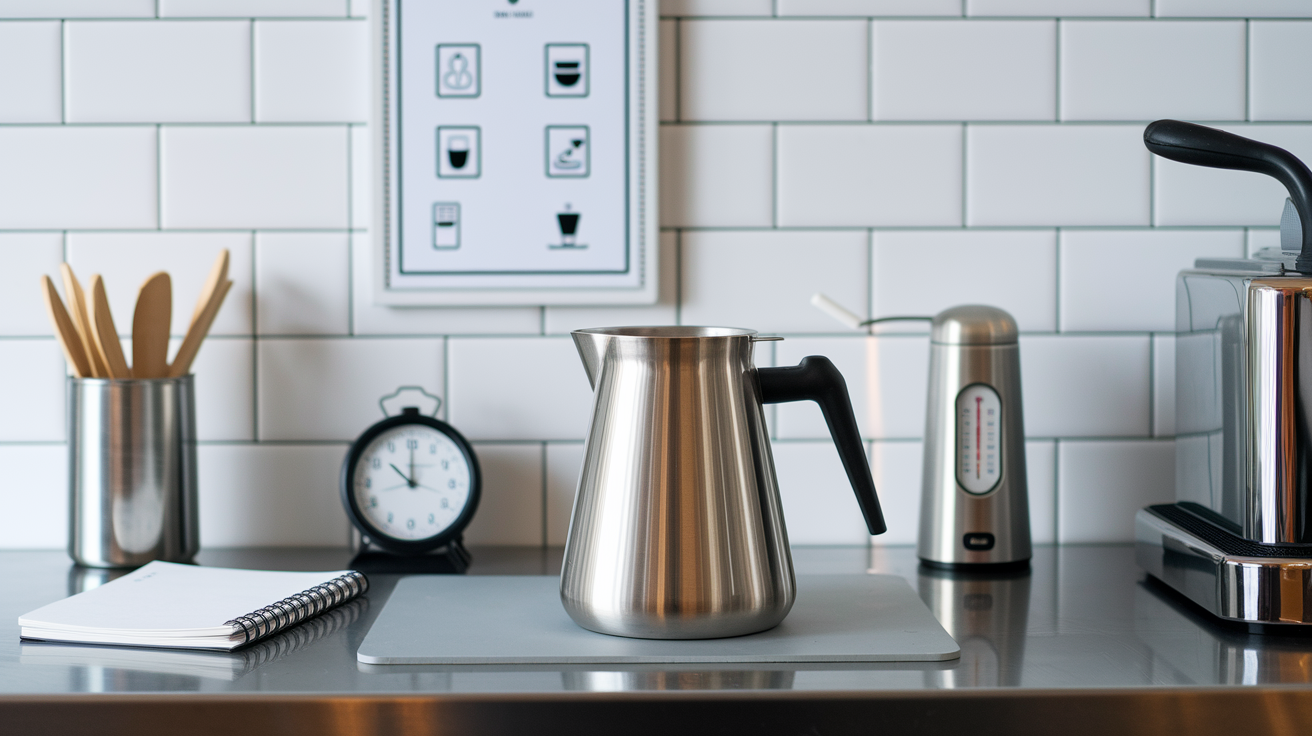
Repeatable microfoam starts with a setup routine that cuts out guesswork. Before every steam session, fill the pitcher one third full, purge the wand for 1 to 2 seconds, and grip the handle the same way. Insert the wand tip 1 to 3 millimeters below the surface, tilt the pitcher to 15 to 20 degrees, and open the valve fully. Listen for the soft “tsss” and watch for a gentle surface ripple. These confirm correct depth and tilt. Stretch for 3 to 8 seconds depending on drink style, then deepen the tip to 5 to 10 millimeters and hold the tilt steady. Watch the vortex form and nudge by one or two degrees if it slows. Stop steaming when the pitcher’s too warm to hold or your thermometer reads 140 to 150 degrees, accounting for the temp rise after you stop. Total steaming time should be 20 to 45 seconds depending on milk volume. Finish by pulling the wand, wiping it right away, and purging for 1 to 2 seconds to clear leftover milk.
Building muscle memory takes deliberate practice, not just repetition. Set aside 10 to 15 minutes two or three times per week to drill tilt angles without worrying about the finished drink. Use cold water with one or two drops of dish soap to mimic milk behavior. This lets you practice wand depth, tilt, and vortex creation without wasting milk. Focus on holding the 15 to 20 degree tilt for the full duration of the “steam” and listen for consistent sound. Once the angle feels automatic with water, switch to milk and track your results shot by shot. Note the stretch time, final temp, and visual texture in a notebook or phone app. When you nail three glossy, paint-like batches in a row, your angle control’s reliable.
Five step practice progression to lock in correct tilt:
- Tilt drill (5 minutes): Fill pitcher with cold water, insert unpowered wand, practice holding 15 to 20 degree tilt while checking angle against a protractor or visual reference, repeat 10 times until grip and wrist position feel consistent.
- Wand depth practice (5 minutes): Turn on steam with soapy water, practice placing tip 1 to 3 mm below surface, stretching for 5 seconds, then deepening to 5 to 10 mm, focus on smooth depth transitions without changing tilt.
- Vortex consistency practice (10 minutes): Steam soapy water in 20 second intervals, aim for a single, steady whirlpool every time, adjust tilt by 1 to 2 degrees if vortex fades, repeat until vortex forms within 3 seconds of deepening wand.
- Timing tests (10 minutes): Steam milk and track total time from wand insertion to shutoff, aim for 25 to 35 seconds for a 6 oz latte, check that stretch phase is 3 to 5 seconds and texturing phase is 15 to 25 seconds, adjust if consistently over or under.
- Texture evaluation (5 minutes per session): Pour finished milk into a clear cup and inspect for bubble size, gloss, and blending, compare against reference photos of correct microfoam, figure out whether big bubbles, flat texture, or separation trace back to tilt, depth, or timing errors.
Final Words
Keep the pitcher tilted 15–20° and set the wand about 1/4 radius off center. Start with the tip 1–3 mm below the surface to stretch, then drop to 5–10 mm to texture and build the whirlpool.
Grip with a steady wrist, use your index finger for stability, and listen for a soft “tsss” that turns into a low roll. Fix one thing at a time if the vortex or bubbles aren’t right.
Use the drills here to practice how to hold a milk pitcher at the right angle for steaming. A few repeats and you’ll get glossy, paint‑like microfoam every time.
FAQ
Q: How to hold a milk jug when steaming? How to angle a milk steamer? How should you position the milk jug when setting up to the steam wand?
A: To hold and angle a milk jug for steaming, tilt it about 15–20° with the wand tip placed just off center (~1/4 radius). Start 1–3 mm below the surface, then 5–10 mm for texturing.
Q: What are some common steamed milk mistakes?
A: Common steamed milk mistakes are the tip too high (large bubbles), too deep (no aeration), inconsistent tilt (no vortex), and over-stretching or overheating. Fix by adjusting tilt toward 15–20° and tip depth 1–3 mm.