

Think a distribution tool makes channeling impossible?
Not even close.
You can stir or spin and still get a thin jet spraying from one side.
Uneven flow after using a tool almost always means a density problem inside the puck.
This post gives the fastest checks to run before you replace parts: check grind uniformity, make sure your WDT (needle tool) reaches the basket floor, and confirm your tamp is level.
Read on to learn one simple test that pinpoints which of those is causing your channeling.
Immediate Diagnosis: Causes of Uneven Espresso Flow After Using a Distribution Tool

Uneven flow almost always means you’ve got density differences inside the puck. Water finds the lighter zone and rushes through, leaving the denser spots under-extracted. You can use a WDT tool or a leveling disk and still end up with those density problems if your grind isn’t consistent, if your distribution didn’t reach all the way through the coffee bed, or if your tamp wasn’t level.
The usual suspects? Grind clumps that survived the distribution step, an uneven dose spread before you started distributing, or a tamp that tilted to one side. Sometimes it’s not even your technique. A grinder that’s producing uneven particle sizes, a sticky basket holding old oils, or a portafilter that doesn’t sit flush in the group can all override good puck prep and send water sideways.
Start by ruling out the fastest fixes. Most channeling issues trace back to just a few mechanical errors that show up shot after shot once you know what to look for.
Quick diagnostic checks to run before your next shot:
-
Grind uniformity. Look at the dry grounds in your hand. If you see obvious boulders mixed with powder, your grinder is creating channels before you even start prepping. Single-dose and purge stale coffee to reduce retention clumps.
-
Puck distribution coverage. Did your WDT needles or distribution tool move coffee at the basket edges and all the way to the bottom, or did you only stir the center and top half? Incomplete stirring leaves untouched dense pockets.
-
Preinfusion drip pattern. Watch where the first drops appear during preinfusion. If one side drips several seconds before the other, water found a weak spot. That tells you the puck density isn’t uniform.
-
Tamp angle and pressure. Set your tamper in the basket before you press and check that the rim sits flat against the coffee bed on all sides. A tilt as small as a couple of degrees creates a wedge-shaped puck and an instant channel.
-
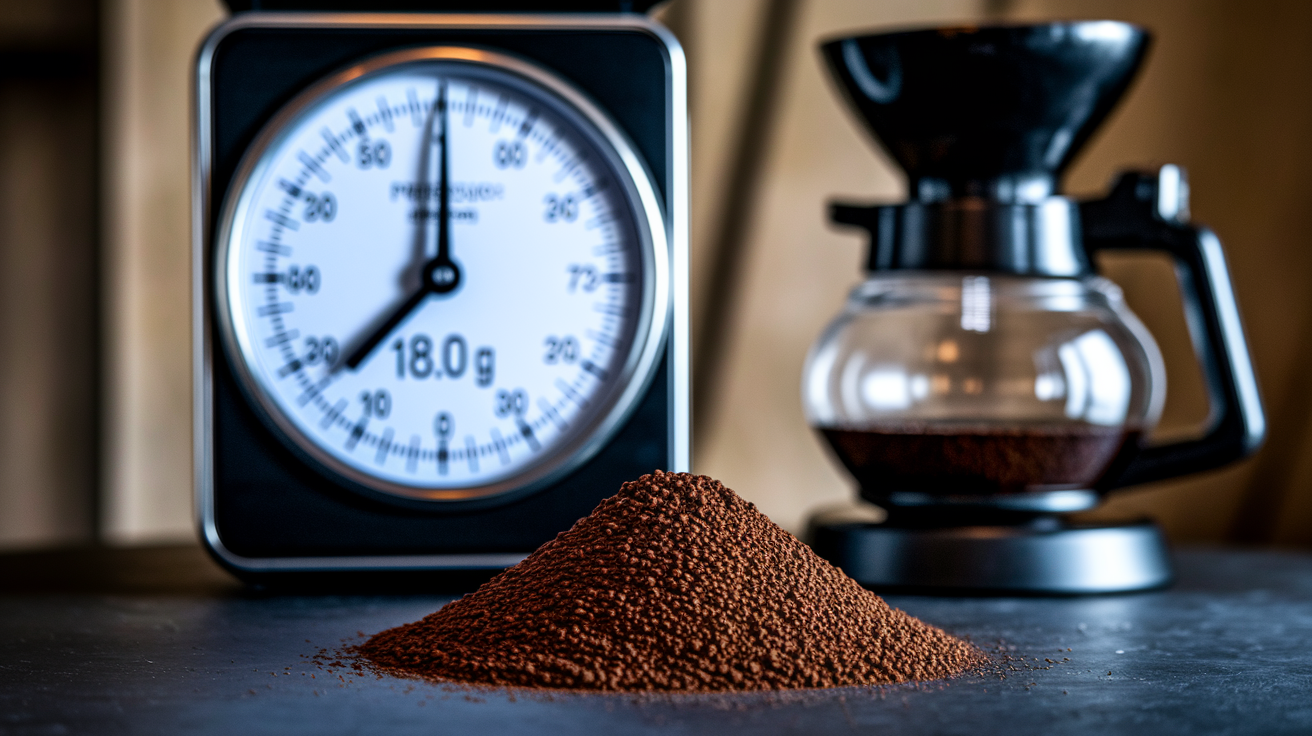
Dose consistency. Weigh your dose to the nearest 0.1 gram for three consecutive shots. Variation beyond ±0.2 g changes puck resistance enough to alter flow, especially in smaller baskets.
Distribution Technique Errors and How They Affect Flow
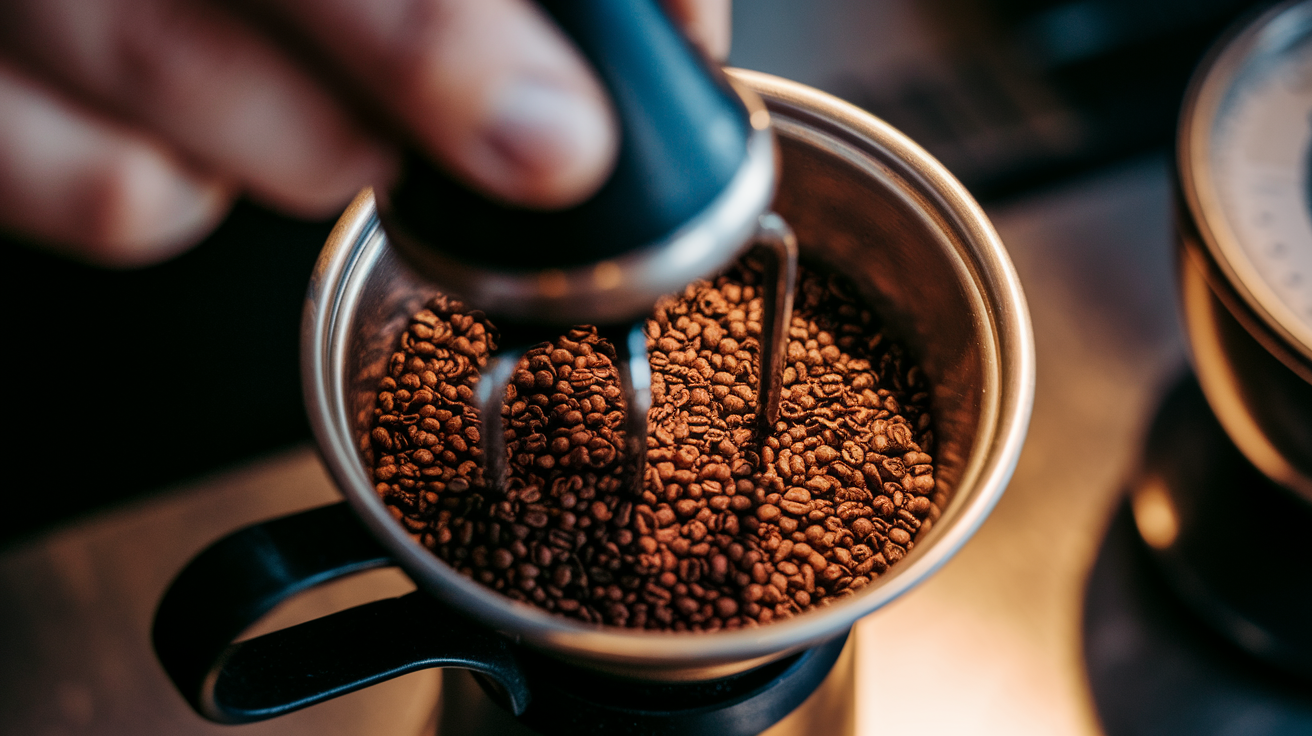
How you use your tool determines whether you create an even bed or just rearrange clumps into new shapes. The most common WDT mistake is shallow stirring. Needles that only skim the top centimeter leave the bottom half of the puck undisturbed, so clumps remain and water finds them. Insert your needles until they touch the basket floor, then stir in small circles while slowly lifting. That motion breaks clumps at every depth and redistributes fines that settled during dosing.
Over-aggressive stirring causes a different problem. If you whip the needles in fast, wide loops, you aerate the coffee and create voids. Those voids collapse unevenly during tamping, leaving random soft zones. You’re aiming for fluffy and uniform, not whipped into a foam. Slow, deliberate circles with 8 to 12 passes across the entire basket diameter work better than 30 fast jabs in the center.
Cover the edges. Grinders tend to drop more coffee in the middle, so the perimeter stays under-filled unless you intentionally move grounds outward.
Distribution disks and leveling tools can also create problems if you spin them too many times or press down while rotating. Excessive spinning compacts the top layer and pushes fines to the sides or bottom, creating a dense skin that chokes flow. One or two light rotations to level the surface is enough.
Grind Size and Dose Accuracy
Grind size controls flow resistance. A half-step adjustment on your grinder changes how water moves through the puck. If you go too fine, the puck chokes and water searches for any crack or low-density patch, amplifying small distribution errors into visible channels. Go too coarse and water rushes through so fast that minor density differences don’t have time to cause spraying, but you’ll still taste the uneven extraction as sour, thin shots.
Start from a medium-fine baseline and adjust in the smallest increments your grinder allows. One click finer or coarser, then pull a shot and watch the flow before you change anything else.
Dose errors compound grind problems. If your target is 18.0 grams but you dose 18.4 one shot and 17.7 the next, the puck height and density change. A taller puck increases resistance and can turn a borderline-fine grind into a choking puck. A short puck reduces resistance and lets water spread unevenly across the bed before it compacts the coffee enough to create backpressure.
Consistency matters more than the absolute number. Dial in at a repeatable dose, then hold it steady while you adjust grind.
Common grind and dose mistakes that cause uneven flow:
- Adjusting grind and dose at the same time, making it impossible to know which variable caused the change.
- Ignoring grinder retention and pulling a shot with a mix of stale and fresh grounds that extract at different rates.
- Using a stepped grinder and landing between two settings, then toggling back and forth instead of committing to one and testing it over multiple shots.
- Trusting a volumetric doser instead of weighing, especially after the grinder warms up and output drifts.
Achieving Consistent Tamping Pressure and Levelness

Tamp pressure consistency matters less than most people think. Tamp levelness matters more. If you press with 25 pounds of force one shot and 35 the next, you’ll notice a small difference in flow rate but rarely see channeling from that alone. If your tamper tilts even slightly, you create a wedge. The thin side of the wedge offers less resistance, water takes that path, and you see a jet spraying from one side of a bottomless portafilter while the other side drips slowly.
Check your tamp level by setting the tamper in the basket without pressing and looking at the gap between the tamper edge and the coffee surface. It should be even all the way around. If one side touches the coffee and the opposite side floats, your wrist or grip is off.
Most people tilt without realizing it when they’re reaching across a counter or holding the portafilter at an awkward angle. Set the portafilter on a flat surface at a comfortable height, square your shoulders, and press straight down with your elbow over your wrist. A light twist polish after pressing can smooth the puck surface, but if you grind the tamper side to side during the twist, you’ll plow a trench and create a new channel.
Basket Cleanliness, Retention, and Portafilter Preparation

Old coffee oils bake onto basket holes and turn into a varnish that partially blocks water flow. When some holes stay open and others clog, water pressure isn’t distributed evenly across the puck surface, and the puck can’t compensate.
Clean your baskets with hot water and a stiff brush daily. Once a week, soak them in a coffee detergent solution, rinse thoroughly, and check that you can see light through every hole when you hold the basket up.
Retention inside the basket or around the basket rim creates the same problem as a bad distribution. A few tenths of a gram of old grounds stuck to the side means your fresh dose doesn’t fill the basket evenly, and you start with a lumpy bed before you even pick up the WDT tool. Wipe the basket and portafilter threads dry before dosing.
If your grinder exit chute is static-prone or you see grounds clinging to the portafilter funnel, a quick spray of water on the beans before grinding reduces static cling and keeps the dose where you intended it. Portafilter prep also includes checking that the basket sits flat and fully seated in the portafilter cradle. A cocked or loose basket tilts the entire puck and guarantees uneven flow no matter how good your distribution and tamp are.
Visual Indicators of Channeling and What They Mean
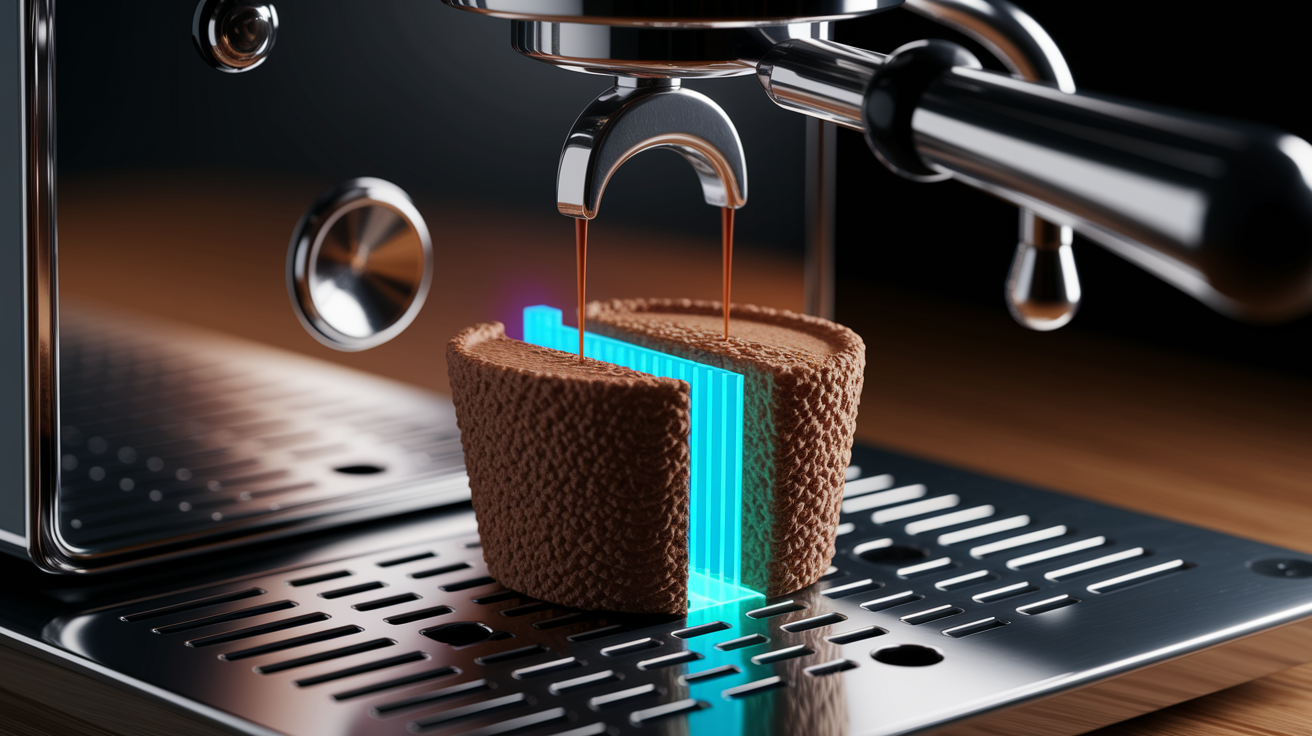
Channeling shows up as flow asymmetry, and a bottomless portafilter makes it obvious. The classic sign is a thin jet spraying out to one side while the rest of the puck barely drips. That jet is water that found a crack, a clump boundary, or a section where your tamp didn’t reach full density.
You’ll also see delayed stream formation, where the shot dribbles from one side for several seconds before the other side starts flowing, then both sides merge into a single uneven stream.
Blonding that happens too early is another giveaway. If the stream turns pale and thin before you’ve hit your target yield, the channel is dumping water through a fast path and leaving the rest of the puck behind. The spent puck often tells the story after the shot. A uniform puck is evenly colored, dry on top, and drops out in one solid disk. A channeled puck shows light and dark patches, wet spots, or visible cracks and craters.
If you’re using a spouted portafilter, you won’t see the jet, but you will notice uneven drip timing from the two spouts and a thin, under-bodied shot that tastes simultaneously sour and harsh.
Common channeling indicators and their likely causes:
- Single thin jet from one side. Localized low-density zone from incomplete WDT coverage, uneven dose spread, or a tamp tilt.
- Multiple small sprays around the puck edge. Perimeter under-filled during dosing or WDT didn’t reach the basket sides.
- One spout flows several seconds before the other. Major tilt in tamp or uneven coffee distribution left versus right.
- Stream starts centered, then splits and sprays. Subsurface clump or void that collapsed during extraction and opened a crack.
- Rapid blonding in under 15 seconds. Channel created a shortcut. Grind likely too coarse or dose too low, amplifying any distribution flaw.
- Puck has a single large crater or hole. Severe localized channeling from a big clump, a void, or a section that didn’t tamp.
Verification Tests to Confirm the Root Cause

Run controlled tests to isolate whether the problem is distribution, grind, tamp, or equipment. The simplest test is a side-by-side comparison: pull one shot with your normal WDT routine and one shot where you skip WDT entirely but keep dose, grind, and tamp identical. If the no-WDT shot channels worse, your distribution tool is helping but not enough. If both shots channel the same way, the issue is upstream, likely grind quality, dose accuracy, or tamp technique.
A puck screen test adds another data point. Place a puck screen on top of the coffee bed before locking in and pull a shot. The screen forces water to spread evenly across the surface before it enters the puck, so if the channeling disappears, your problem is uneven water delivery from a dirty shower screen or an unlevel portafilter, not puck prep.
Grind isolation testing means pulling three consecutive shots at the same dose and tamp routine but stepping the grind finer by one click each time. Watch where and when the flow starts on each shot. If the channeling jet moves to a new spot every shot, the problem is random and points to inconsistent puck prep. If the jet appears in the same place every time, your grinder may have a bias (uneven particle distribution) or your dosing routine drops more coffee on one side.
Another useful test is the basket swap. If you have a spare basket, swap it in and pull a shot with everything else identical. A clogged or damaged basket will show up immediately as improved flow with the clean spare.
Four practical verification tests to pinpoint your issue:
- WDT on/off comparison. Pull two consecutive shots, identical dose and grind, one with WDT and one without. Compare flow symmetry and shot time to measure WDT effectiveness.
- Puck screen test. Add a screen on top of the puck and check if flow evens out. Improvement confirms the issue is at the puck surface or shower screen, not inside the coffee bed.
- Grind step series. Pull three shots stepping grind finer or coarser in small increments. If channeling persists at all three settings, grind isn’t the root cause.
- Basket and portafilter swap. Use a different basket or portafilter and repeat your exact routine. If the problem disappears, your original basket is clogged, warped, or your portafilter doesn’t seat level.
Final Words
Grab your grinder, distribution tool, and tamper, and run one quick test — change only grind or distribution and pull a shot.
We covered the usual suspects: grind inconsistency, wrong puck-prep order, WDT depth mistakes, tilted tamp, and dirty baskets. Use the five fast checks and the verification tests to isolate the issue.
If you need one next step, confirm grind uniformity first. Troubleshooting uneven flow after using a distribution tool gets easier with simple tests and small tweaks. You’ll see steady improvement.
FAQ
Q: What happens when you have uneven levels of coffee compacted in the portafilter?
A: Uneven levels of coffee compacted in the portafilter cause channeling and uneven flow, producing fast weak streams and spotty over-extraction. Re-distribute the bed, level it, and tamp evenly to restore uniform extraction.
Q: Why is my coffee channeling?
A: Your coffee is channeling because water follows low-resistance paths from uneven grind, poor distribution, tilted tamp, or clumps. Check the puck and first drip, then fix distribution or grind one step at a time.
Q: What is the purpose of distributing coffee grounds evenly in the portafilter?
A: The purpose of distributing coffee grounds evenly in the portafilter is to make a uniform coffee bed so water extracts evenly, reduce channeling, and deliver steadier shot times and more consistent flavor.
Q: What causes spurting espresso?
A: Spurting espresso is caused by sudden pressure release through channels, a poor puck seal, or clogged basket holes. Improve distribution, level and tamp the puck, and check grind size to stop spurting.