

Think oat milk has already replaced dairy for latte art? Not quite.
If you want consistent microfoam and clean pours, whole milk is still the best milk for frothing and microfoam.
It’s simple chemistry: proteins make the tiny bubbles stable and fat gives the foam weight and silk.
For a non-dairy pick, barista oat milk comes closest.
In this post we’ll rank the top milks, explain what each fixes, and give one clear pick so you can steam reliably and make sharper latte art.
Top Milk Choices That Deliver the Best Frothing and Microfoam Results
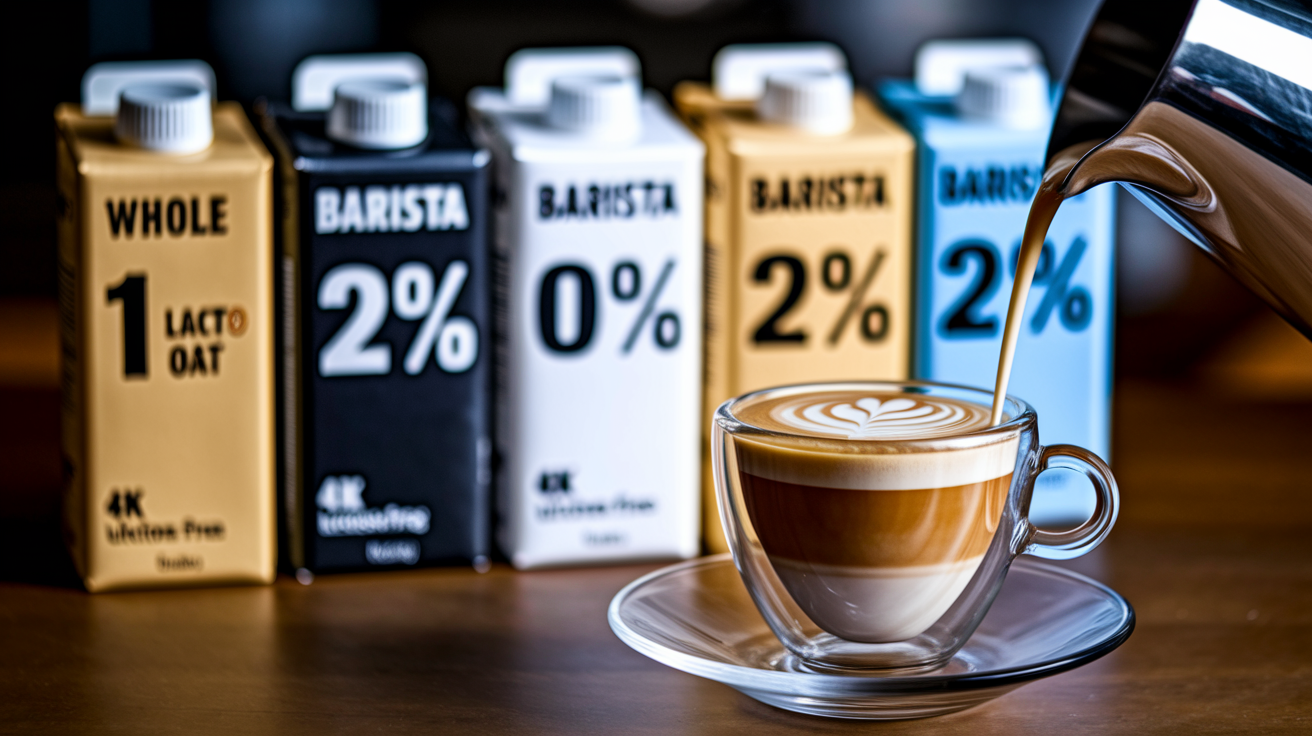
Whole milk with 3.25–4% fat is still the best option for frothing and microfoam. It’s not magic, just chemistry: you get about 3.3% protein (mostly casein and whey) wrapped around enough fat to build stable, glossy foam that actually blends with espresso instead of sitting there like a sad raft. The proteins work like scaffolding for tiny air bubbles, and the fat gives you that creamy weight and texture. Go too lean (skim) and you’ll end up with big airy bubbles. Too much fat drags the whole thing down. Whole milk hits the right spot for latte art because the microfoam pours smooth, melts into the crema, and holds its shape in the cup.
For plant options, barista oat milk wins. Brands made specifically for steaming add oils, stabilizers, and emulsifiers that copy the protein-fat structure you’d get from dairy. Oat milk also has natural beta-glucans that trap air and give you that silky feel. Soy’s got strong protein but it’ll curdle on you if you overheat it, and almond makes delicate foam that falls apart fast unless you’re using a barista blend.
Quick ranking:
- Whole milk — Best stability, richest texture, easiest latte art control.
- Barista oat milk — Top non-dairy pick. Stable foam, naturally sweet.
- 2% milk — Lighter than whole but still reliable for microfoam.
- Barista soy milk — Good protein. Watch your temp or it curdles.
- Skim milk — High volume, airy. Better for cappuccinos than flat whites.
Good microfoam looks glossy and smooth, like a mirror. No visible bubbles. When you pour it, the milk flows into the espresso and actually melds with the crema instead of floating. That velvety blend is what separates microfoam from regular foam and what makes clean latte art even possible.
How Milk Composition Shapes Frothing and Microfoam Performance
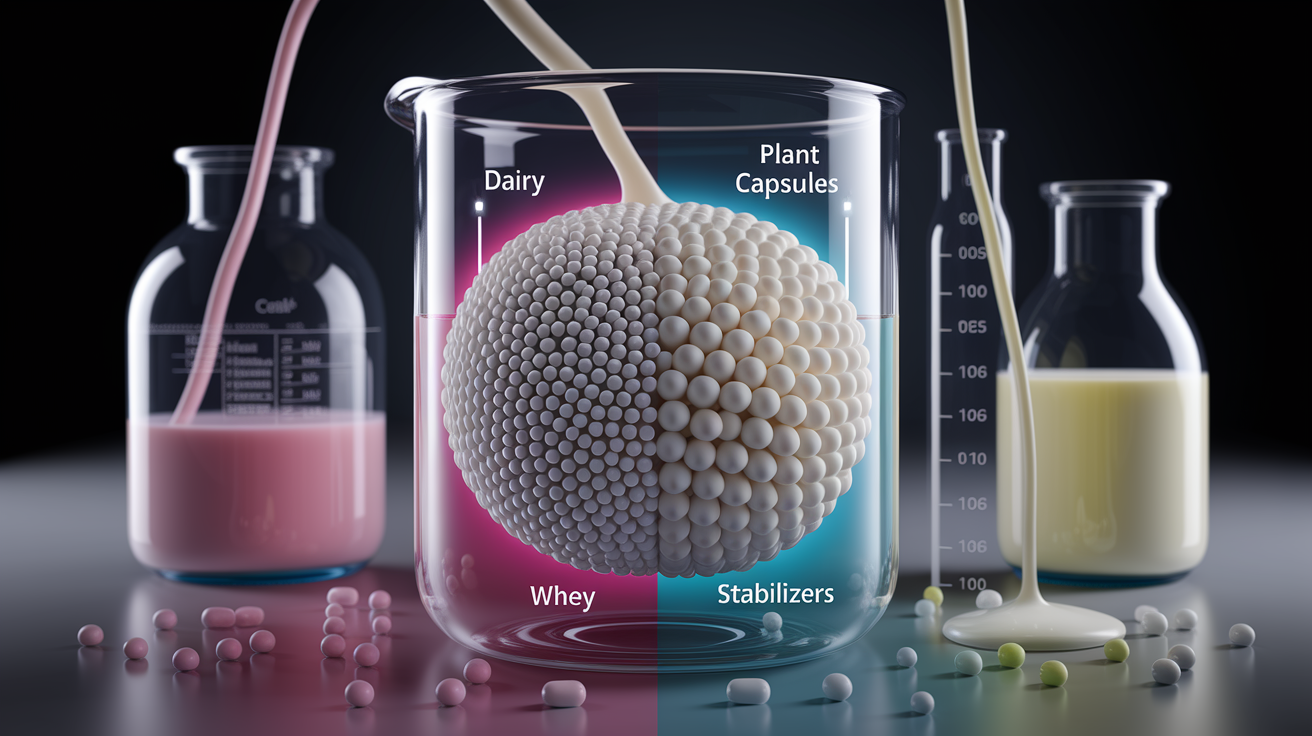
Proteins do the heavy lifting. Casein and whey unfold under heat and steam, then wrap around the air bubbles you’re creating. That protein film keeps tiny bubbles stable and stops them from merging into bigger ones. Fat adds richness and body, but it also cuts foam volume a bit. Whole milk at around 3.25% fat makes thick, creamy microfoam. Skim milk at basically 0% fat creates taller, airier foam with way less silk. Lactose, the sugar in cow milk, caramelizes slightly when heated. That’s where you get the subtle sweetness and warm, rounded flavor in a well-steamed latte.
Plant milks behave differently because they don’t have casein. To make up for it, manufacturers throw in stabilizers like gellan gum, carrageenan, or starches, and often bump up the fat with added oils. That’s why barista blends of oat, soy, and almond actually work compared to the standard versions. They’re trying to mimic that protein-fat balance dairy gives you for free. UHT (ultra-high temperature) pasteurized milk steams a little differently than regular pasteurized because some proteins denature during processing. If your milk tastes flat or won’t froth right, check if it’s UHT and maybe try a regular pasteurized option instead.
Comparing Dairy Milks for Microfoam Quality and Latte Art Control
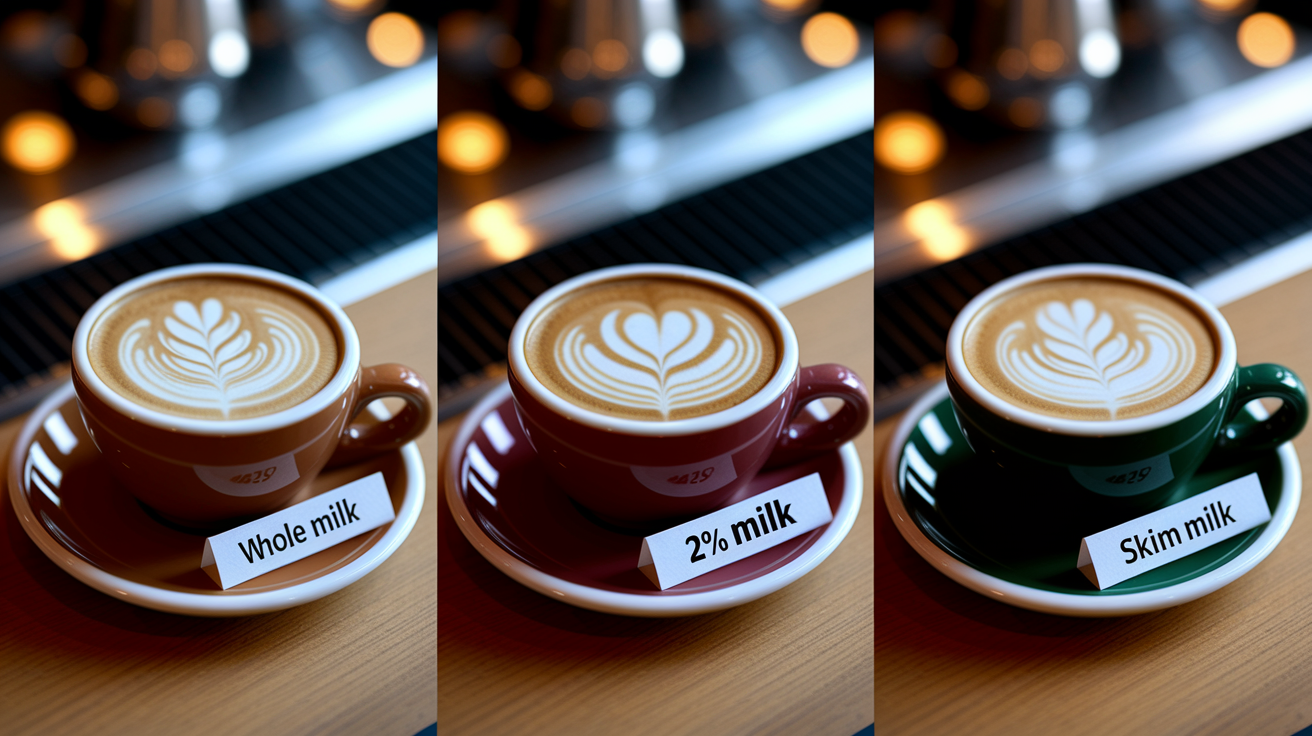
Whole milk is what espresso bars run on. The 3.25–4% fat gives the microfoam enough body to pour smooth and hold patterns, and the full protein load keeps bubbles stable long enough for you to finish your design. The foam integrates tight with espresso crema. You get that velvety mouthfeel and a clean, glossy surface. If you’re learning to steam or practicing latte art, whole milk is forgiving. It’ll give you repeatable results as long as you don’t burn it.
2% milk is lighter, noticeably less rich. It still froths fine because the protein level stays the same as whole milk, but the reduced fat means the foam has slightly less body and a thinner feel. Some home baristas like it for drinks where they don’t want something heavy, and it pours faster because lower viscosity flows easier. You can still do latte art with 2%, but the patterns might look a little less defined and the foam won’t feel as silky.
Skim milk produces the most volume when you steam it. Often balloons to 30–50% of what you started with. But the bubbles are bigger and less stable. Near-zero fat means there’s nothing to add weight or creaminess, so the foam feels dry and airy instead of velvety. Skim works if you want tall, stiff peaks for a traditional cappuccino, but it’s a bad choice for flat whites or detailed latte art because the foam doesn’t integrate smoothly. The texture is more whipped egg whites than wet paint.
Lactose-free dairy milk steams almost the same as regular milk because the fat and protein levels haven’t changed. Only the lactose has been broken down into simpler sugars. You’ll get similar microfoam quality, though some baristas notice it tastes slightly sweeter since glucose and galactose (the breakdown products) taste sweeter than lactose. If you’re lactose intolerant but want whole milk’s microfoam performance, lactose-free is a solid swap.
| Milk Type | Fat % | Foam Style | Best Use |
|---|---|---|---|
| Whole | 3.25–4% | Thick, glossy microfoam | Latte art, flat whites, lattes |
| 2% | ~2% | Lighter microfoam, still stable | Lattes, cappuccinos |
| Skim | ~0% | High volume, airy foam | Cappuccinos, macchiatos |
| Lactose-Free | 3.25% (typical) | Glossy microfoam, slightly sweeter | Latte art, lattes (lactose-intolerant) |
Ranking the Best Non-Dairy Milks for Frothing and Microfoam
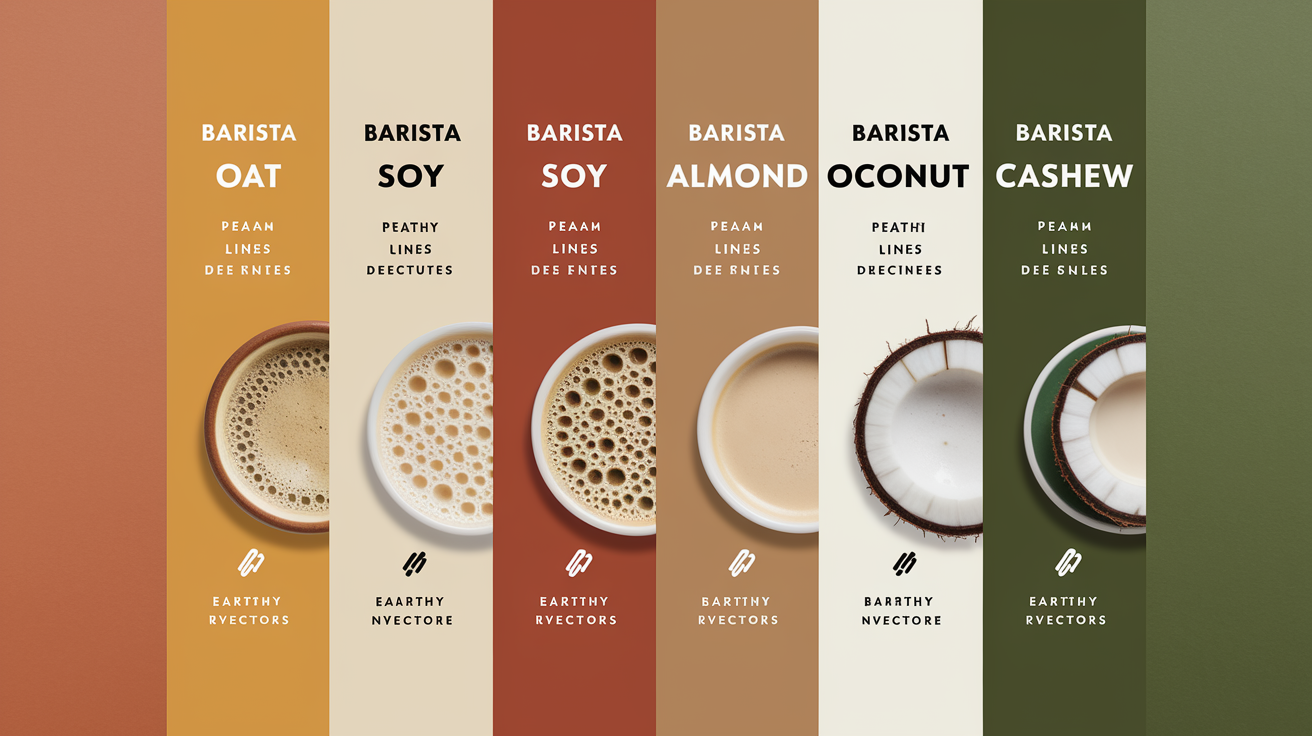
Barista oat milk is the most reliable plant option for stable, glossy microfoam. These blends come in 1-liter cartons, usually labeled “Barista Edition,” and they’ve got added oils, emulsifiers, and stabilizers that help the milk trap air and hold foam structure. Oat milk also brings natural beta-glucans, which thicken the liquid and improve mouthfeel. The result is foam that pours smooth, integrates well with espresso, and holds latte art nearly as well as whole dairy milk. It’s also got a mild, slightly sweet flavor that doesn’t fight with the coffee.
Soy milk has a strong protein profile, so on paper it should foam well. But high temperatures can make it curdle when it hits acidic espresso. Barista soy blends resist curdling better and steam more consistently, but you still need to watch your finishing temperature and avoid pushing past 65°C (149°F). When steamed right, soy creates dense, creamy microfoam with a subtle bean flavor. It’s a good choice if you can manage the temperature carefully.
Almond, pea-protein, coconut, and cashew milks are all over the place. Almond milk makes light, delicate foam that collapses fast unless it’s a barista formulation. Pea-protein blends improve vegan microfoam by adding back the protein structure other plant milks are missing. Coconut milk tends to be watery and unstable, even in barista versions, because it’s naturally low in protein. Cashew milk is thick and creamy but also low in protein, so the foam sits more like a cap than an integrated layer.
Top non-dairy milks, ranked:
- Barista oat milk — Pro: Excellent foam stability and latte art control. Challenge: Slightly thicker texture can clog steam wands if you don’t clean promptly.
- Barista soy milk — Pro: High protein for strong foam structure. Challenge: Curdles if overheated or poured into very acidic espresso.
- Pea-protein milk — Pro: Improves vegan microfoam with added protein. Challenge: Can taste earthy or chalky.
- Barista almond milk — Pro: Light, nutty flavor and acceptable foam when formulated for steaming. Challenge: Foam separates quickly. Serve it right away.
- Barista coconut milk — Pro: Rich coconut flavor. Challenge: Low protein yields unstable, watery foam.
- Cashew milk — Pro: Naturally thick and creamy. Challenge: Low protein means foam doesn’t hold. Better for iced drinks.
Mastering Steaming Technique for Consistent Microfoam

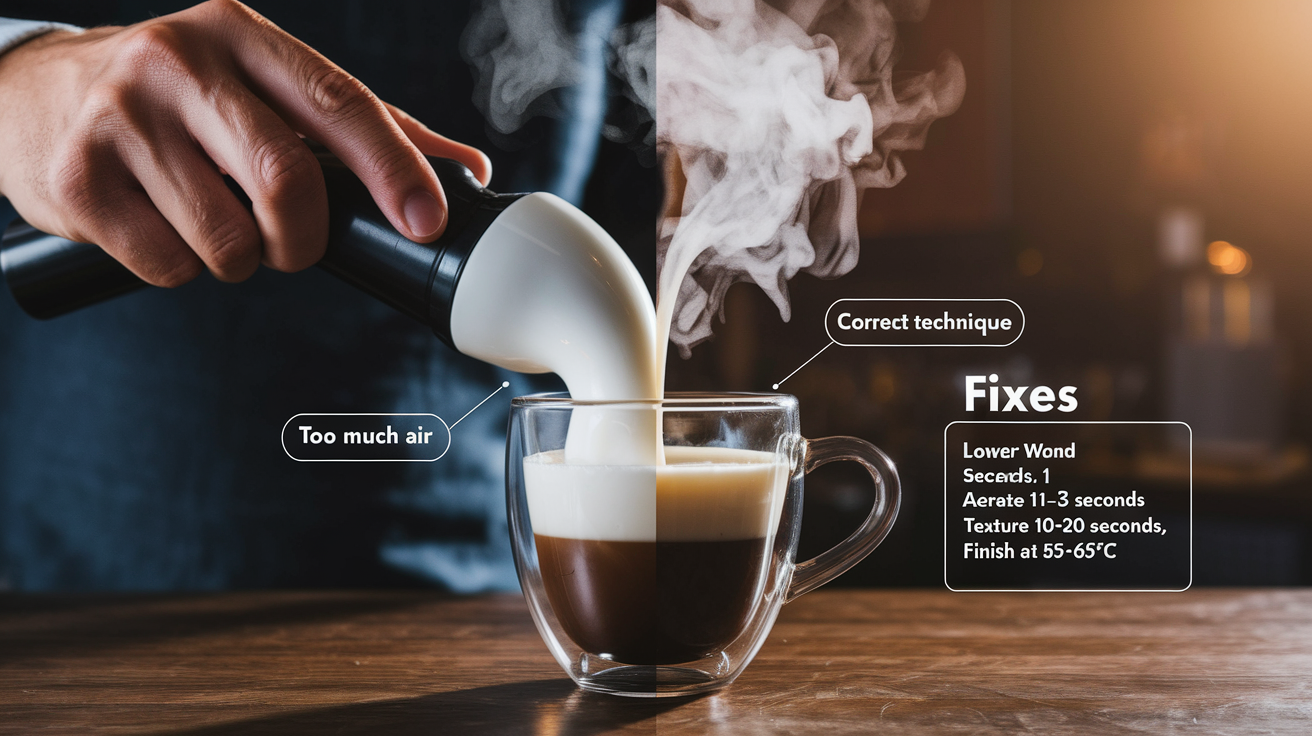
Start with cold milk straight from the fridge, around 4°C (39°F). Fill your pitcher no more than halfway to leave room for the milk to expand. Microfoam should grow by about 10–20% in volume. If you overfill, you’ll either run out of room or risk spilling once the foam rises. Use a stainless steel pitcher with a spout designed for pouring latte art. The shape helps you control the flow and see the milk’s surface as you steam.
Aeration is the brief phase where you introduce air to create bubbles. Position the steam wand tip just below the milk’s surface and tilt the pitcher slightly to create a whirlpool. Open the steam valve fully and listen for a light hissing or paper-tearing sound as air gets drawn in. This phase should last only 1–3 seconds for microfoam. If you hear loud screeching or see the milk surface breaking into large bubbles, your wand is too high or you’re letting in too much air. As soon as the milk has expanded by about 10–20%, lower the wand tip deeper into the pitcher to stop aerating and start texturing.
Texturing is where you refine the foam by creating a strong whirlpool that breaks up large bubbles and distributes the air evenly. Keep the wand submerged and angled so the milk spins in a smooth vortex. Keep steaming until the pitcher’s outer wall becomes too hot to hold for more than 2 seconds, which is about 55–65°C (130–149°F). Stop before you hit 70°C (158°F). Any hotter and the proteins break down, the milk tastes scalded, and the foam loses its silky texture. Once you’ve stopped steaming, tap the pitcher gently on the counter a couple of times and swirl to knock out any remaining large bubbles and polish the surface.
Step-by-step steaming:
- Fill pitcher halfway with cold milk (4°C / 39°F).
- Submerge steam wand tip just below the surface. Tilt pitcher to start a gentle whirlpool.
- Aerate for 1–3 seconds until milk expands 10–20%. Listen for a light hiss, not loud screeching.
- Lower wand deeper to stop air intake. Maintain whirlpool for 10–20 seconds.
- Finish at 55–65°C (130–149°F). Stop steaming before the pitcher is too hot to hold.
- Tap and swirl pitcher to remove large bubbles and create a glossy, mirror-like surface.
Microfoam vs Regular Foam: Understanding Texture, Volume, and Use Cases

Microfoam is defined by extremely fine bubbles that are so small you can’t see them individually. The surface looks glossy and wet, almost like paint, and when you pour it into espresso it flows smoothly and integrates with the crema instead of sitting on top. The texture is velvety and silky in your mouth, with no dry or airy feeling. Microfoam typically increases milk volume by only 10–20%, which keeps it dense and pourable. This is what you need for latte art. The milk has to flow in a controlled stream and blend with the coffee to create contrast and definition.
Regular foam is made of larger, visible bubbles that create a matte, dry surface. It holds peaks and feels light and airy, more like whipped cream than wet paint. Regular foam can expand the milk by 30–50% or more, which is why it’s standard for cappuccinos. The foam sits on top of the drink as a thick cap instead of integrating, and it doesn’t pour smoothly enough for detailed latte art. If you’re making a traditional cappuccino or a macchiato, you want this kind of foam. For flat whites, lattes, and latte art, you want microfoam.
Visual cues to identify microfoam:
- Glossy, mirror-like surface with no visible individual bubbles.
- Pours like wet paint, flowing smoothly into espresso without breaking apart.
- Blends with crema, creating contrast instead of sitting on top as a separate layer.
- Volume increase of only 10–20%, keeping the texture dense and creamy.
Troubleshooting Microfoam: Fixing Large Bubbles, Flat Foam, and Non-Dairy Issues
If you’re getting large, airy bubbles instead of silky microfoam, you’re introducing too much air during the aeration phase. This happens when the steam wand tip is too high above the milk surface or when you aerate for more than a few seconds. Lower the wand tip so it’s just barely submerged and limit the aeration phase to 1–3 seconds. You should hear a soft hissing or paper-tearing sound, not loud screeching. Once the milk has expanded by about 10–20%, drop the wand deeper and switch to texturing mode to break up any bubbles that did form.
Flat foam with no texture usually means the wand was submerged too deeply from the start, so no air got introduced. It can also happen if you overheat the milk, above 70°C (158°F), because the proteins denature and can’t hold the foam structure. To fix flat foam, make sure you’re starting with the wand tip just below the surface and that you’re hearing that light air intake sound for at least 1–3 seconds. If the milk is overheating before you finish texturing, reduce your steam pressure or stop sooner, targeting 55–65°C (130–149°F) instead of waiting until the pitcher is scalding.
Non-dairy milks, especially soy and some barista blends, can curdle or break when they hit acidic espresso or when they’re steamed above 65°C (149°F). Curdling looks like small lumps or separated liquid in the milk. It happens because plant proteins behave differently than dairy casein under heat and acid stress. Use barista-formulated non-dairy milks, which resist curdling, and finish steaming at a lower temperature, around 55–60°C (130–140°F). Pour the milk promptly after steaming. Letting it sit gives the foam more time to collapse or separate.
| Problem | Likely Cause | Numeric Cue | Fix |
|---|---|---|---|
| Large bubbles, airy foam | Too much air introduced | Aeration phase >3 seconds or volume increase >20% | Reduce air intake to 1–3 seconds; lower wand tip closer to surface |
| Flat foam, no texture | Wand too deep or milk overheated | Temperature >70°C (158°F) or no hissing sound | Start wand just below surface; stop steaming at 55–65°C (130–149°F) |
| Milk separates or curdles after pouring | Overheated or acidic espresso reaction | Temperature >65°C (149°F) for non-dairy | Use barista-formulated non-dairy; finish at 55–60°C; pour immediately |
| Foam collapses quickly | Low protein or non-barista plant milk | Foam disappears within 30 seconds | Switch to barista oat or soy; ensure proper texturing for 10–20 seconds |
Selecting the Best Milk for Specific Espresso Drinks

Cappuccinos need thicker, airier foam with more volume than microfoam. Whole milk or 2% milk both work well because the protein stabilizes the foam even when you aerate longer. Fill your pitcher about one-third full, aerate for 3–5 seconds instead of 1–3, and aim for a 30–50% volume increase. The foam should hold stiff peaks and sit on top of the espresso as a distinct layer. Skim milk also works for cappuccinos because the high volume and light texture match the traditional style, though it won’t taste as creamy as whole milk.
Flat whites and lattes require silky microfoam that integrates tightly with the espresso. Whole milk is the best choice because the higher fat content creates a dense, glossy texture that pours smoothly and holds latte art. Barista oat milk is the top non-dairy option for these drinks. It mimics the mouthfeel and stability of whole milk closely enough that most people can’t tell the difference. Keep your aeration phase short (1–3 seconds) and aim for only 10–20% volume increase so the milk stays pourable and velvety.
For cortados and macchiatos, which use smaller volumes of milk, you want microfoam but with slightly less volume since the drink is more espresso-forward. Use whole milk or barista oat milk, steam to about 55–60°C (130–140°F), and keep the texture silky. The smaller pour means any imperfections in the foam show up more, so take extra care to tap and swirl the pitcher before pouring.
Drink-to-milk pairings:
- Cappuccino → Whole or 2% milk. Aerate 3–5 seconds for 30–50% volume. Skim also works for traditional airy foam.
- Flat white / Latte → Whole milk or barista oat milk. Aerate 1–3 seconds for 10–20% volume. Silky microfoam essential for latte art.
- Cortado / Macchiato → Whole milk or barista oat. Lower volume (55–60°C finish). Dense microfoam to blend with concentrated espresso.
Final Words
Pick whole milk or a barista oat blend for the most reliable microfoam. Their fat–protein balance or stabilizers give a glossy, silky texture that pours and holds.
You’ve also seen why milk chemistry matters and how simple technique fixes most problems: start cold, aerate briefly, finish 55–65°C, and whirlpool until glossy. Change one thing at a time.
For a quick next step, test the best milk for frothing and microfoam side‑by‑side—whole vs barista oat—and judge flow, texture, and art. Small tests add up.
FAQ
Q: What milk makes the best microfoam? What type of milk is best used in frothing milk? Which type of milk creates the most stable microfoam?
A: The best milk for frothing and the most stable microfoam is whole milk (3.25–4% fat) because its fat–protein balance yields glossy, silky microfoam. For non-dairy, barista oat milk performs best.
Q: Can you make microfoam with milk frother?
A: Yes, you can make microfoam with a milk frother. Use a quality steam or electric frother, start with chilled milk, aerate 1–3 seconds, and finish at 55–65°C for glossy, no‑bubble microfoam.